

navMSU - Messaging Campaigns
Messaging Campaigns allow staff to email or text a specific group of students on scheduled dates about tasks they need to complete or events they need to attend. For example, a messaging campaign could be used for priority registration reminders, advising follow-up, or deadline notices.
Unlike appointment or enrollment campaigns, messaging campaigns do not integrate measurable objectives, so all students in the campaign receive every scheduled message. Utilize messaging campaigns if you want to send at least one message to all students.
Launching a Messaging Campaign
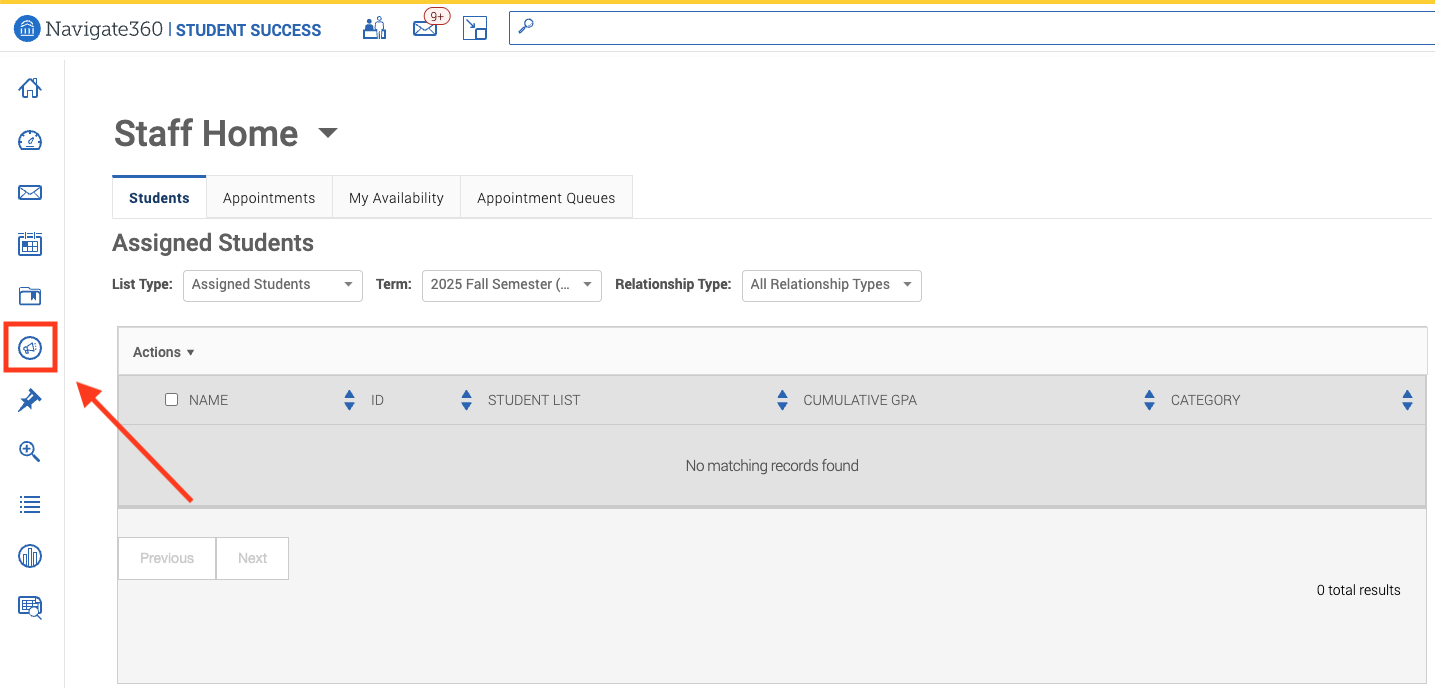
- Navigate to the Campaigns & Events page on the sidebar of the navMSU home page.
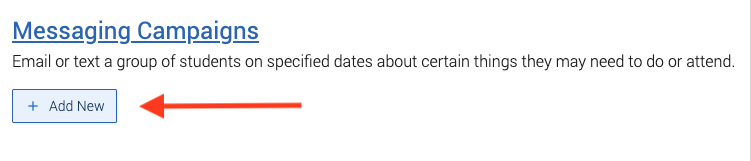
- Select Add New from the Messaging Campaigns section.
- The Edit Messaging Campaign page will open. Complete the following fields and select Continue.
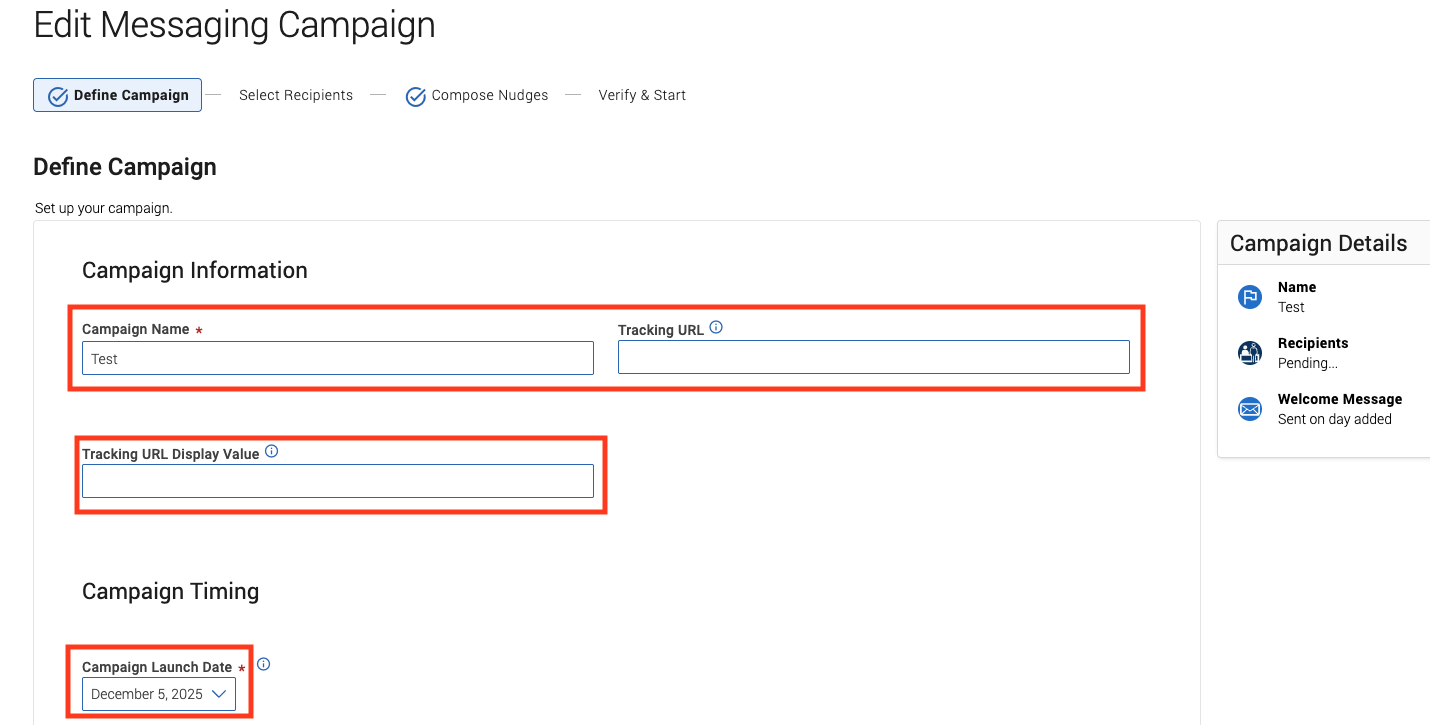
- Campaign Name: This field is visible to you and any other users who have access to view campaigns, but not visible to the student. Please use the following naming convention: Term Year / Purpose / Dept / Creator Initials. Following this format makes it easier to locate campaign reporting details and helps other staff quickly identify the campaign when viewing a student profile.
- Tracking URL (Optional): The web address you want students to click.
- Tracking URL Display Value (Optional): The text students will see and click instead of the full web address.
- Campaign Launch Date: Select the date you would like the initial message to go out to your recipients.
- Students may be added to a campaign at this stage using the Advanced Search feature. If you are unfamiliar with Advanced Search, we recommend using the V3 Search and Uploading a Student List.
To upload a student list, click on Student Information and Student List to choose from your saved lists. Scroll to the bottom and select the blue Search button.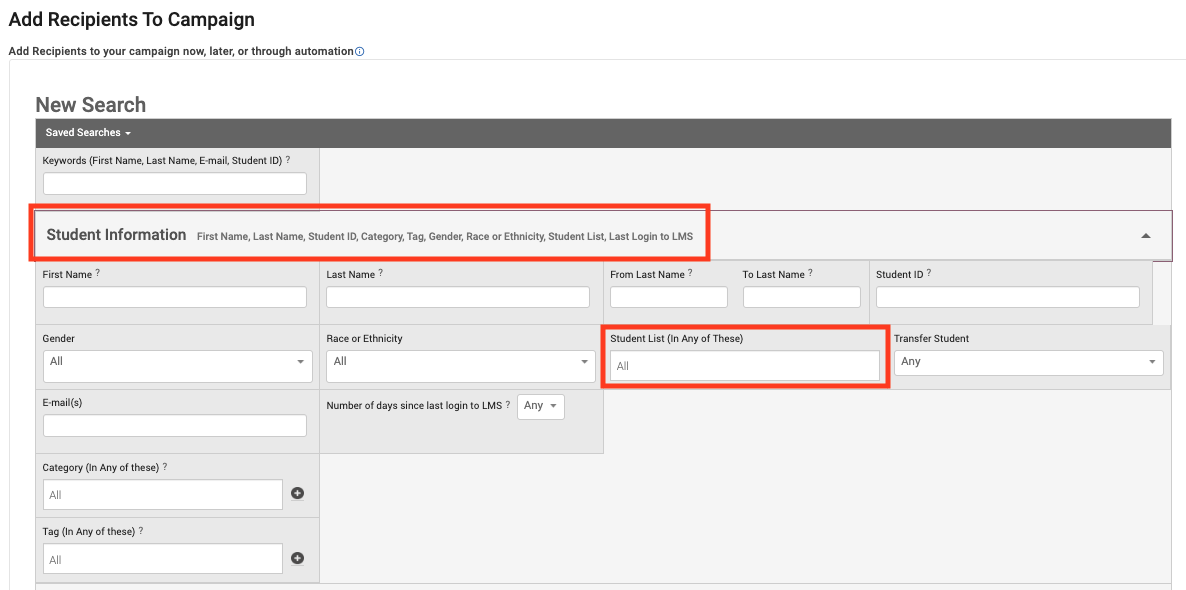
- Review the students on the next page. To remove a student from the campaign, select
the box next to their name and choose Remove Selected Users from the Actions menu. Once finished, click Continue.
Please note that this list is static and does not change based on changing data in navMSU or Banner. If you would like to add or remove students, you will need to do so manually on this screen.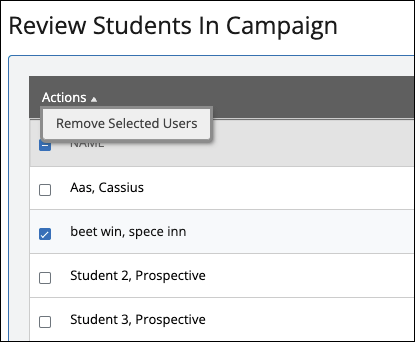
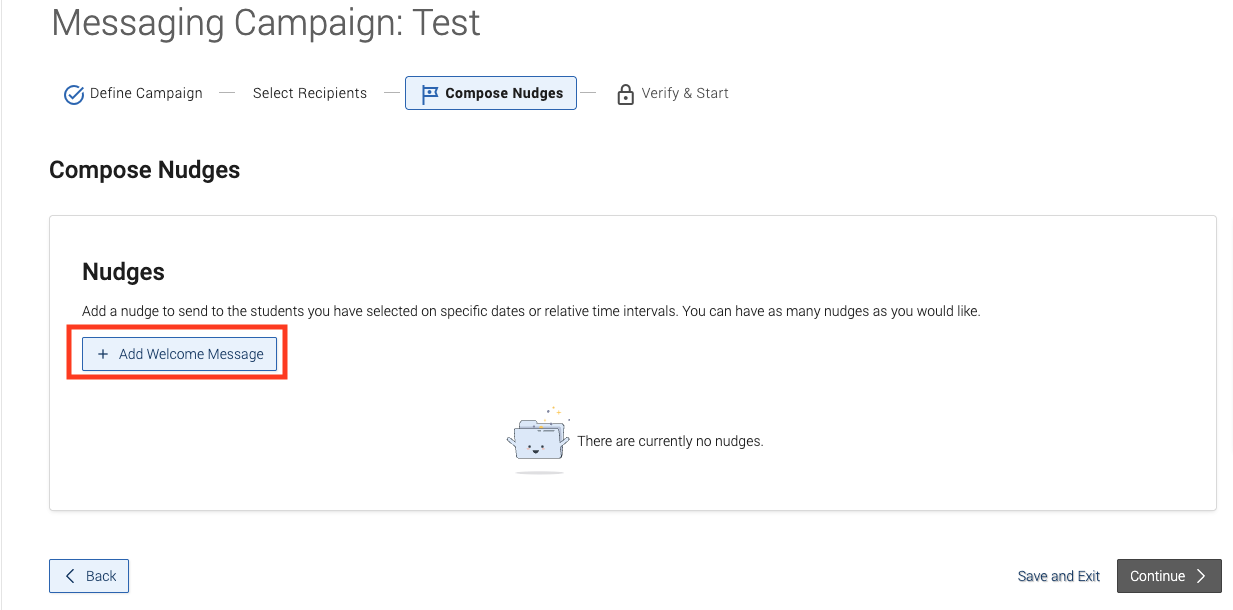
- Add a welcome message by clicking the Add Welcome Message button. Welcome messages are the first communication sent to students. The welcome
message will send at the start of the campaign or immediately after a student is added
to the campaign.
- Craft and format your welcome message as either an email or SMS text message. Once
finished creating your welcome message, click Save Welcome Message at the bottom of the page.
Please note that copying and pasting text can sometimes cause formatting issues, so it’s recommended that you type your text directly into the appropriate fields.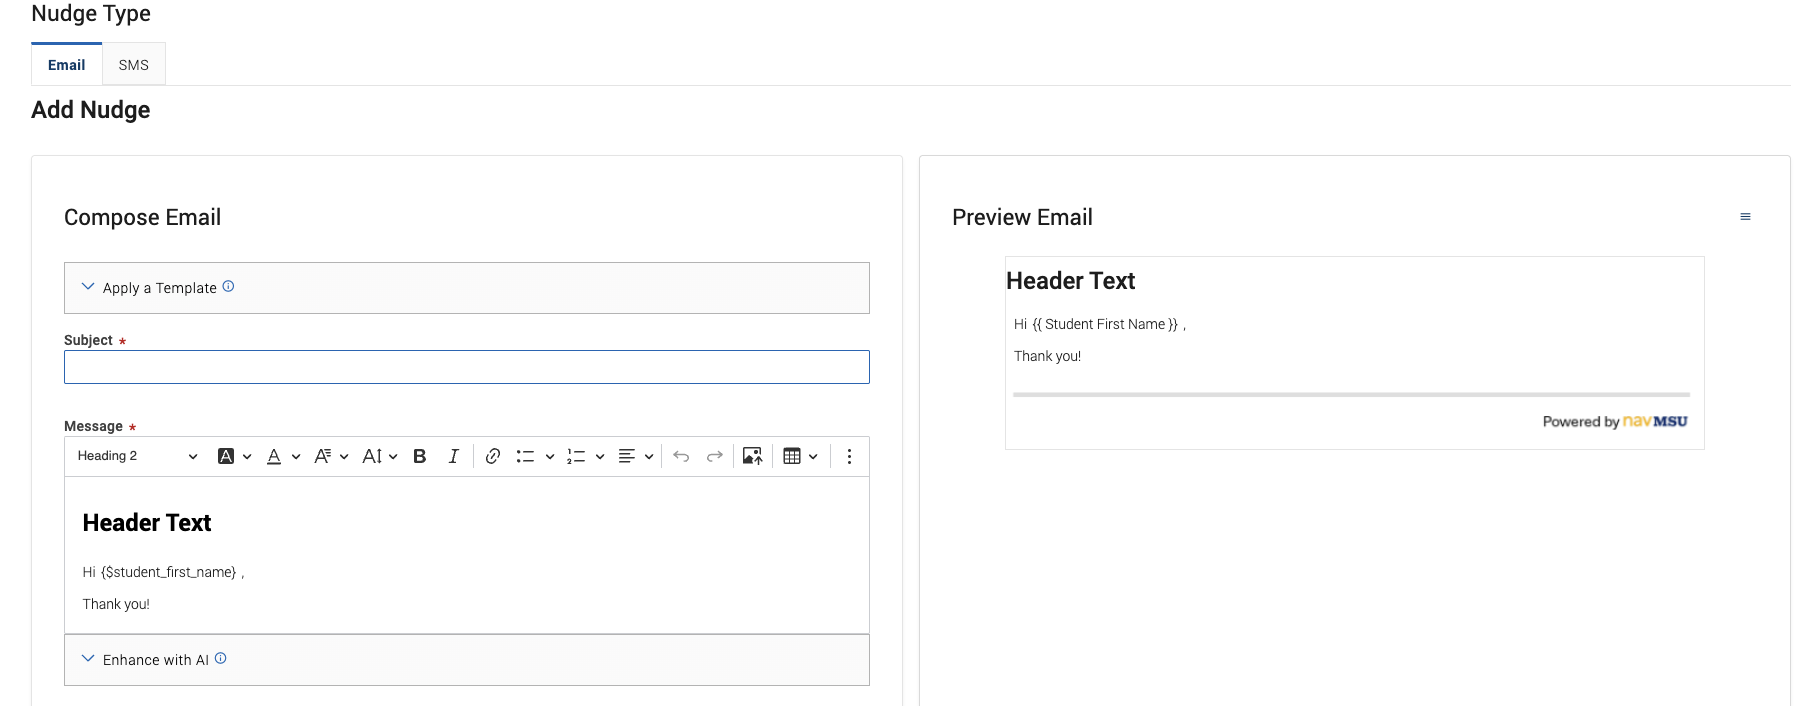
- Create at least one nudge per campaign by selecting Add Nudge on the Compose Nudges page.
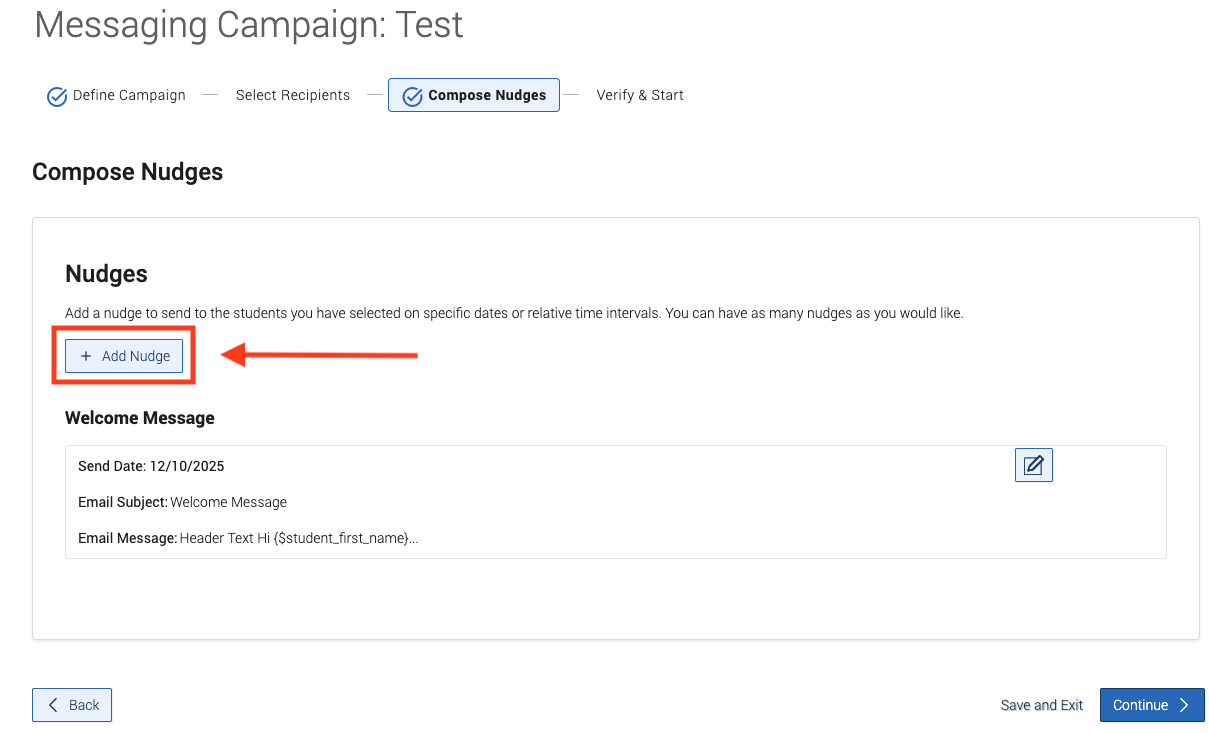
- Craft your nudge(s). You can create as many nudges as needed, but you may only create
one nudge of each type (email or SMS) per day. You can use Content Templates for any messaging nudge. Please refer to the tips below the screenshot for guidance
on email content and nudge dates.
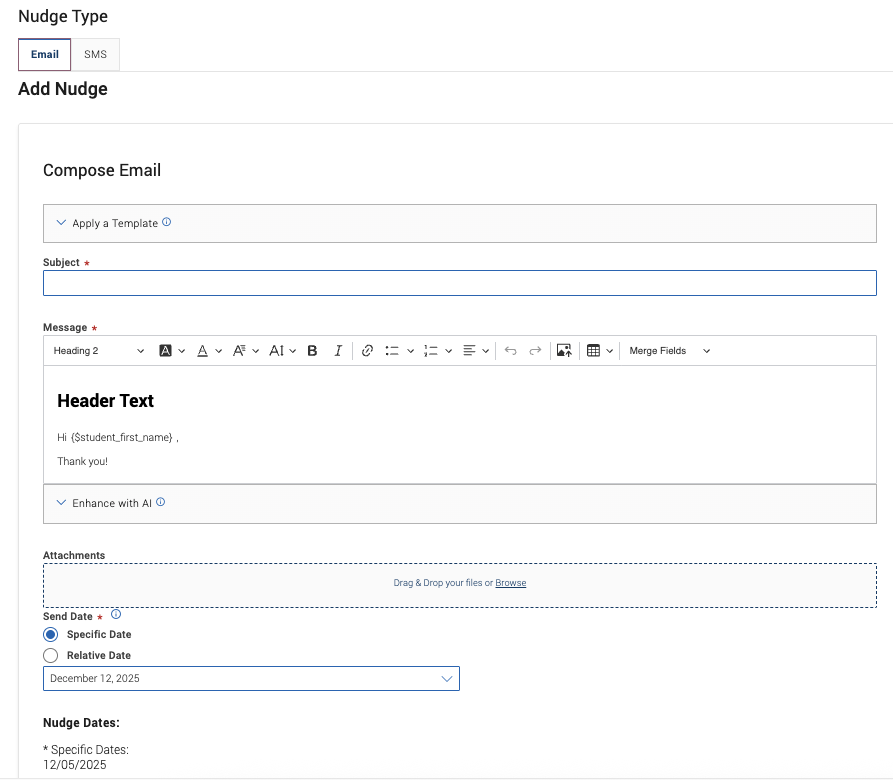
- Email nudges: You can add attachments, upload images, insert merge tags, and preview the message in the panel on the right.
- Send Date: Select from a specific date or relative date.
- Specific Date: Useful if you have a time-bound campaign that will not add many, if any, new students. If a student is added after a specific date nudge, they do not receive the nudge.
- Relative Date: Useful if you will be adding new students to the campaign regularly. This allows you to send a nudge
a certain number of days after being added to the campaign.
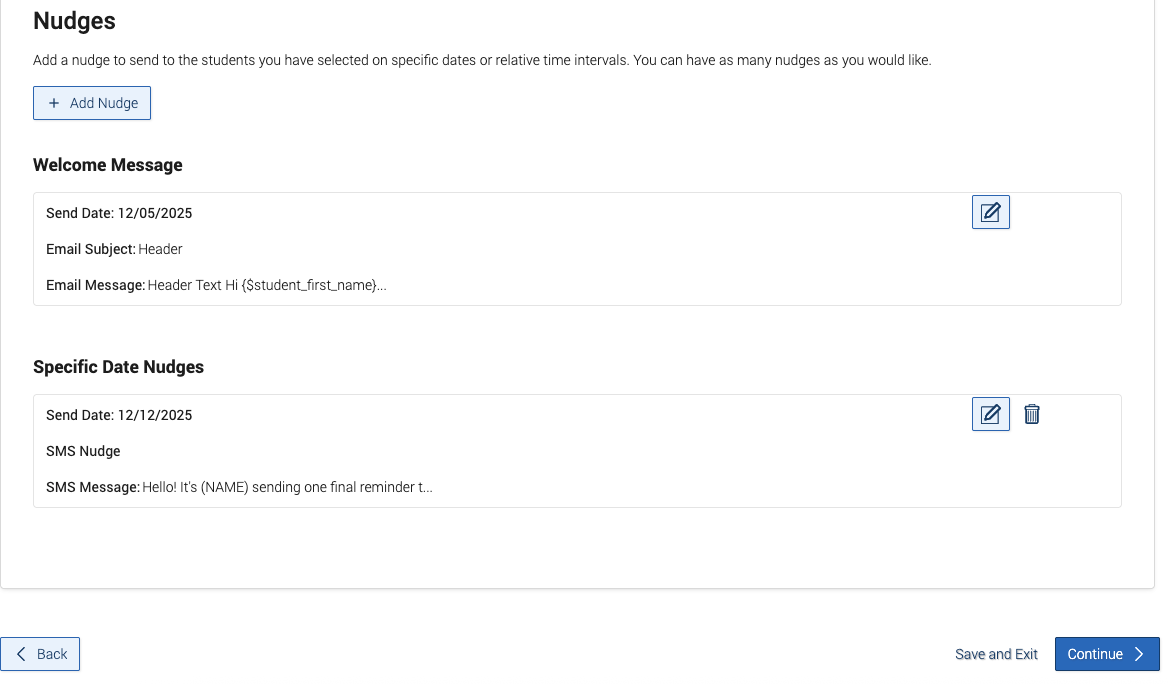
- After creating your nudge, click Save Nudge to continue. You may continue creating nudges by clicking the Add Nudge button again. If finished creating nudges, click Continue.
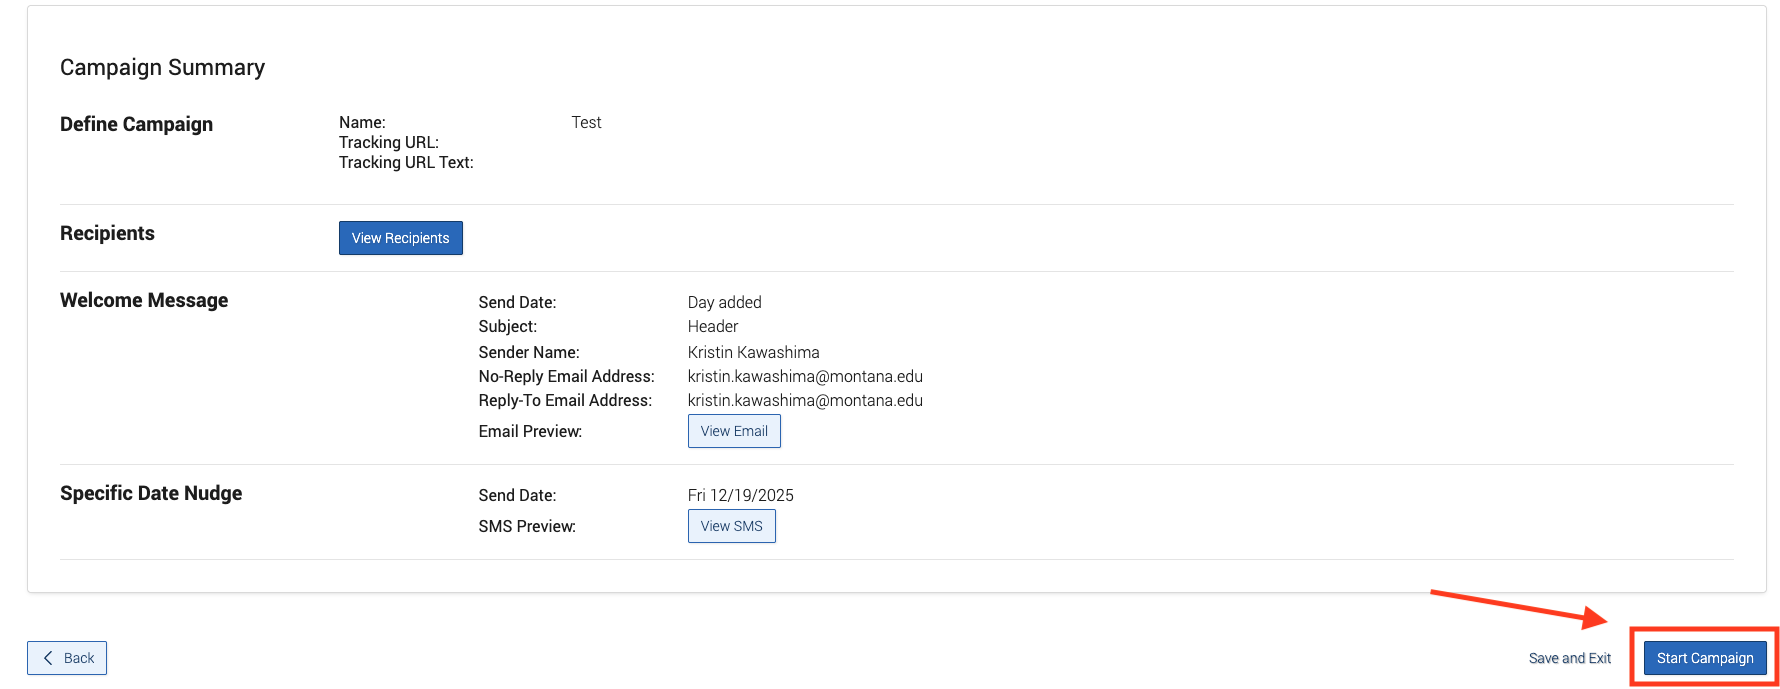
- Review your campaign details, nudges, and recipients on the Verify and Send page. Here, you can preview email and SMS nudges. Click Start Campaign when you are ready to send the welcome message to the selected students.
- You can return to the Messaging Campaign page at any time to preview or edit your campaign details after the campaign has been created.