
navMSU - Content Templates
Content Templates in navMSU allow staff and faculty to create, save, and share a library of reusable templates. This helps users save time and energy from manually entering repetitive messaging, such as appointment instructions, while promoting consistent, timely, and accurate messaging for students across campus.
Building a Template
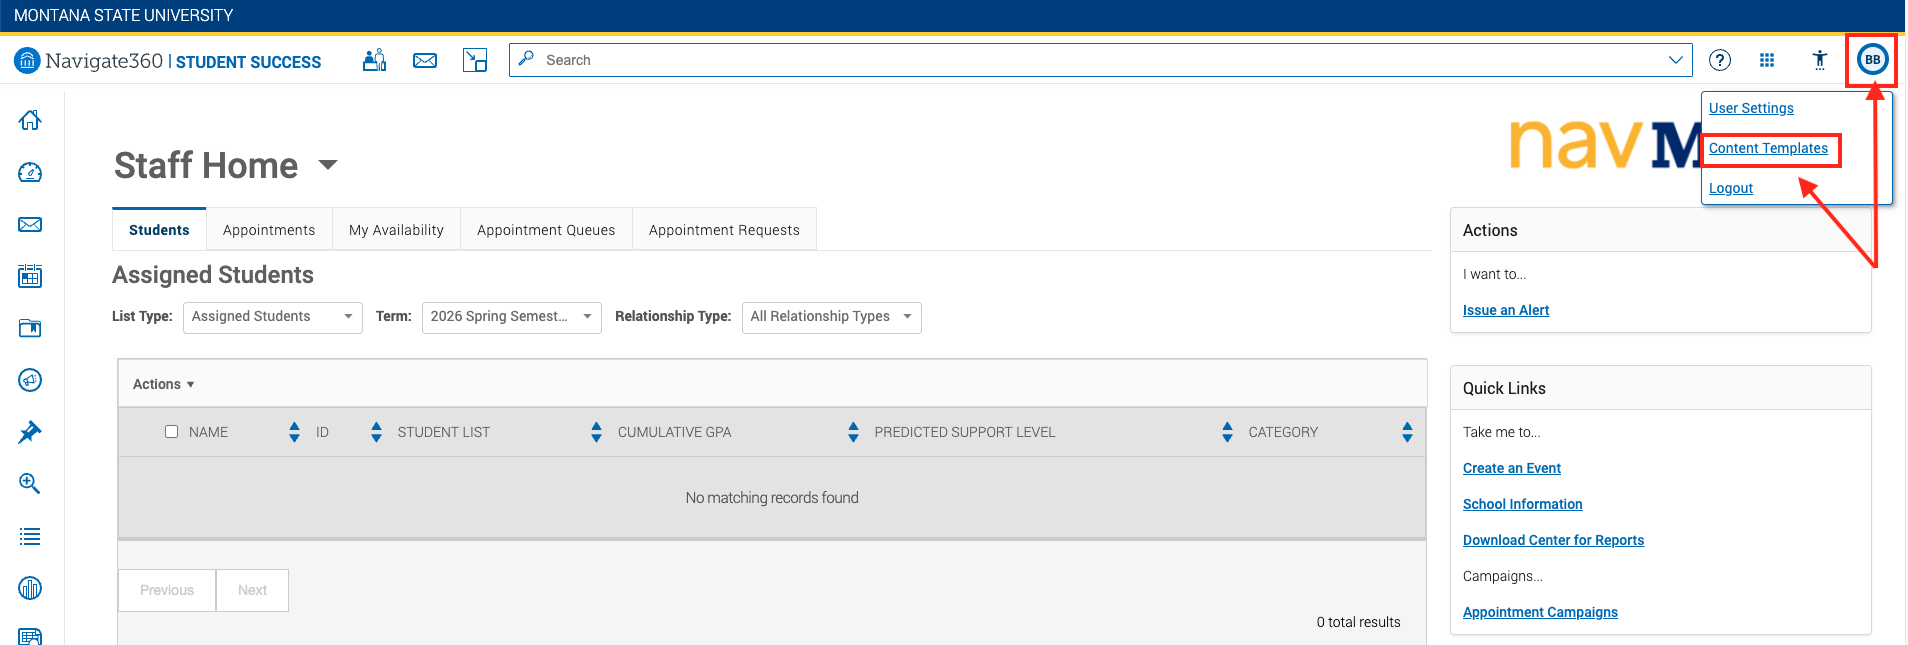
- Access Templates by going to User Menu -> Content Templates. If templates are not turned on for your user account, please submit a request to
bz-navsupport@montana.edu.
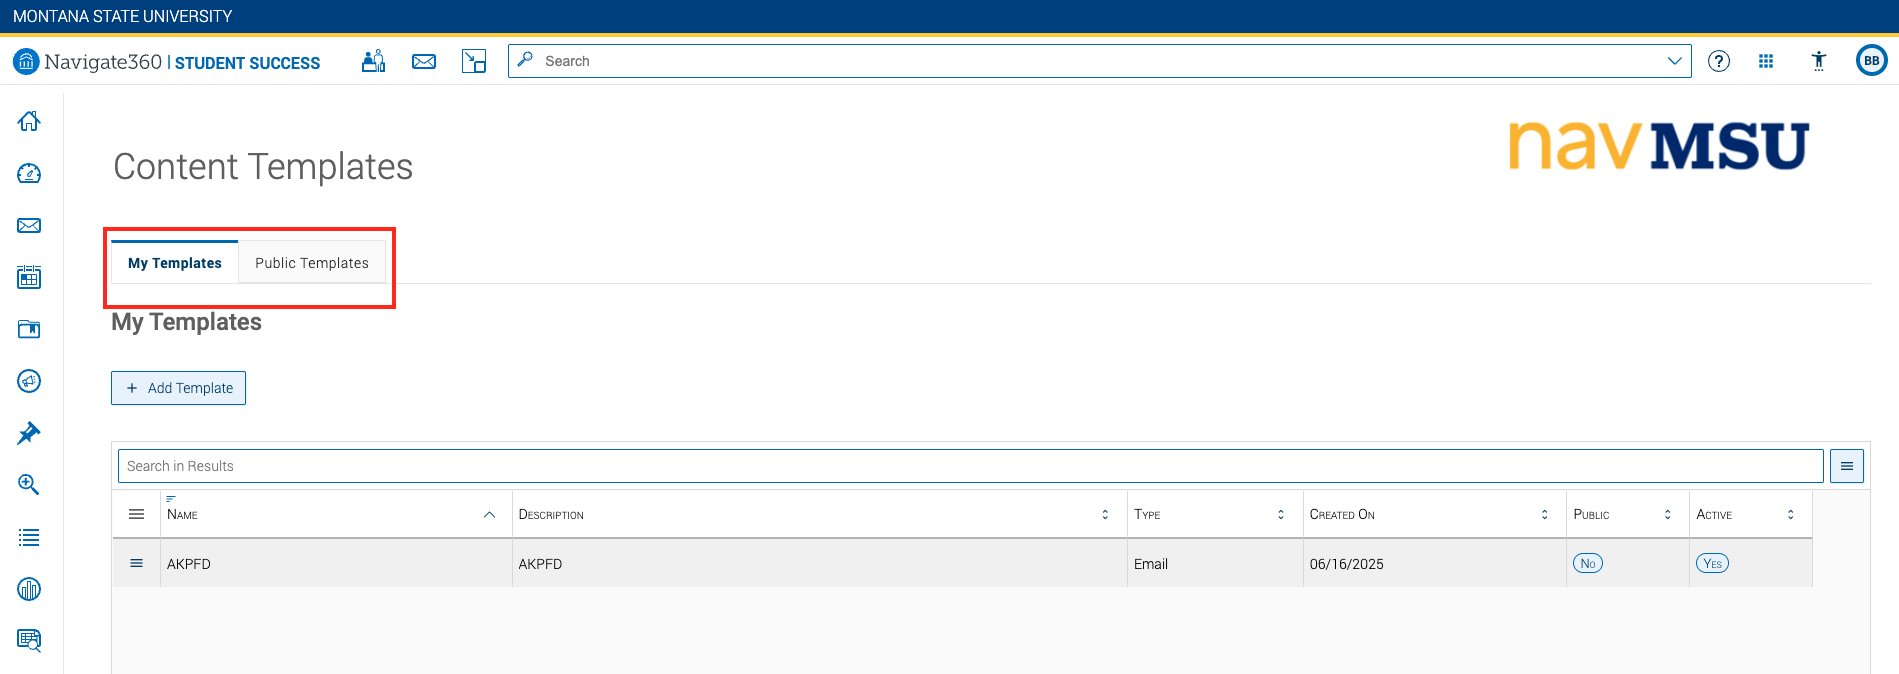
- In the Content Template page, you can add different types of templates depending on your user role and permissions.
My Templates are only accesible for YOUR individual account, while Public Templates can be viewed by all users who have access to templates. Each section includes a
searchable list, making it easy to quickly locate the template you need.
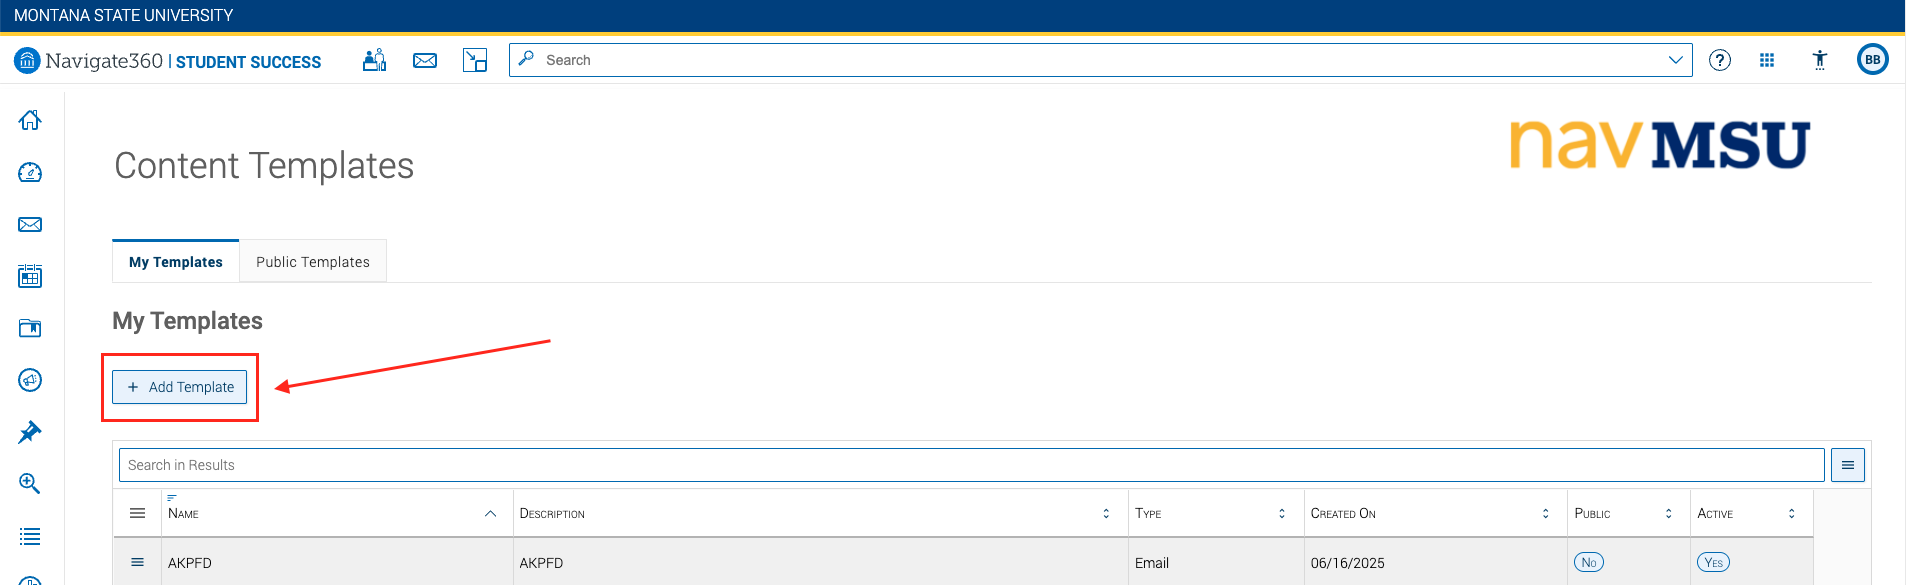
- Select the Add Template button on the My Templates tab to create a new template.
- On the Compose Template page, complete the following fields:
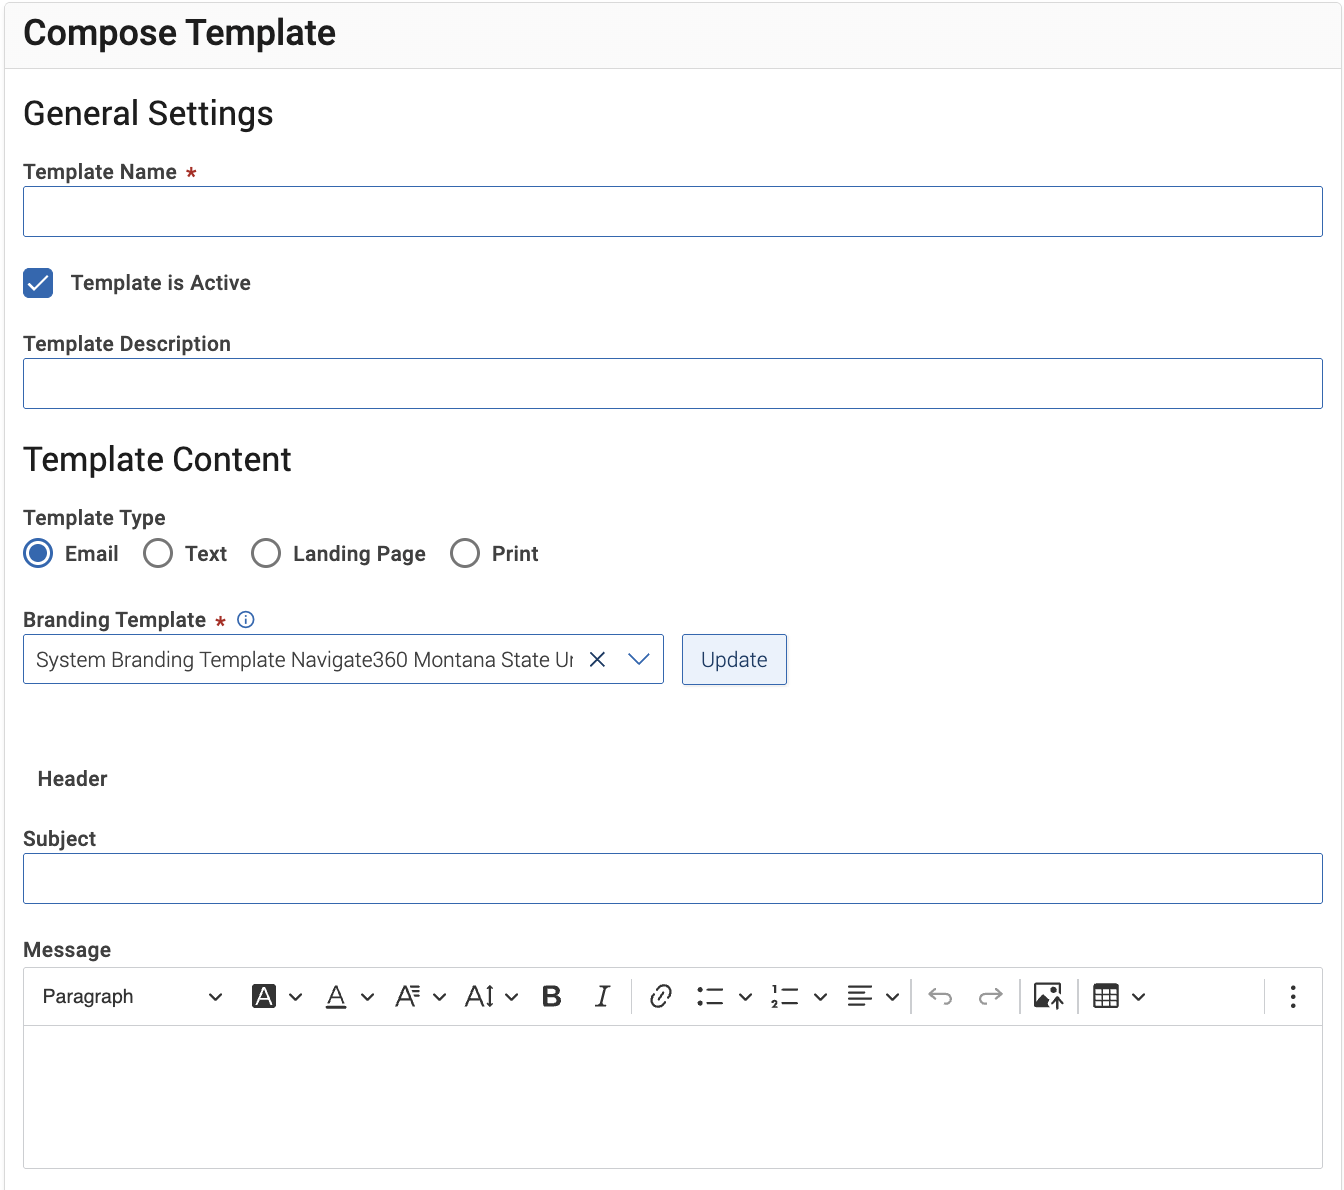
- Template Name (Required): You can create your own naming conventions; however, keep template names clear and concise to make it easier to quickly locate the correct template.
- Template is Active: Click the checkbox to make your template active.
- Template Description: Provide a brief description of the template that can be used to find templates when searching results.
- Make Template Public: Select this checkbox to make your template public for all navMSU users with access to templates.
- Template Type: Templates can be email, text, or landing page for any messages you wish to send frequently. Text message templates are limited to 300 characters.
- Branding Templates: These are created by the navMSU team and can consist of a header, footer, or both. Select a template and click Update to preview it on the right.
- Subject: Enter a subject line for the message. You can edit the subject when using the template, but adding a subject now can save time.
- Message: Draft your message and use the preview on the right to review how it will appear
when sent. You can adjust the text color, font sizes, insert links, images, tables,
or attach files if needed.
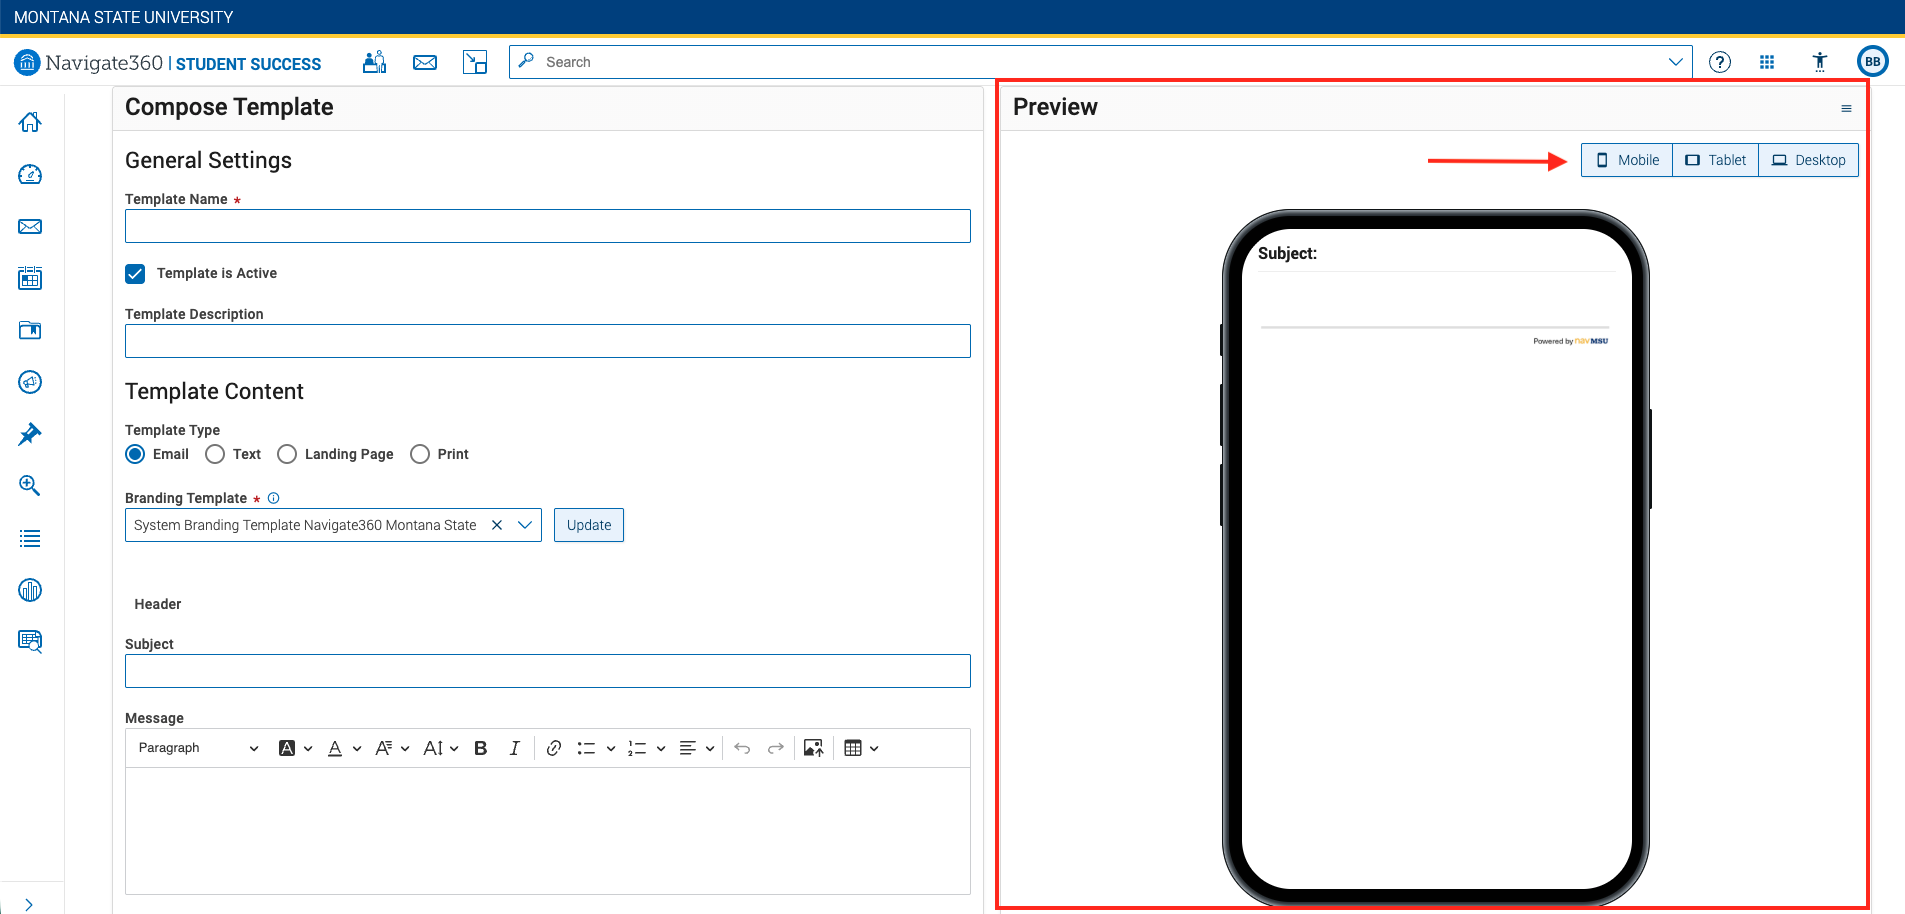
- The Content Preview will display on the right-hand side of the page. Previews can display the frame for
Mobile, Tablet, or Desktop.
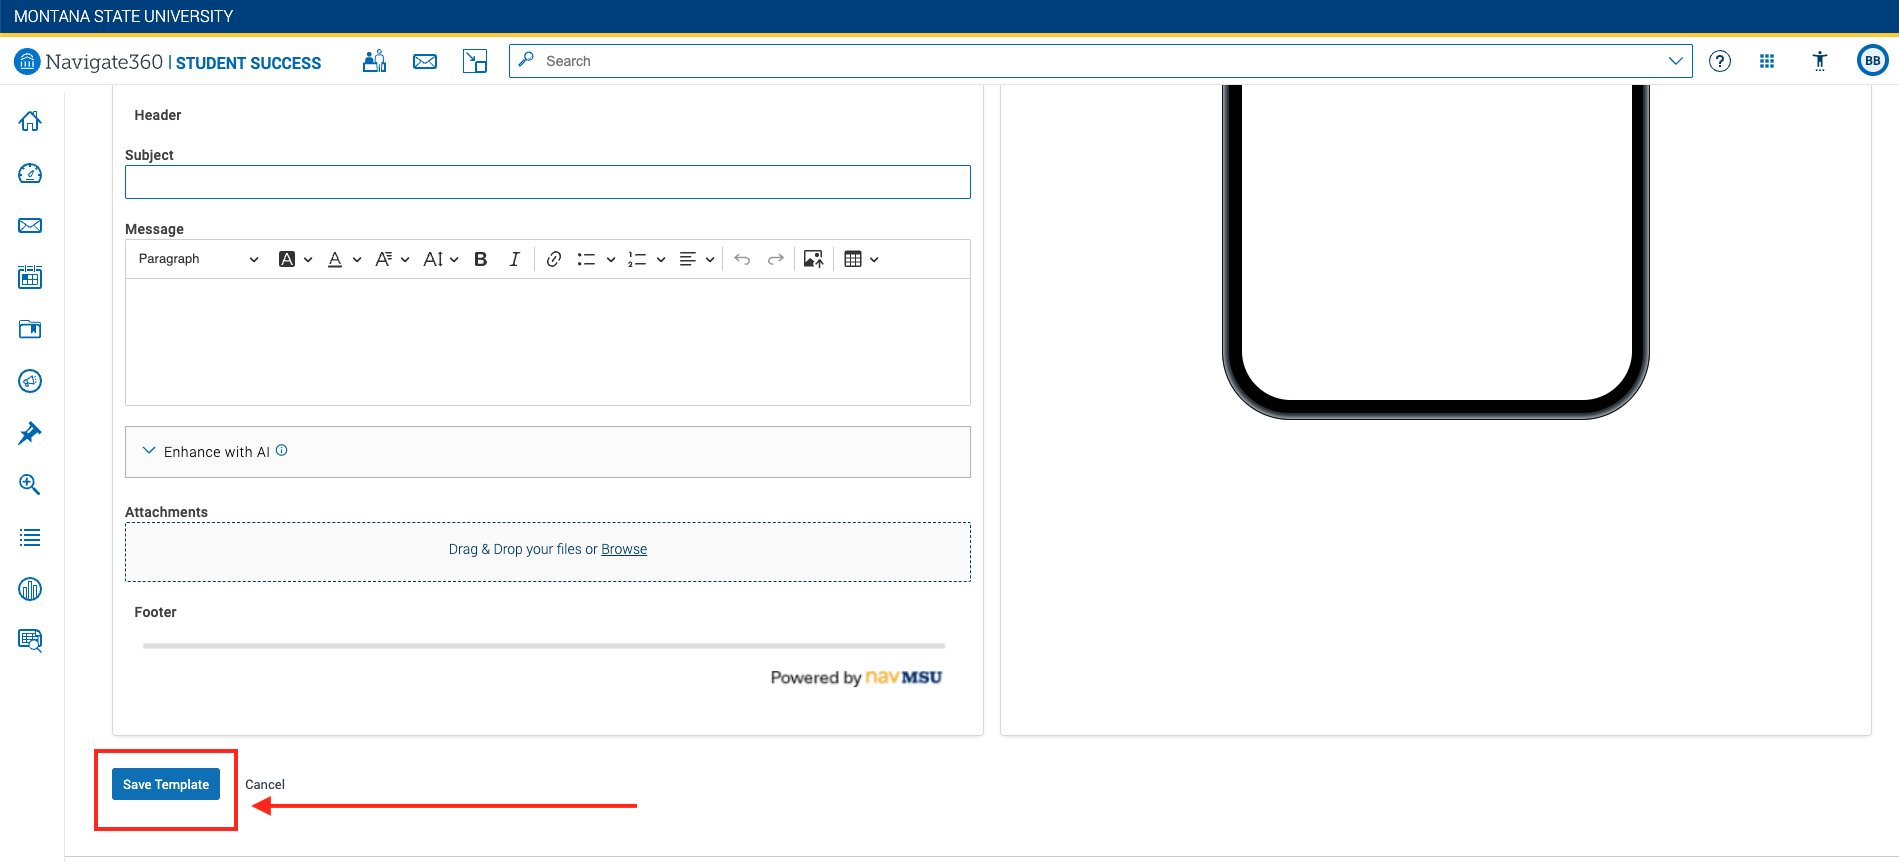
- After configuring the template, click Save Template at the bottom of the page. Completed content templates display in the table on My
Templates.
Tips for Template Editing
- Avoid copy/paste from Word documents. Extraneous formatting can sometimes be hidden and will cause your message to display
incorrectly. Be sure to use the preview option before sending a message. Sometimes
hand-typing the template will save you more time than copy/paste.
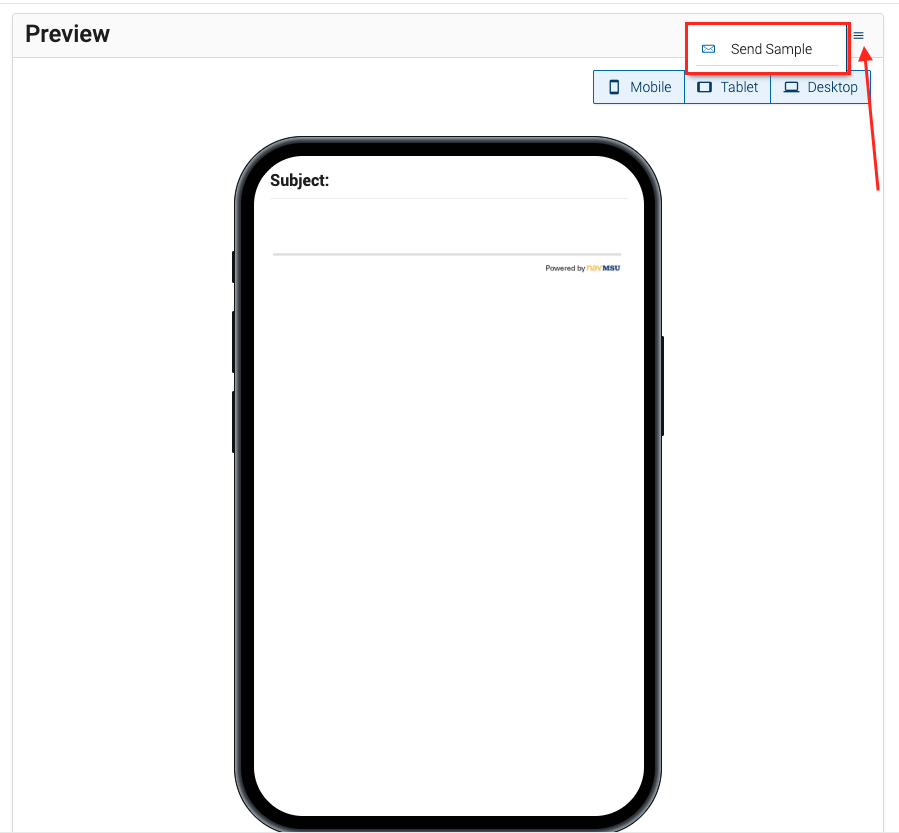
- Previews are generally 95% accurate; however, line spacing or new line formatting may occasionally appear slightly different
on mobile. If you are uncertain about formatting, use the Send Sample feature to view the message on both your phone and desktop.
Using Templates
Templates can be used across all messaging and campaign functions. You can open a message to your student(s) through a profile search, report, or campaign.
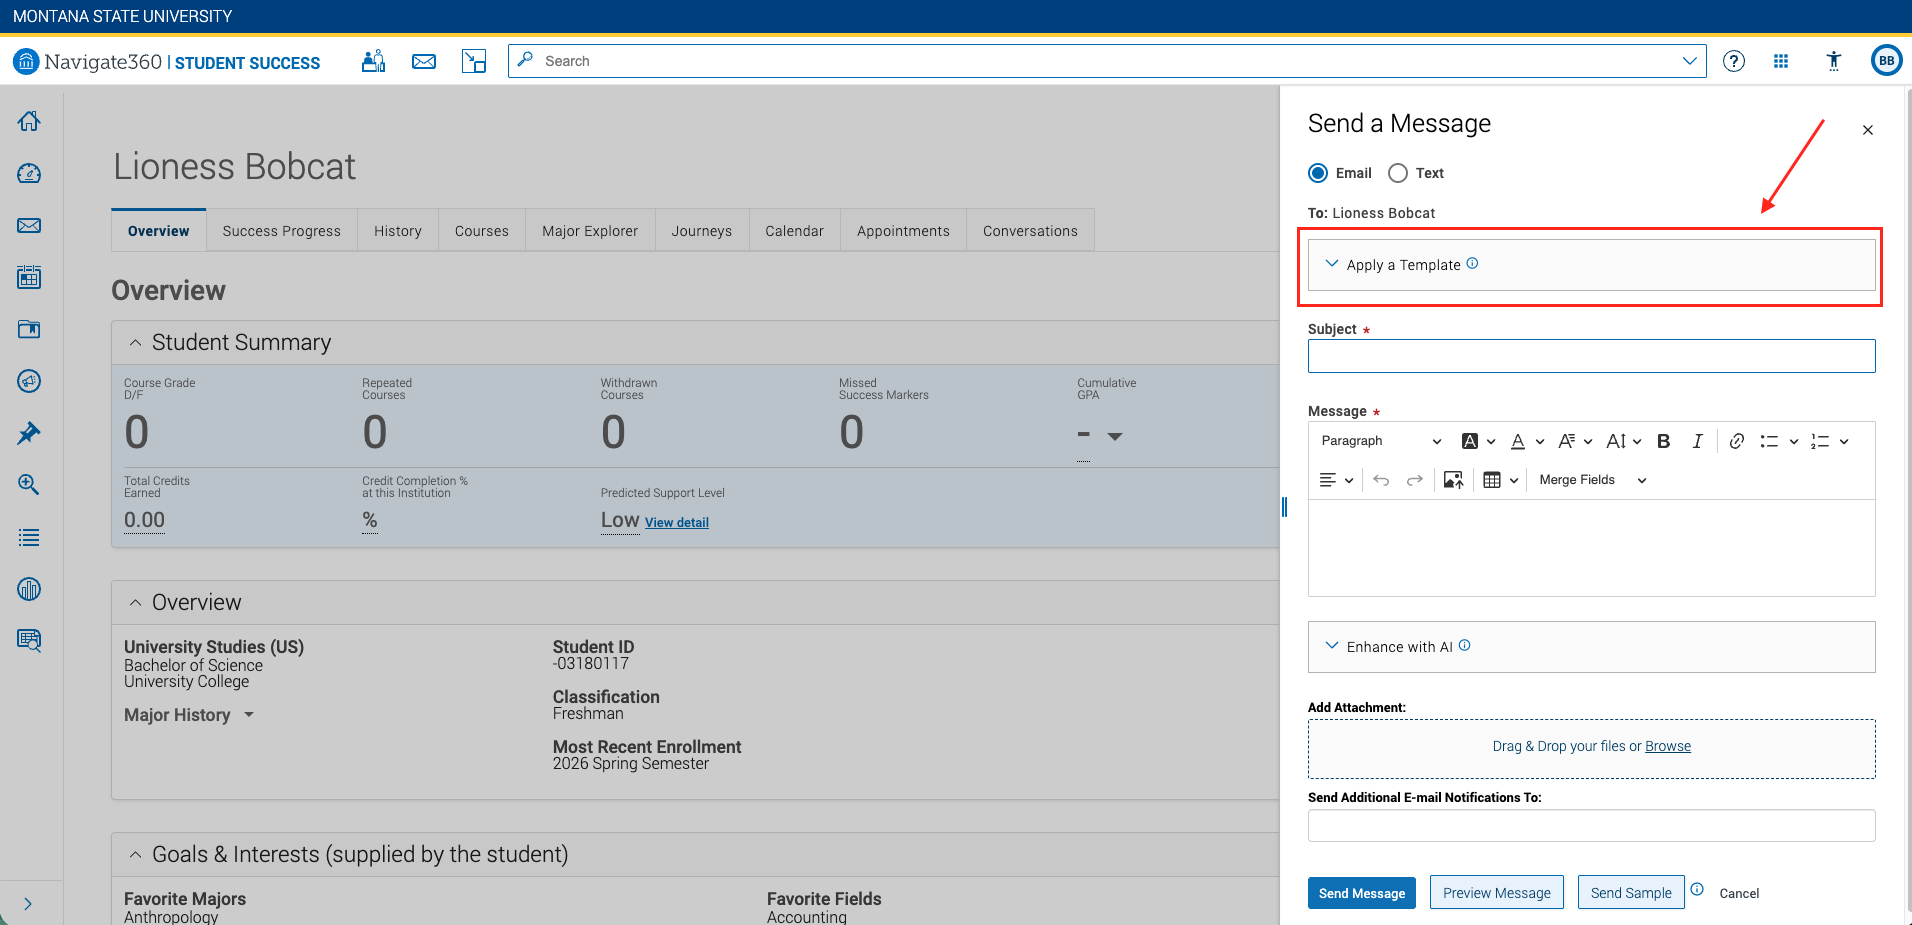
- Choose Email or Text and then select the drop-down menu for Apply a Template.
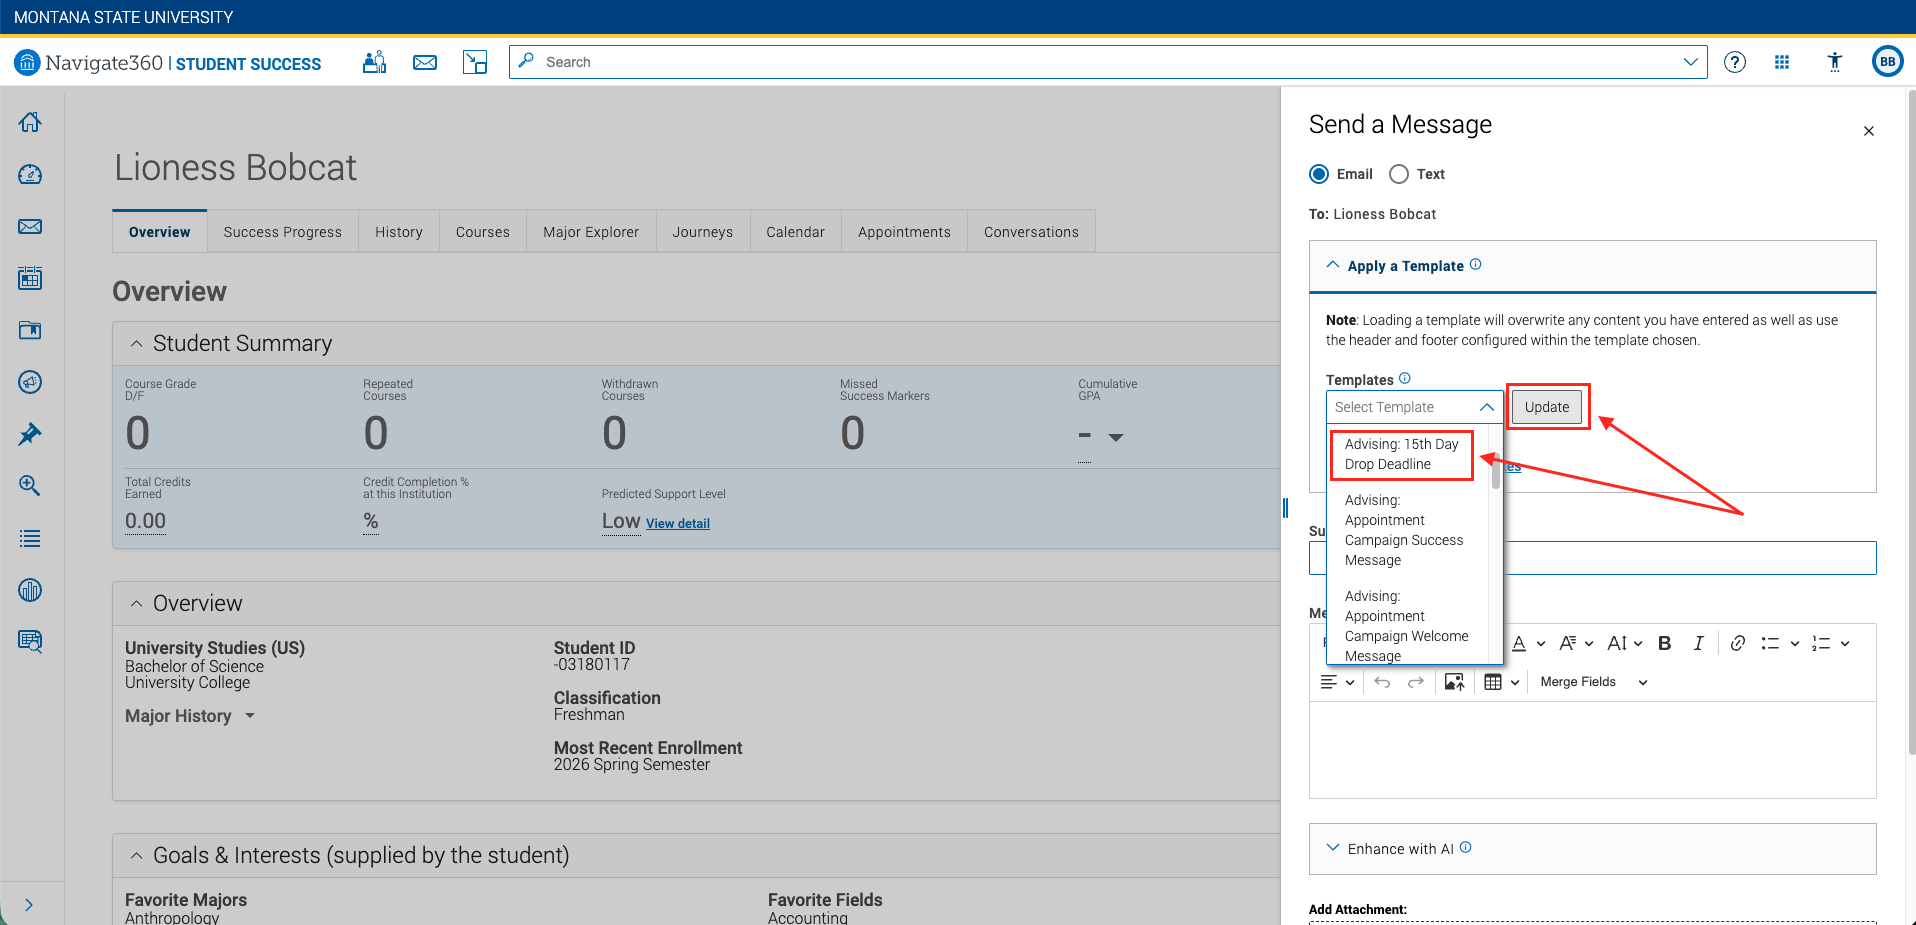
- Select the template you wish to use and click the Update button.
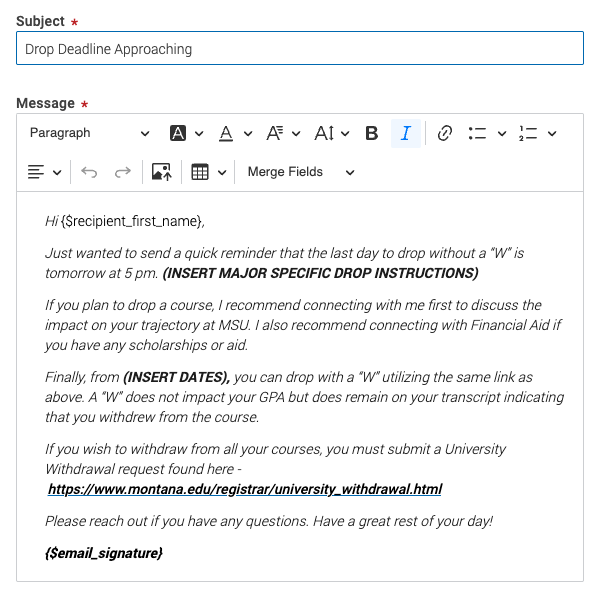
- Review the template carefully including updating any merge tags and dates, and proofread for any errors.
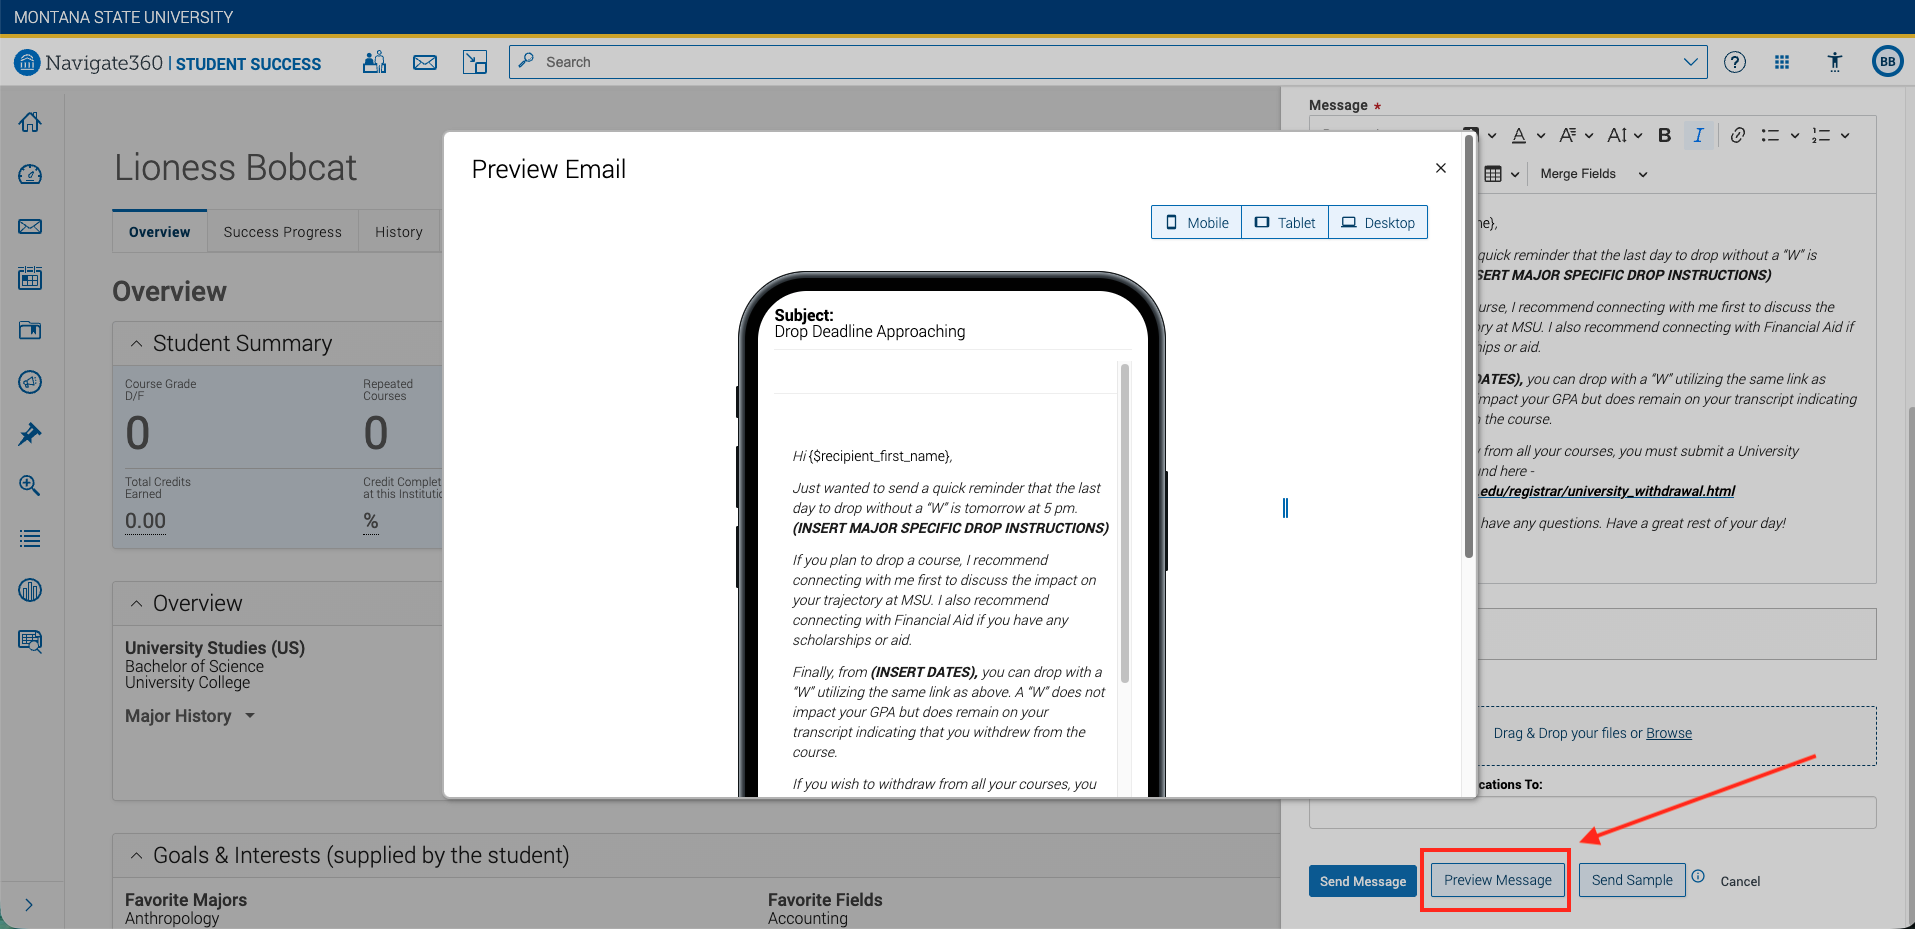
- Preview Message and/or Send Sample to review how the message will display on different devices.
- Select the Send Message button once you have reviewed your message.