
navMSU - V3 Reporting
V3 Reports provide data and analytical insights related to student success, with advanced filtering options to allow you to refine your results. Each filter field includes multiple selectable values, and as additional filters are applied, the report becomes more targeted.
Please note that students will only appear in reports if they are active in the selected terms. If no terms are specified, the report will include all students who were active in any term within the selected filters.
The following instructions provide general guidance on V3 reporting features. For a list of commonly used V3 reports with detailed filter instructions, please refer to the Commonly Used V3 Reports page.
Building a Report
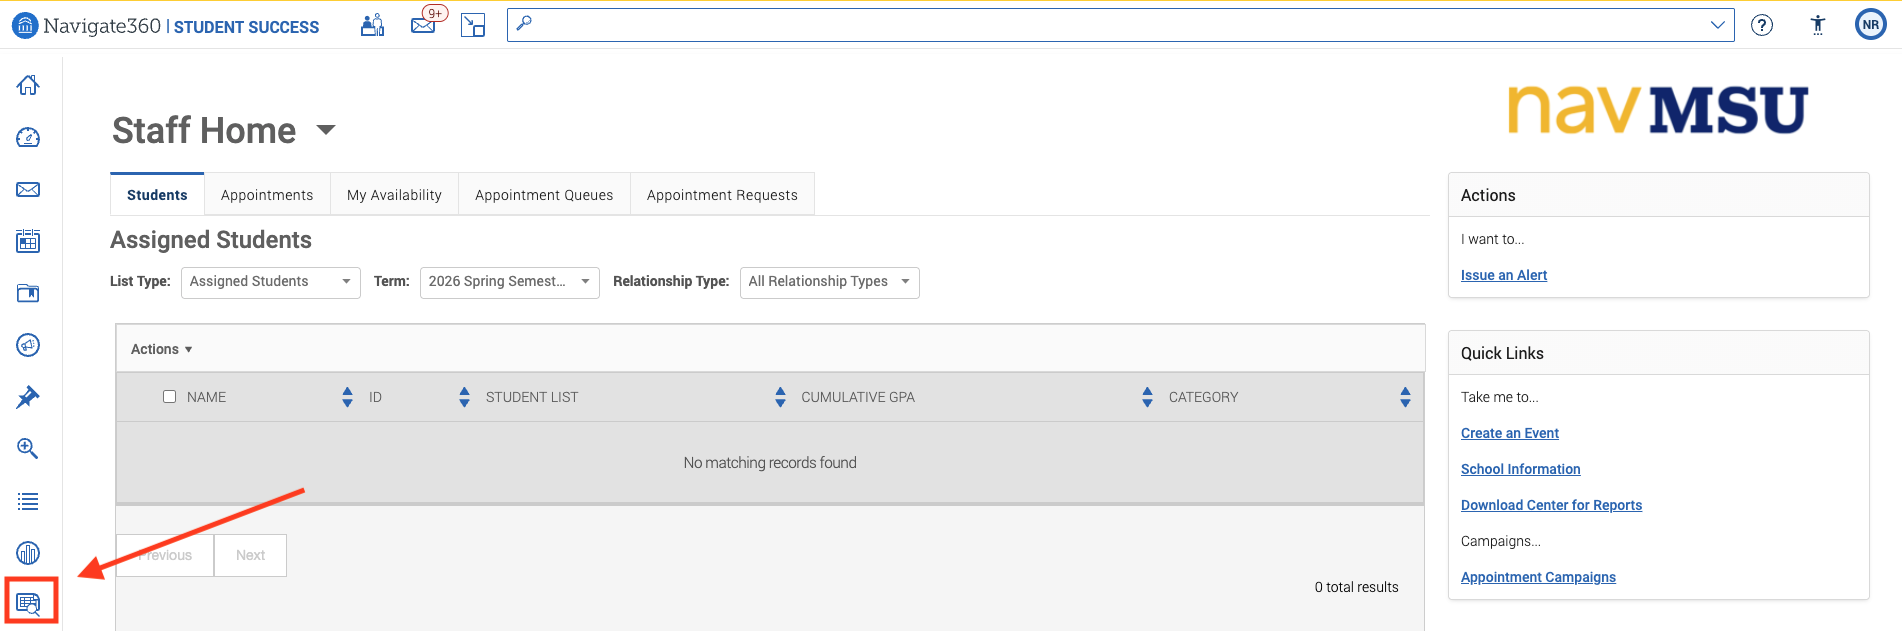
- Navigate to the V3 Reporting page by selecting the report icon on your sidebar.
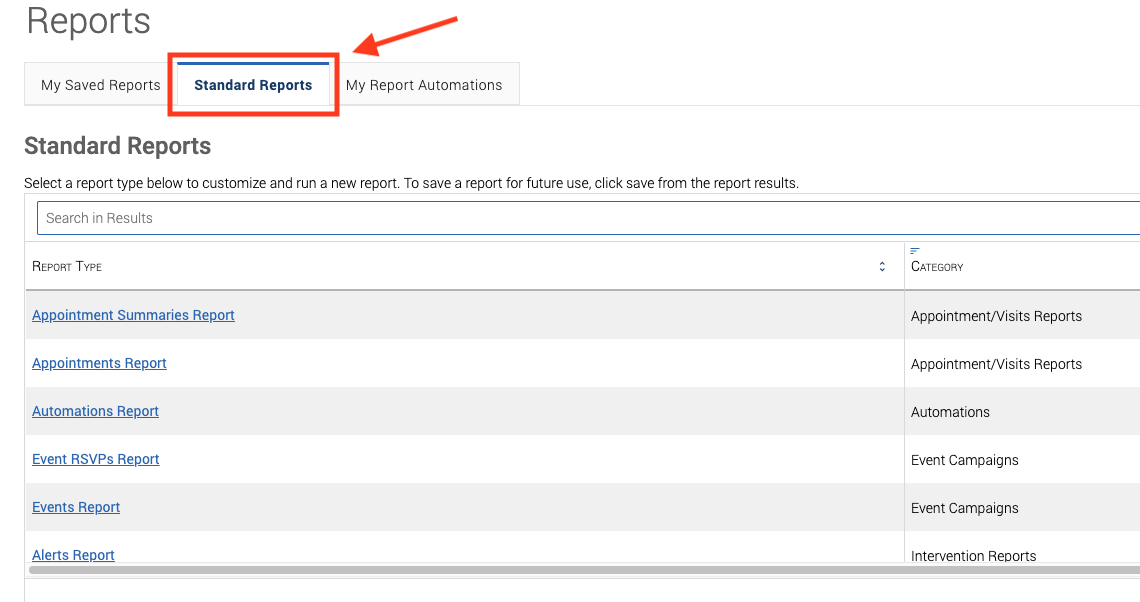
- Select which report you would like to run under the Standard Reports tab.
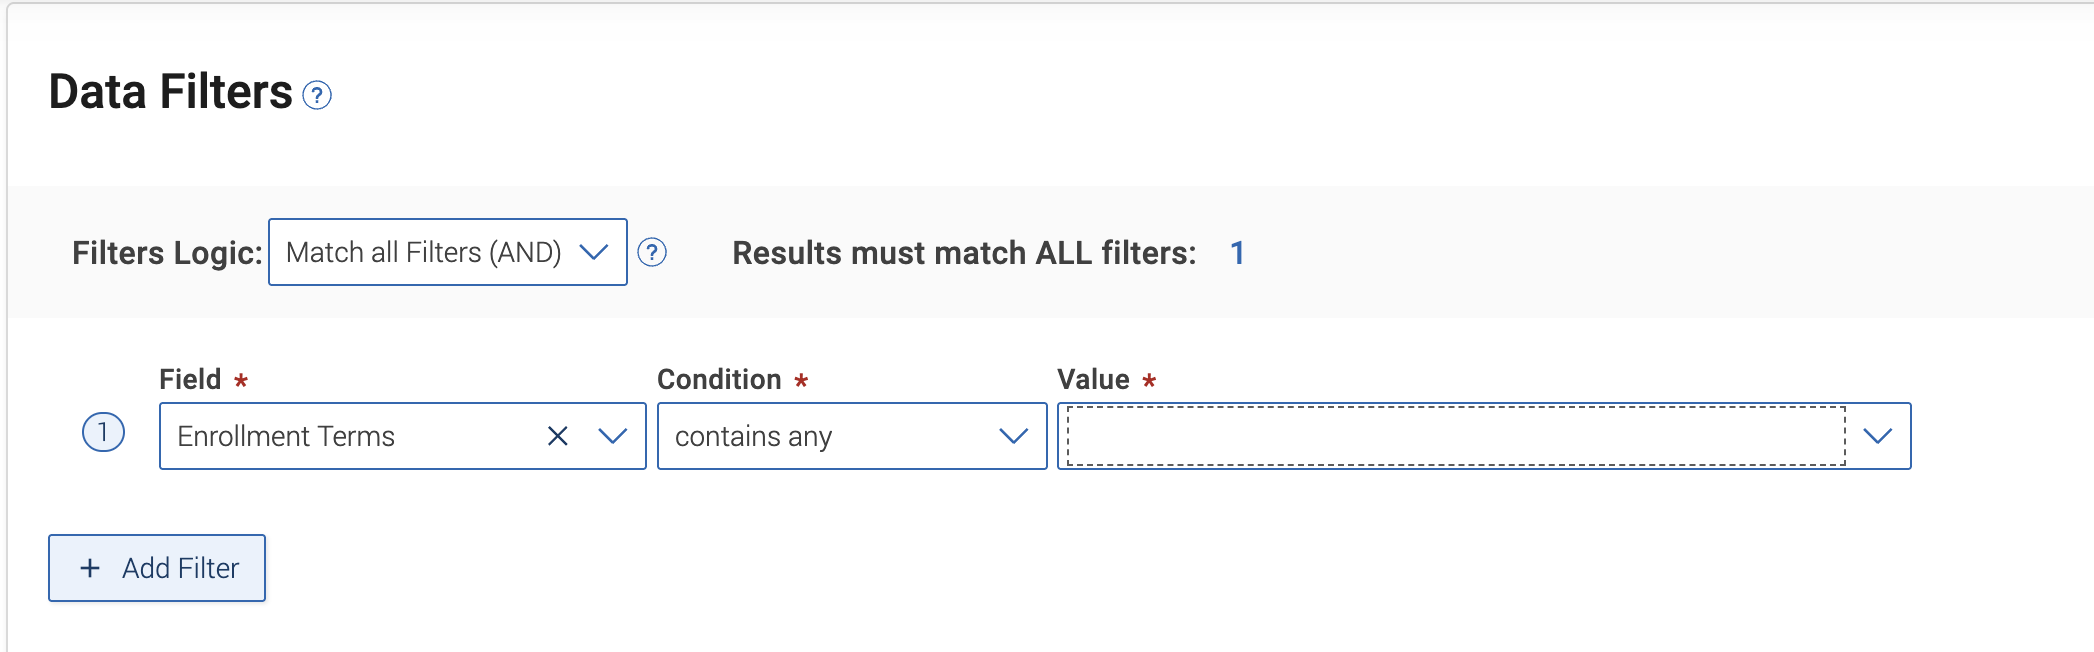
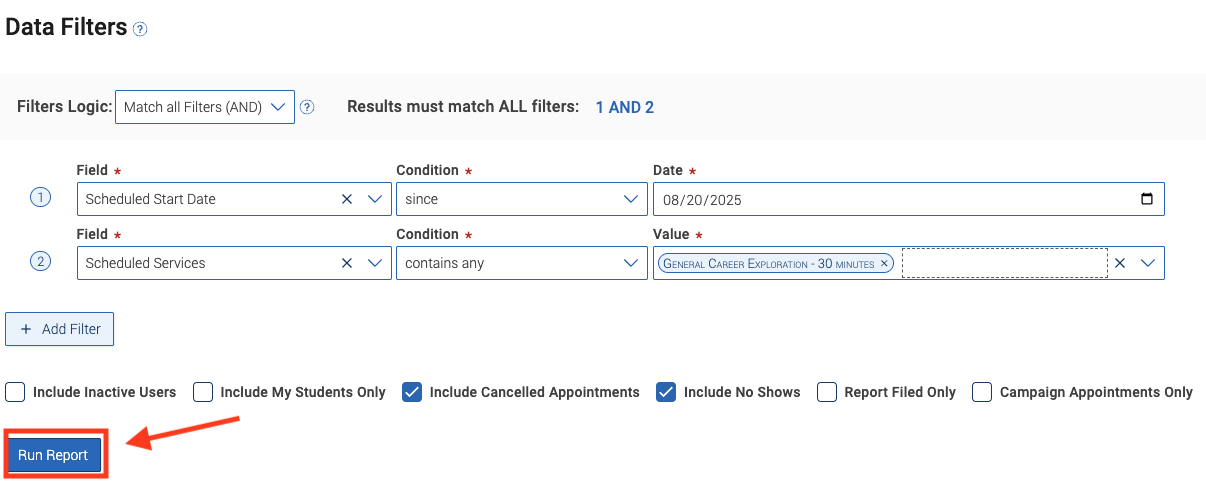
- Once you have selected your report, begin by creating your search parameters. Select a field, condition, and value for each row. You can combine filters to make
your report more precise. Please note that conditions vary by data type. For example,
the date field has the option to filter by date range. You can add multiple filters
to a report by clicking Add Filter. Filter Logic can also be adjusted, and the available options are listed below.
- Match all Filters (AND) creates a condition that requires all specified criteria to be true for a record to be included in the report results. AND logic will narrow your results. We recommend using the default Match all Filters (AND) logic for standard searches.
- Match any Filters (OR) connects multiple conditions, where at least one condition must be true for a record to be included in the report results. OR logic will broaden your results.
- Advanced (AND/OR) creates more complex logic when creating a report. AND requires all conditions to
be true, while OR requires at least one condition be true.
- Once you have selected your search criteria, click Run Report. Please note that any report with more than 50,000 rows will not display results;
instead, you will have to download a CSV of the results.
-
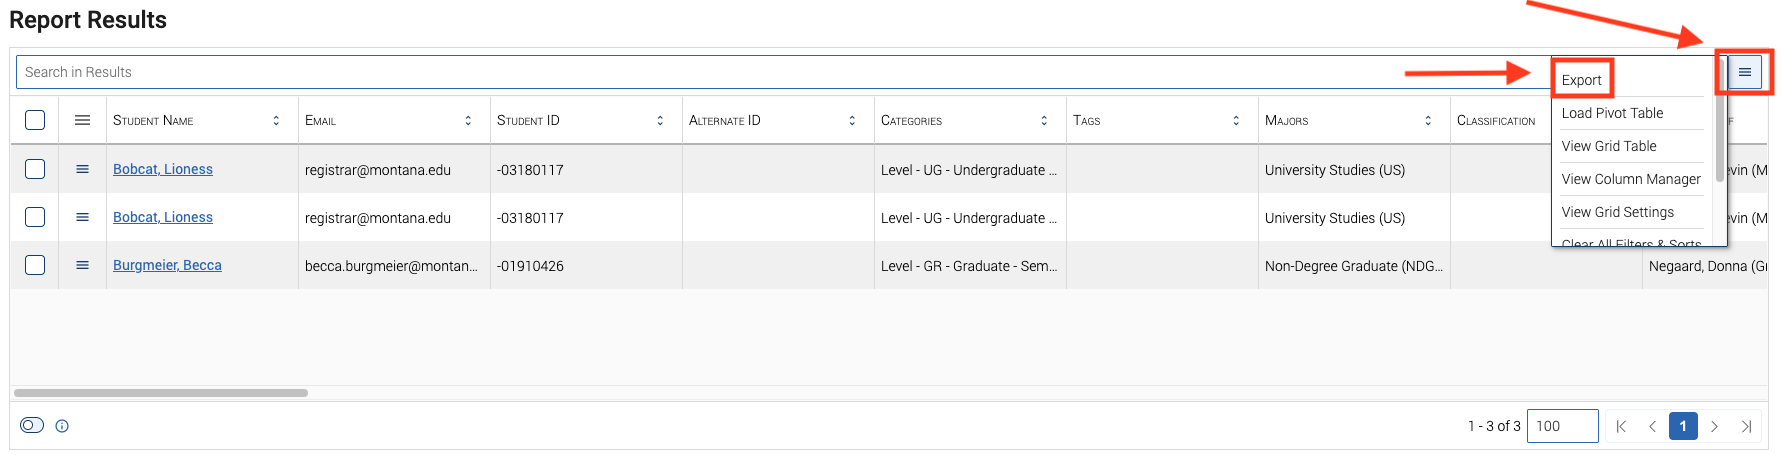
If you want to export your results to a spreadsheet, click on the three lined blue button next to the search bar.
Please note: All V3 Reports correctly filter based on the selected field search criteria. However, report columns display information based on the current term. To view column data for a past or future term, please refer to the Change Default Term instructions at the end of this page.
-
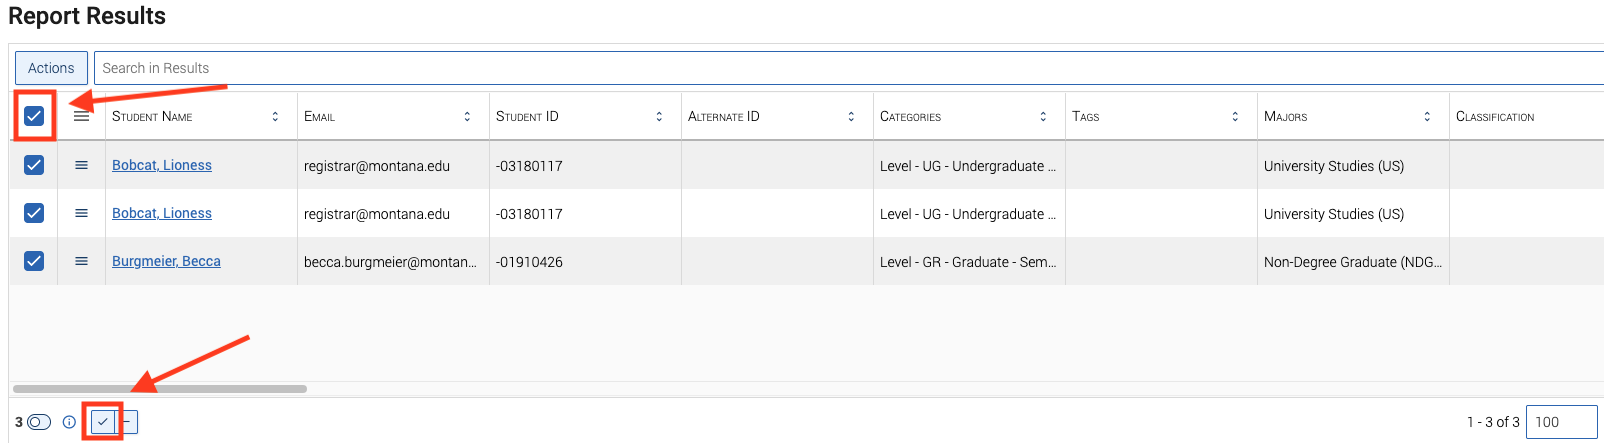
If you want to take action in navMSU based on your search results, select all students by clicking the checkbox next to Student Name. Please note that if there are multiple pages of results, you will need to click the checkmark at the bottom of the page to select all students on all pages.
You may also perform an action on an individual student by selecting the student and clicking the same icon.
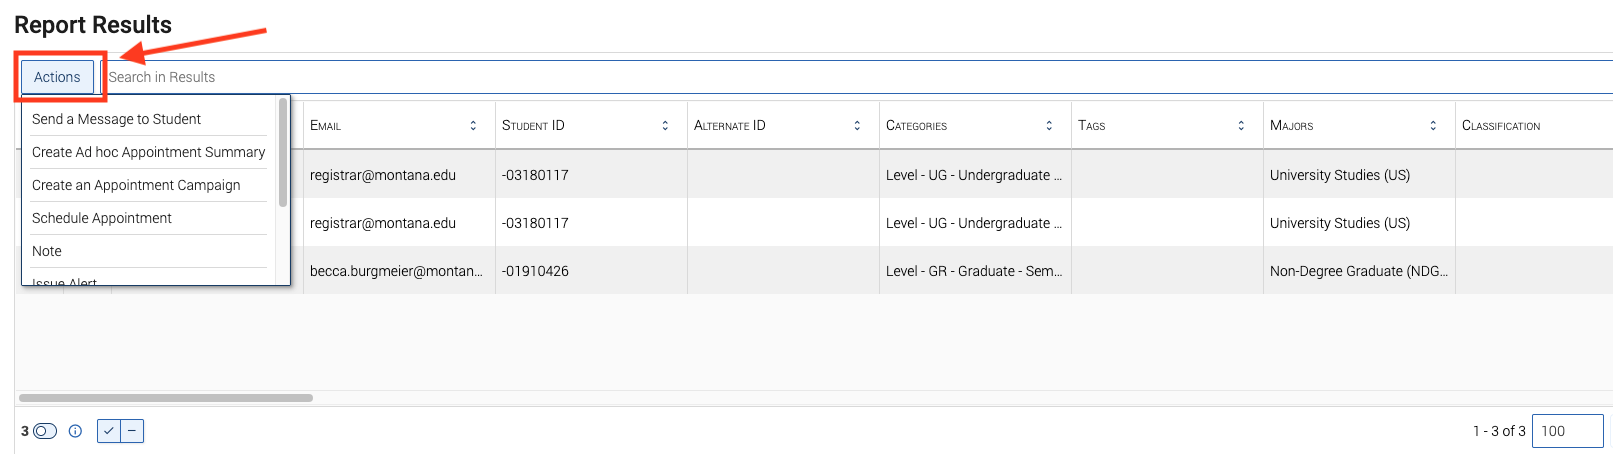
- Once you have selected all students, select the Actions button. From there, you can send a message to students, create an ad hoc appointment
summary, create an appointment campaign, schedule appointments, add to a student list,
and more.
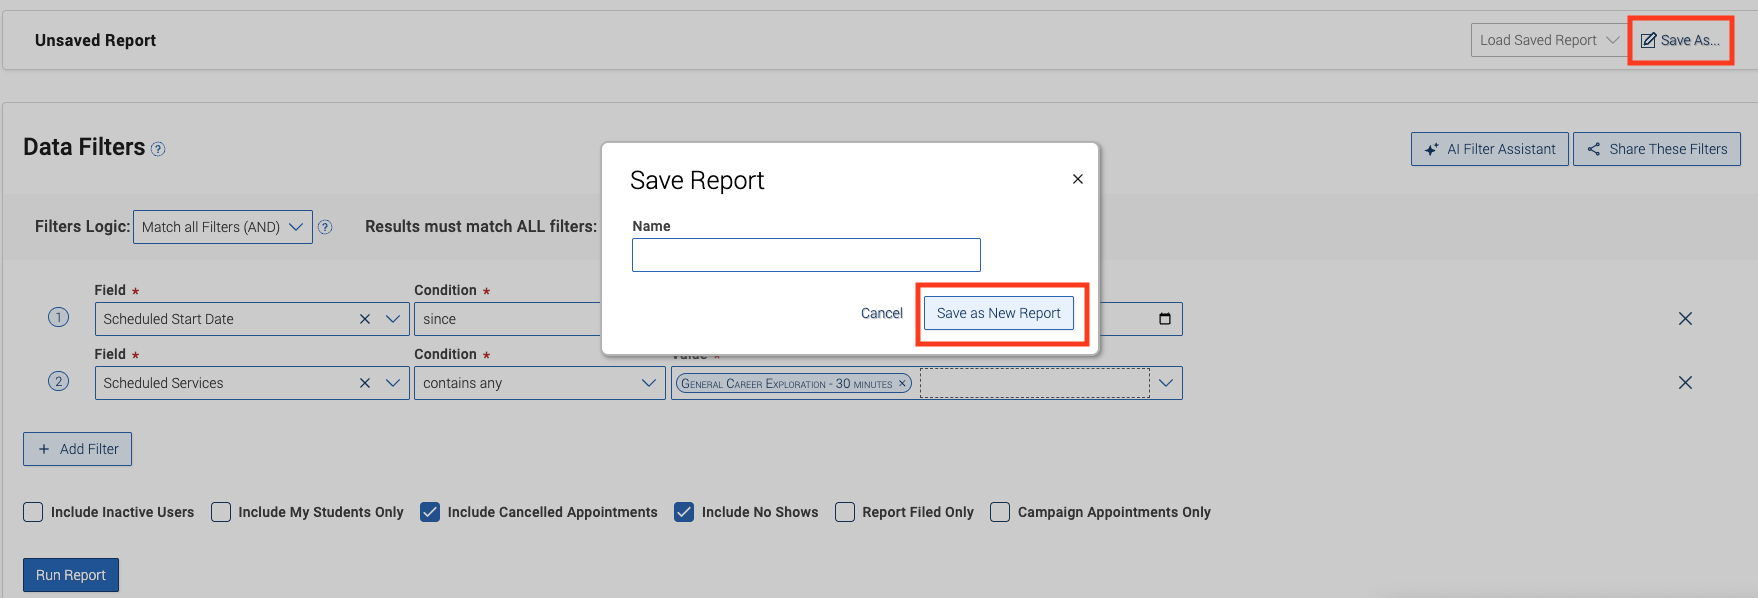
- If you want to save this report to use at a later date, click Save As..., type in the name of your report, and click Save as New Report. Your saved report can be found under My Saved Reports, on the V3 Reports page.
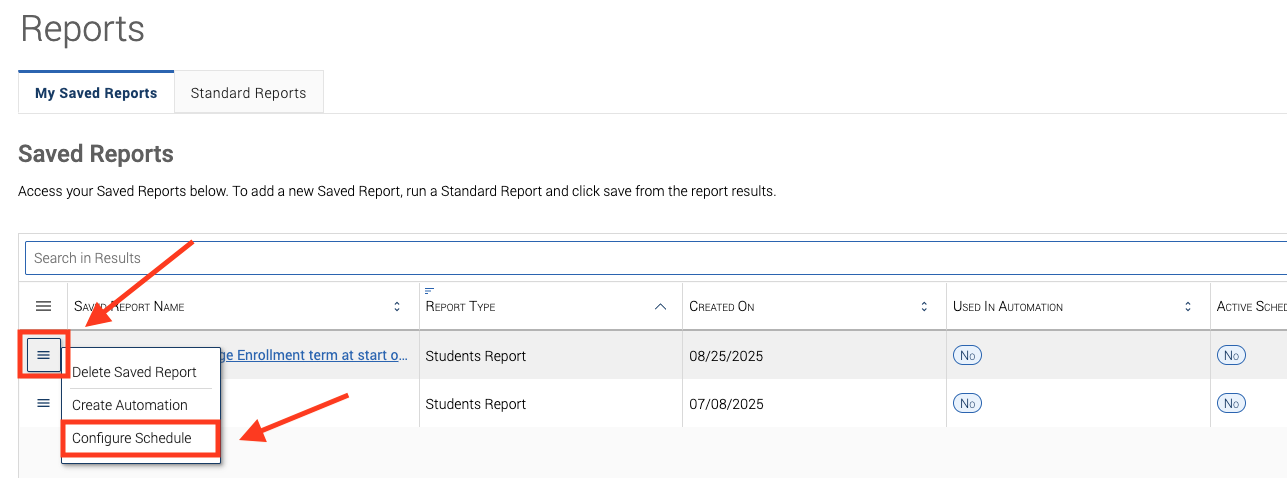
- You can configure a saved report to run on a schedule from the My Saved Reports tab on the Reports page. Find the saved report you want to schedule, click on the
icon with three lines next to your chosen report, and select Configure Schedule. Scheduled reports work best for reports that do not use date filters, since those
filters will not automatically update.
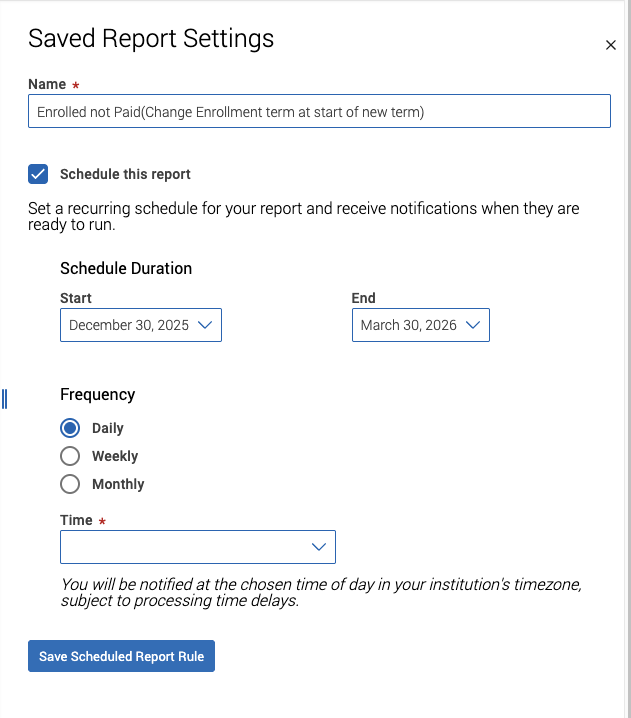
- The Saved Report Settings panel will open. Set a schedule duration, report frequency, and time you want the
report to run. Once you have selected all report criteria, click Save Scheduled Report Rule.
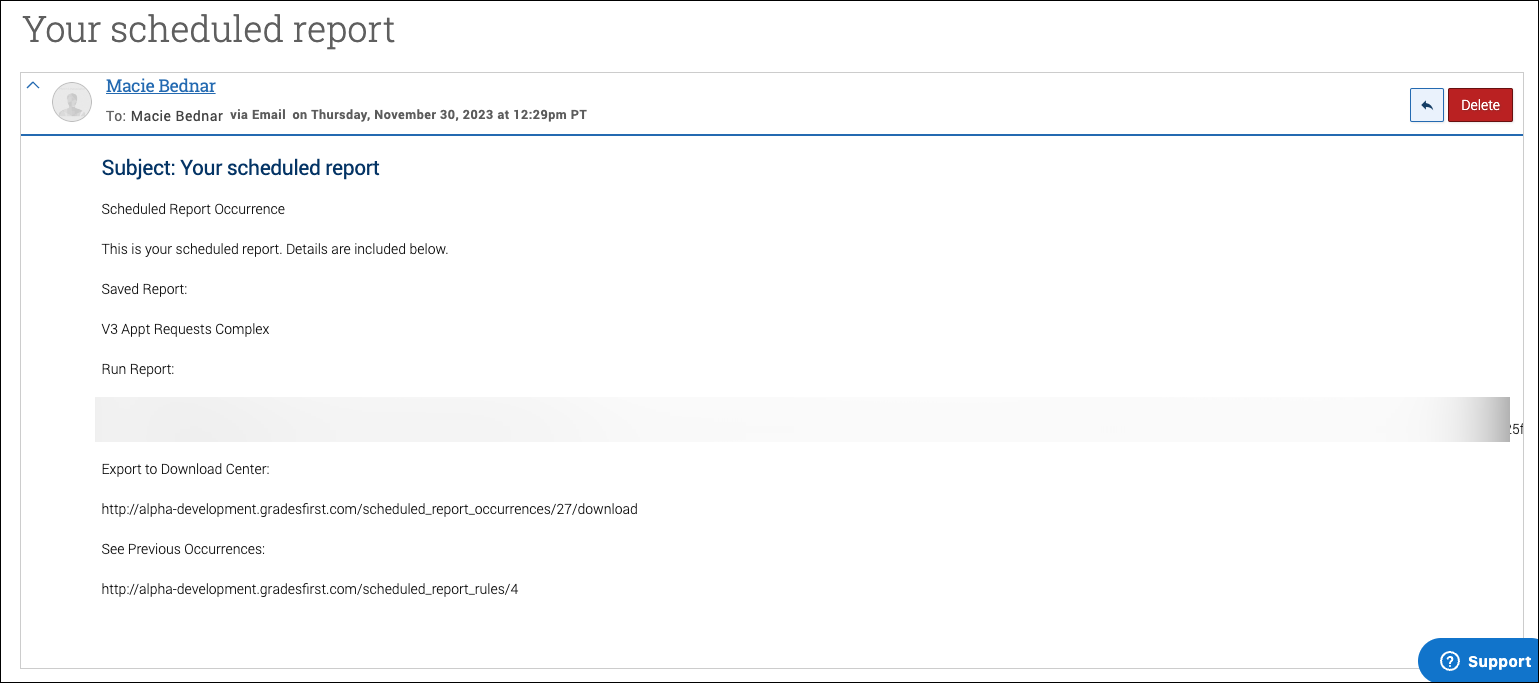
- You will receive an email when the report is ready. Open the link in the email to
run the report.
Change Default Term
All V3 reports correctly filter results based on the selected field search criteria. However, the columns displayed in the report results will always show for the current term. For example, if you run a student report for Fall 2025 with a filter for a 2.0 minimum term GPA, the report will accurately identify students who received a 2.0 or higher in Fall 2025. However, the term GPA column will display the student’s term GPA for the current term.
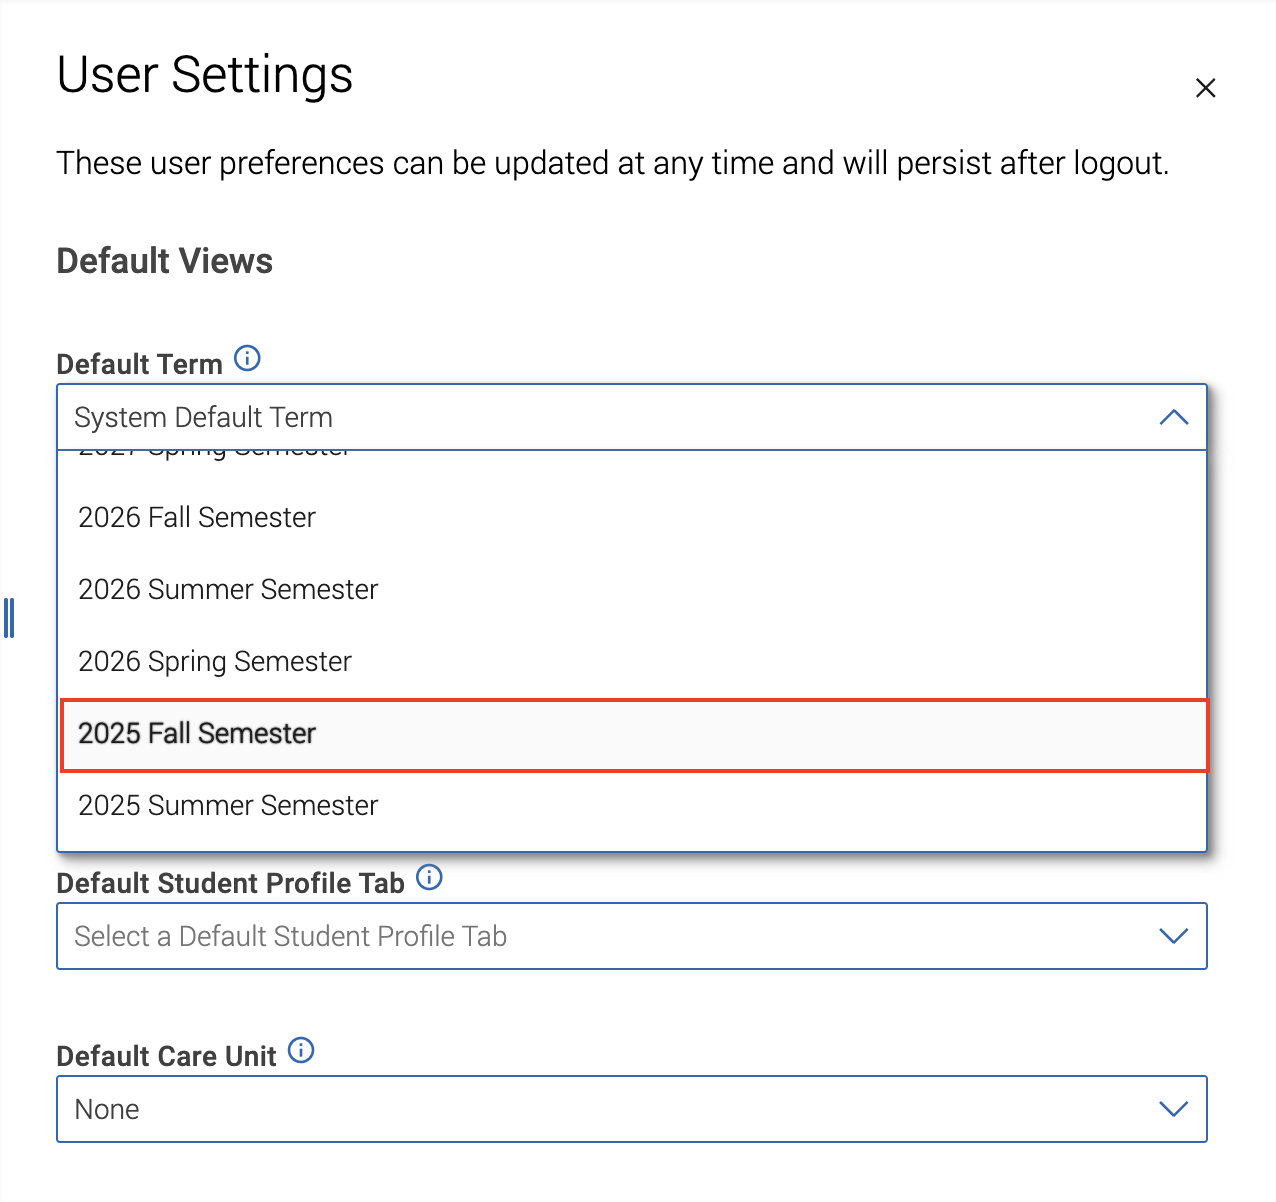
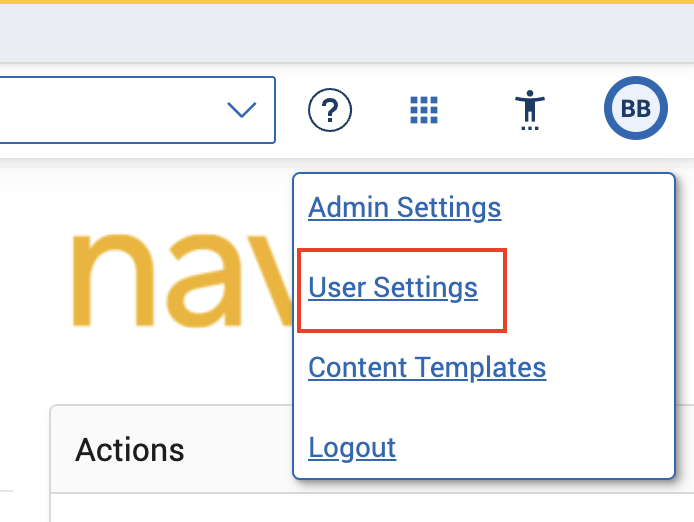
To generate column data for a past or future term, you can change your Default Term in User Settings.
- Click on the profile icon with your initials in the upper right-hand corner of your
homepage. Select User Settings.
- A pop-up window will open. Update the Default Term to the desired term and click Save. After you run the report, be sure to change your default term back.