
navMSU - Uploading Student Lists
Uploading student lists allows faculty and staff to send messages to, report on, create an appointment campaign, or add a to-do for a specific group of students. Please note that student lists are static. You may manually add or remove students, but the list does not change based on data changes in Banner or navMSU.
Uploading a Student List
- Before uploading your list, please take a moment to make sure your Excel file is formatted
correctly. All GIDs in your spreadsheet must include the dash and leading zero (-0). Please also include a column header for the GIDs and save your file as a .csv file.
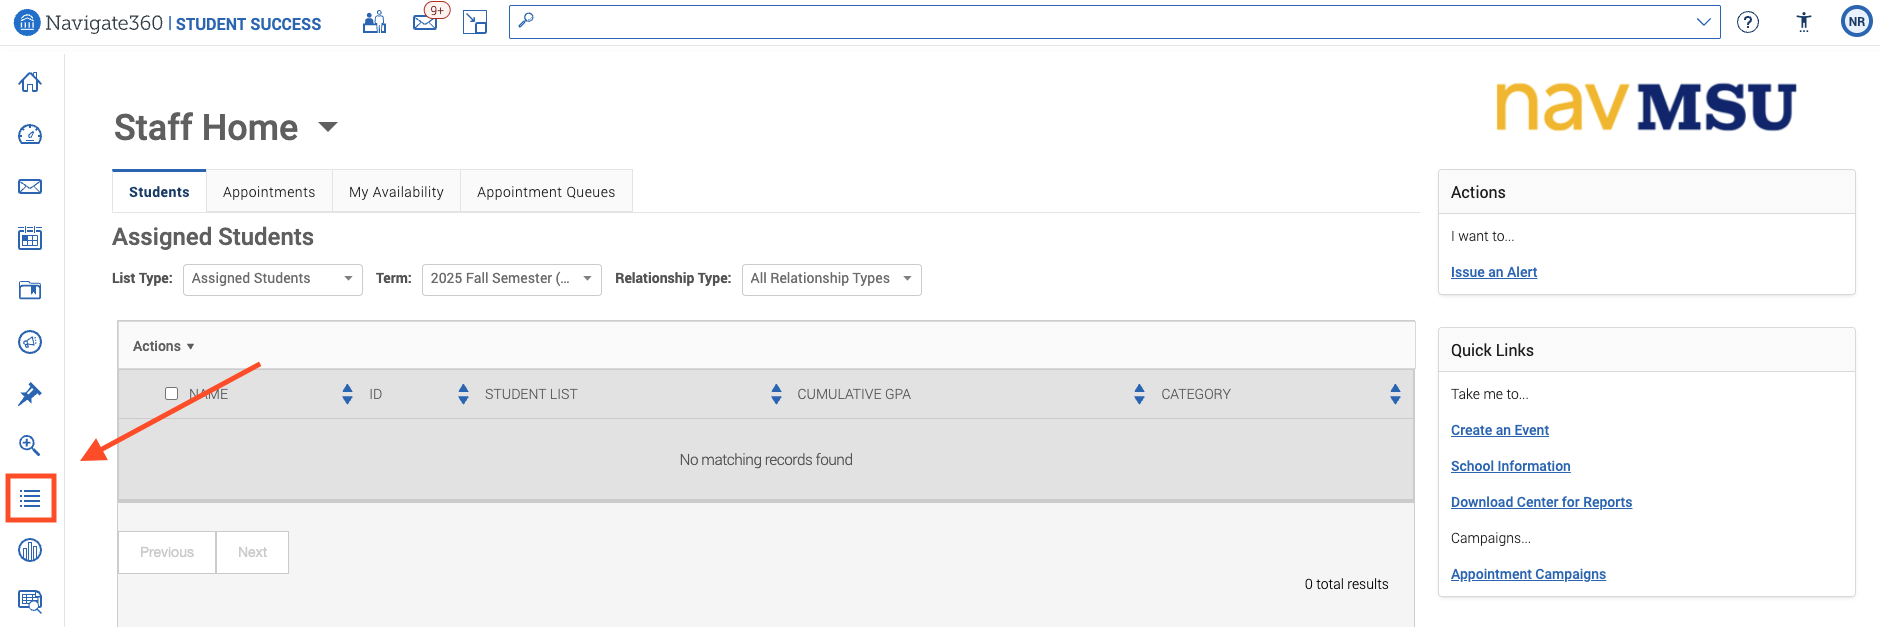
If your GIDs are missing leading zeros, you can add them by selecting the GID column, then going to Format -> Format Cells -> Custom -> type in eight zeros (eg: 00000000) -> Ok. - Navigate to the Lists & Saved Items page from the staff home.
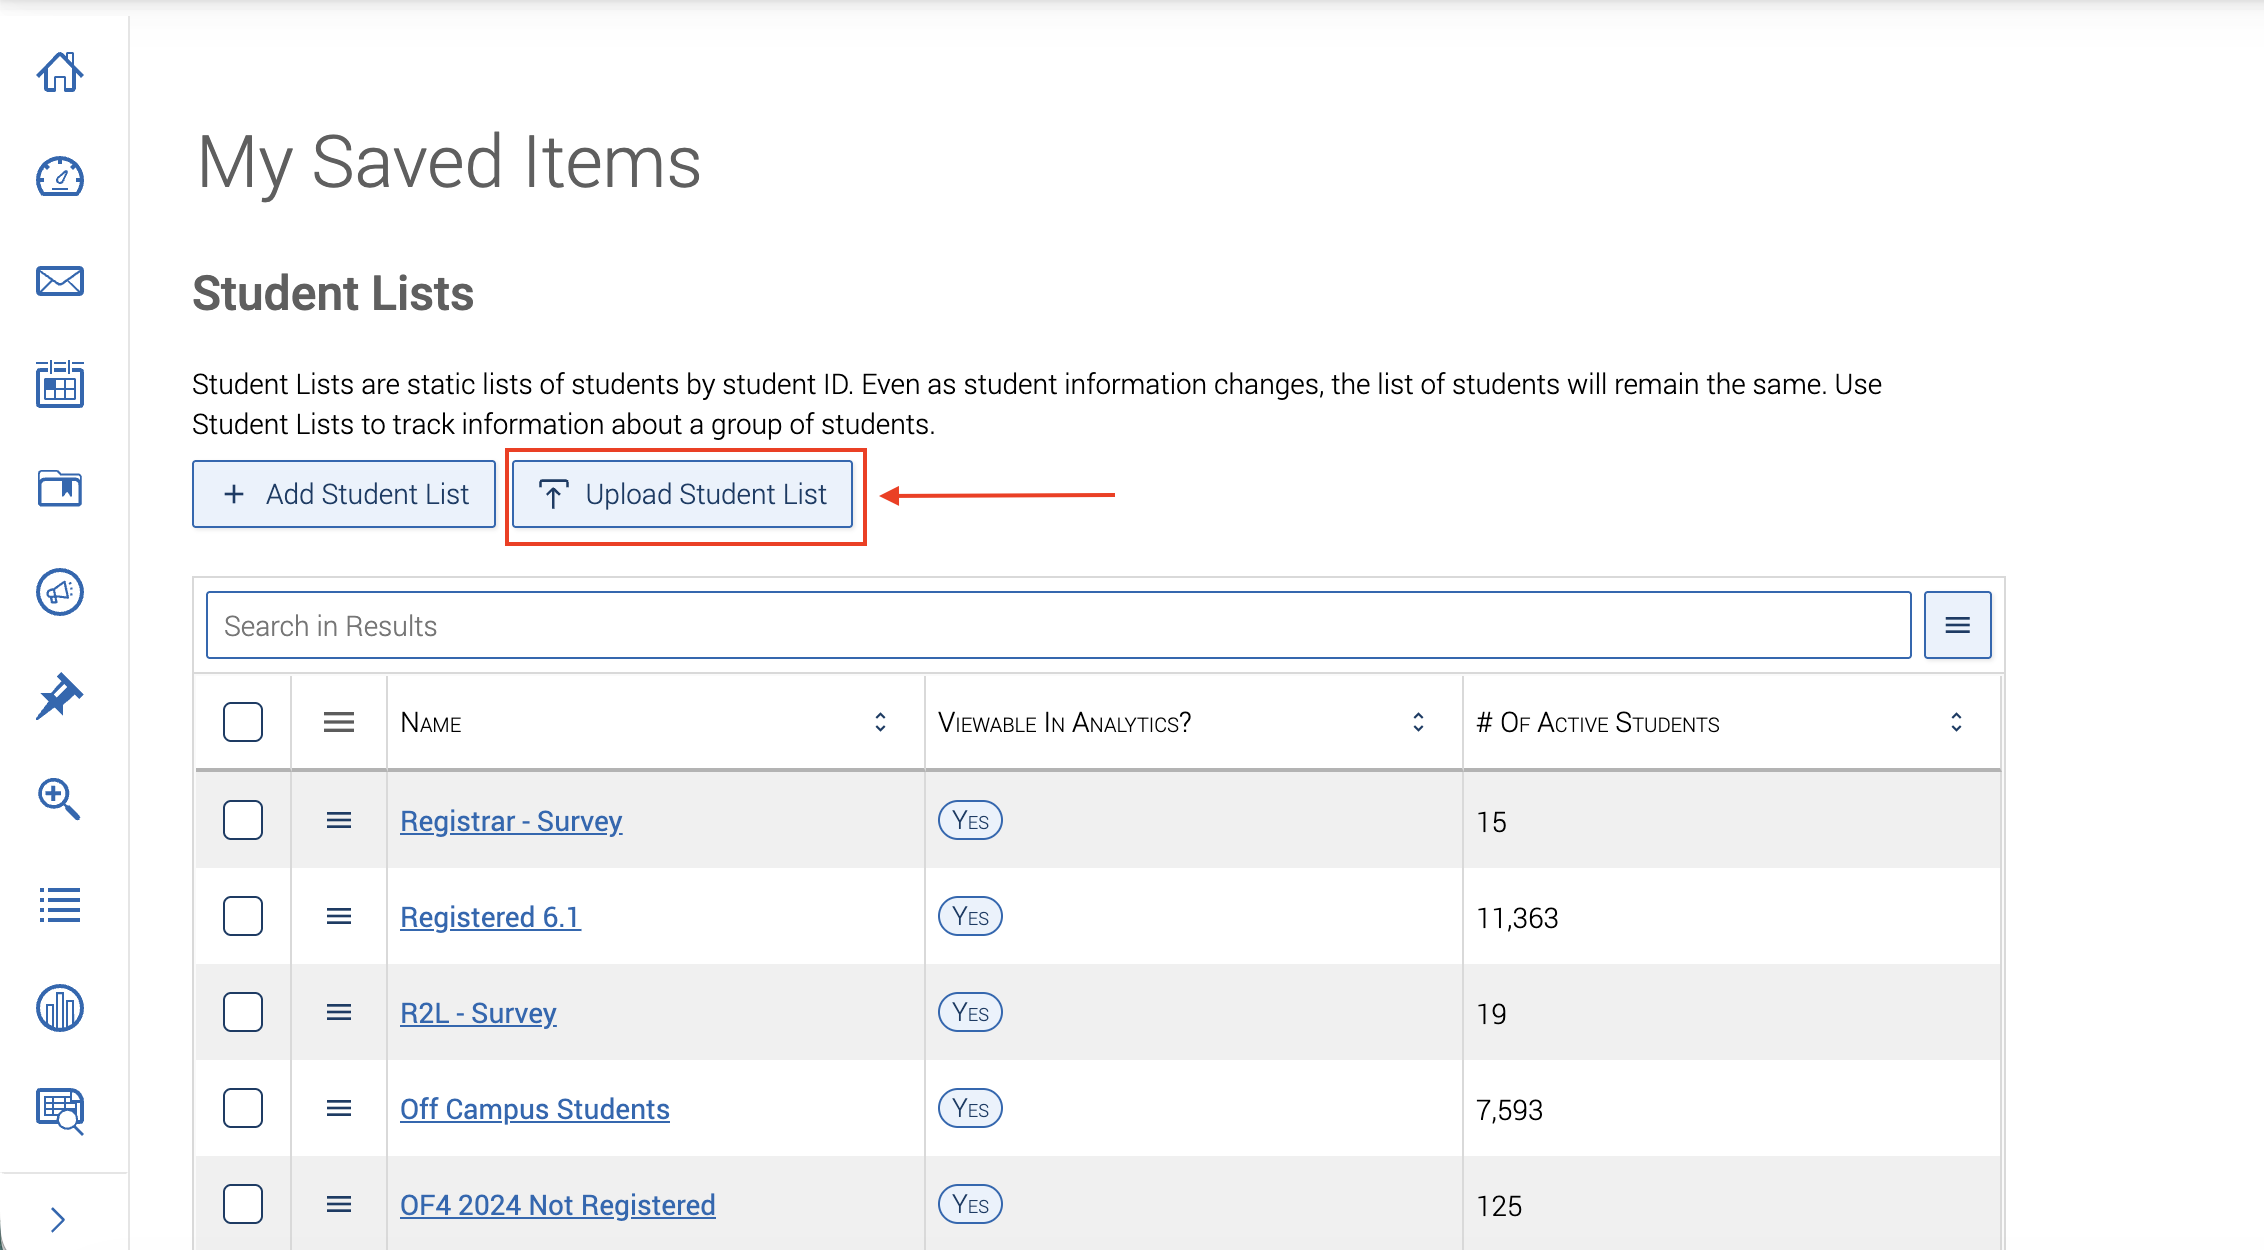
- Click on Upload Student List.
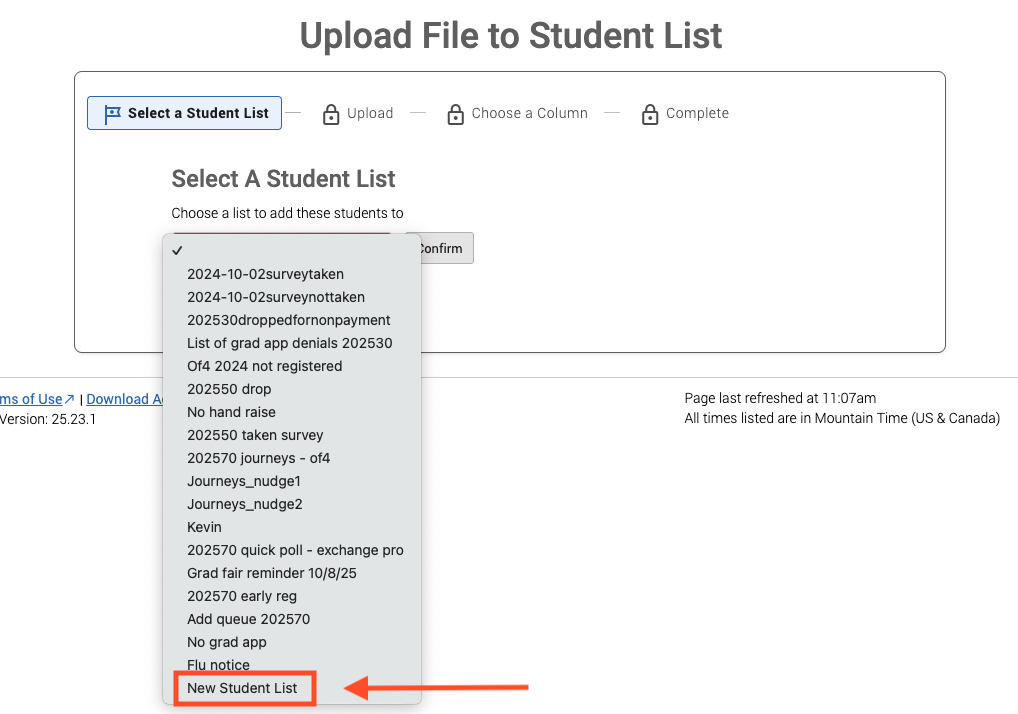
- Under Choose a list to add these students to, click on the drop-down menu. Select New Student List at the bottom of the menu and then select Confirm.
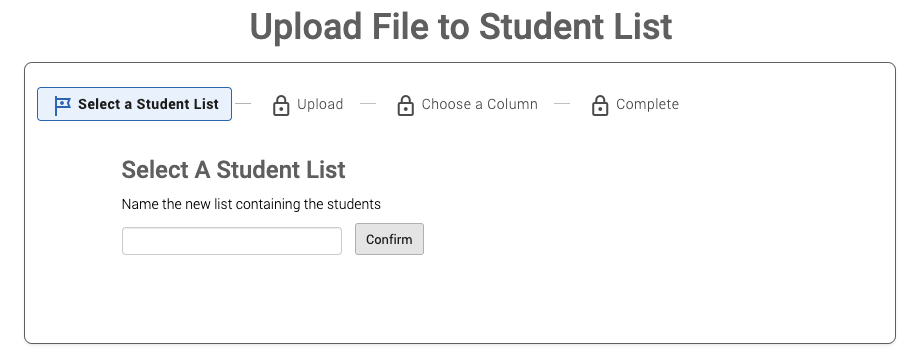
- Name the list of students and select Confirm.
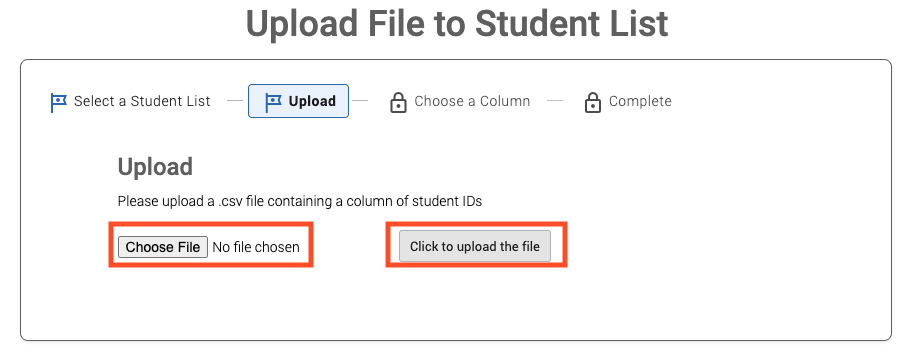
- Upload the file that contains your student list. Make sure the file is in .csv format, and the GIDs
are properly formatted, with the –0. After selecting the file, Click to upload the file to complete the upload process.
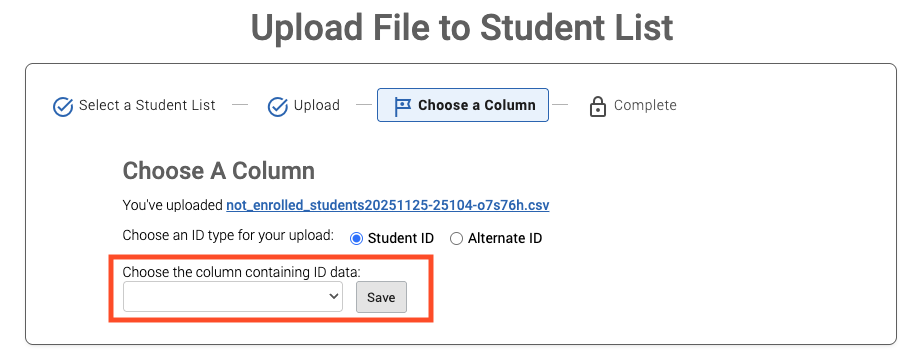
- Once you have uploaded the file, verify that Student ID is the ID type selected for your upload. Then, from the drop-down menu, select the column that contains student GIDs. Click Save.
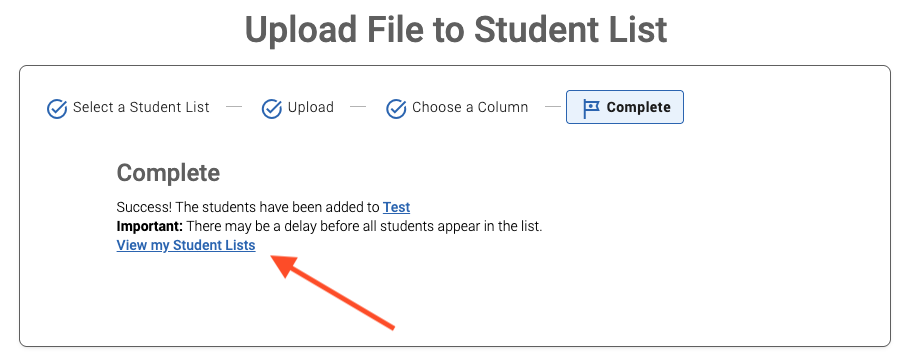
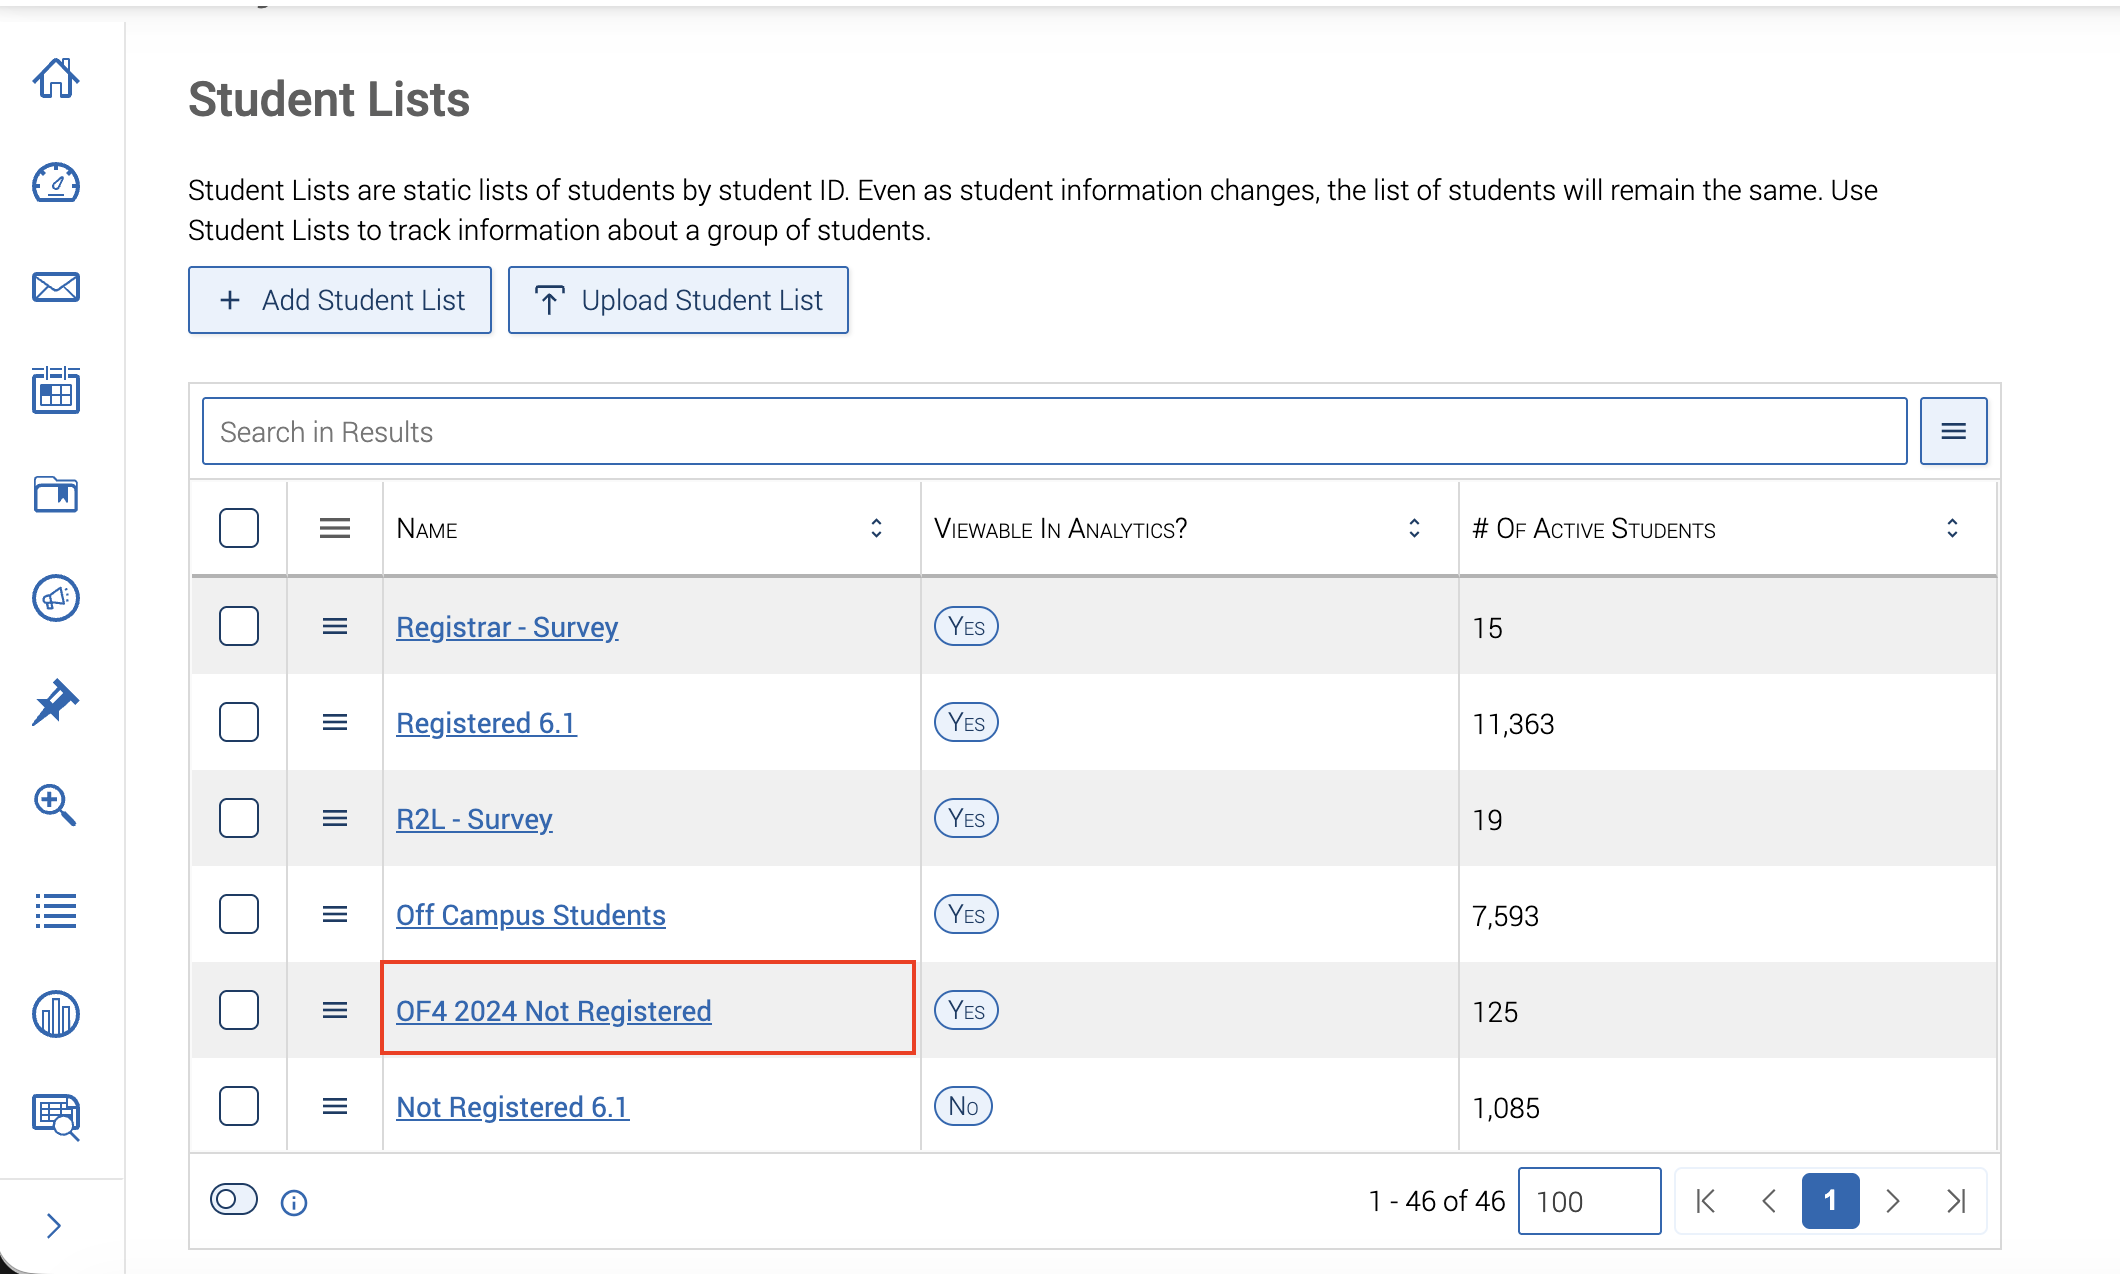
- Once you have saved your list, verify that it looks correct by clicking on View my Student Lists.
- Once you return to your student lists, find and open the list you just created. Please note that sometimes you may need to refresh navMSU in order for all students
to appear on the list.
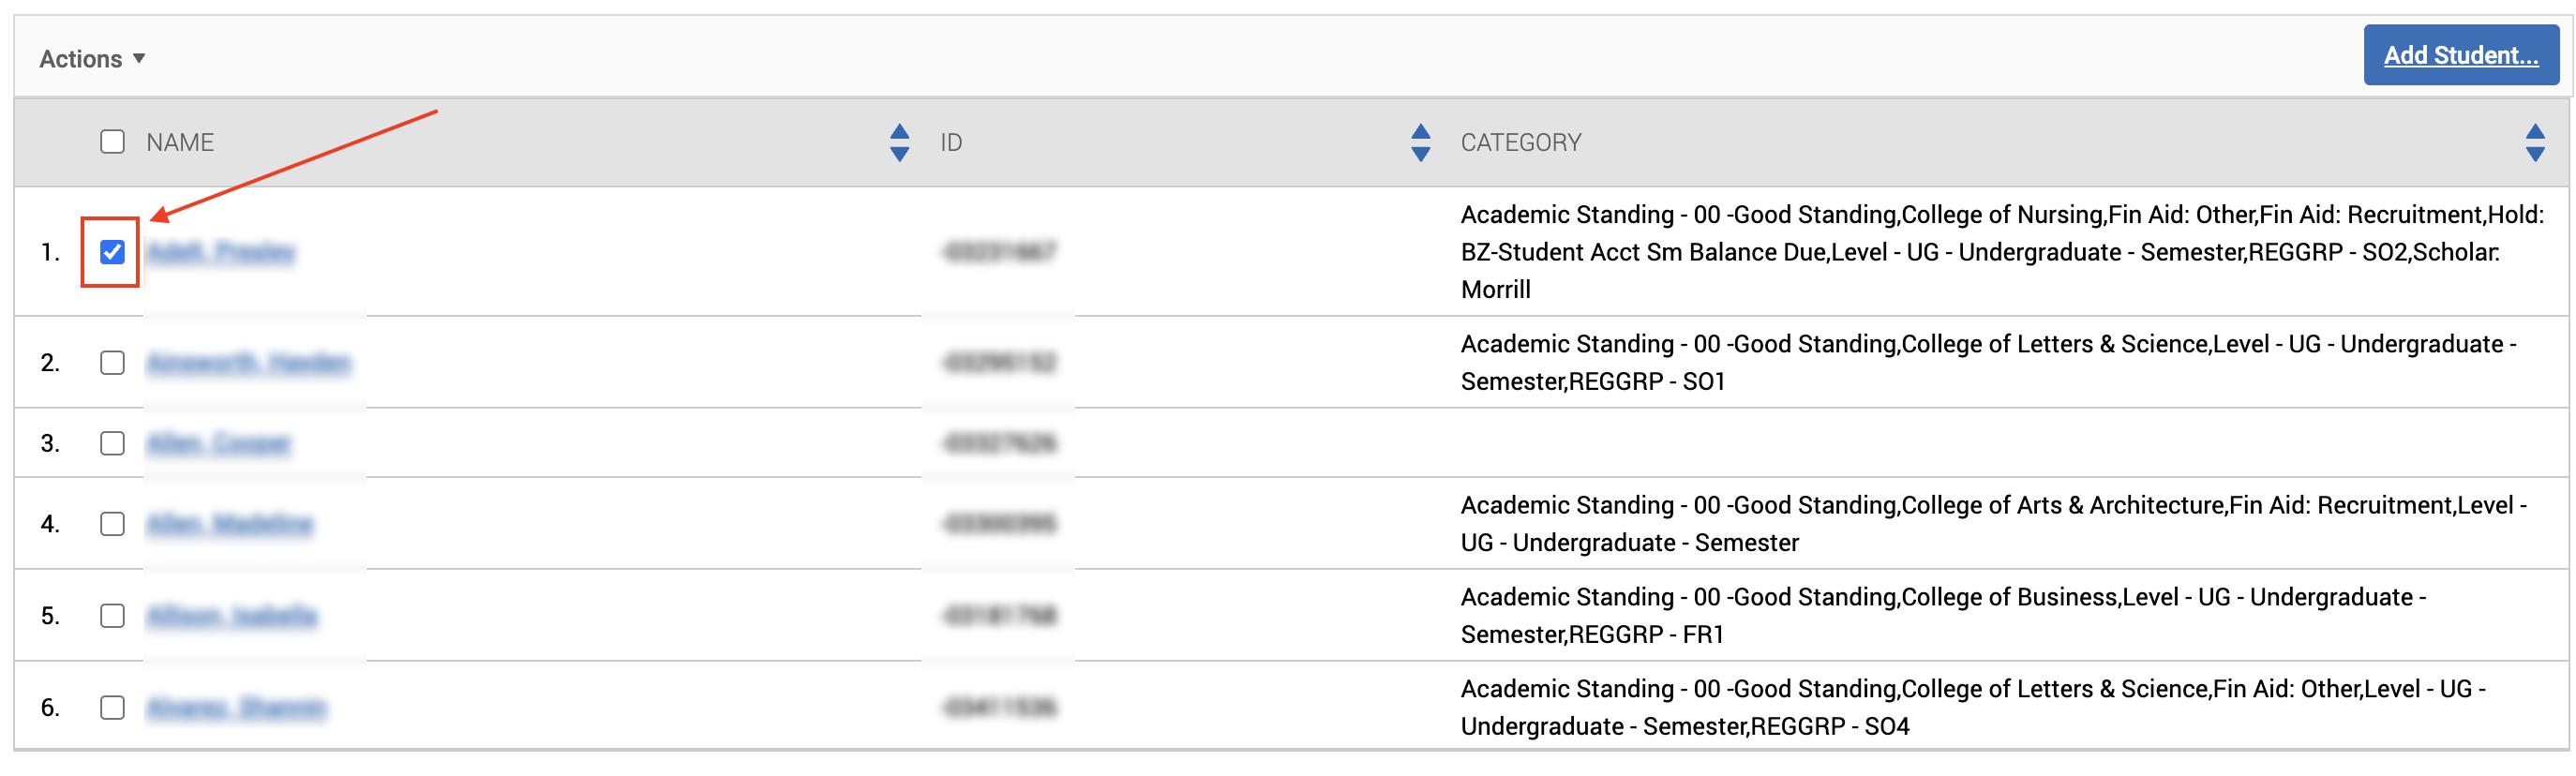
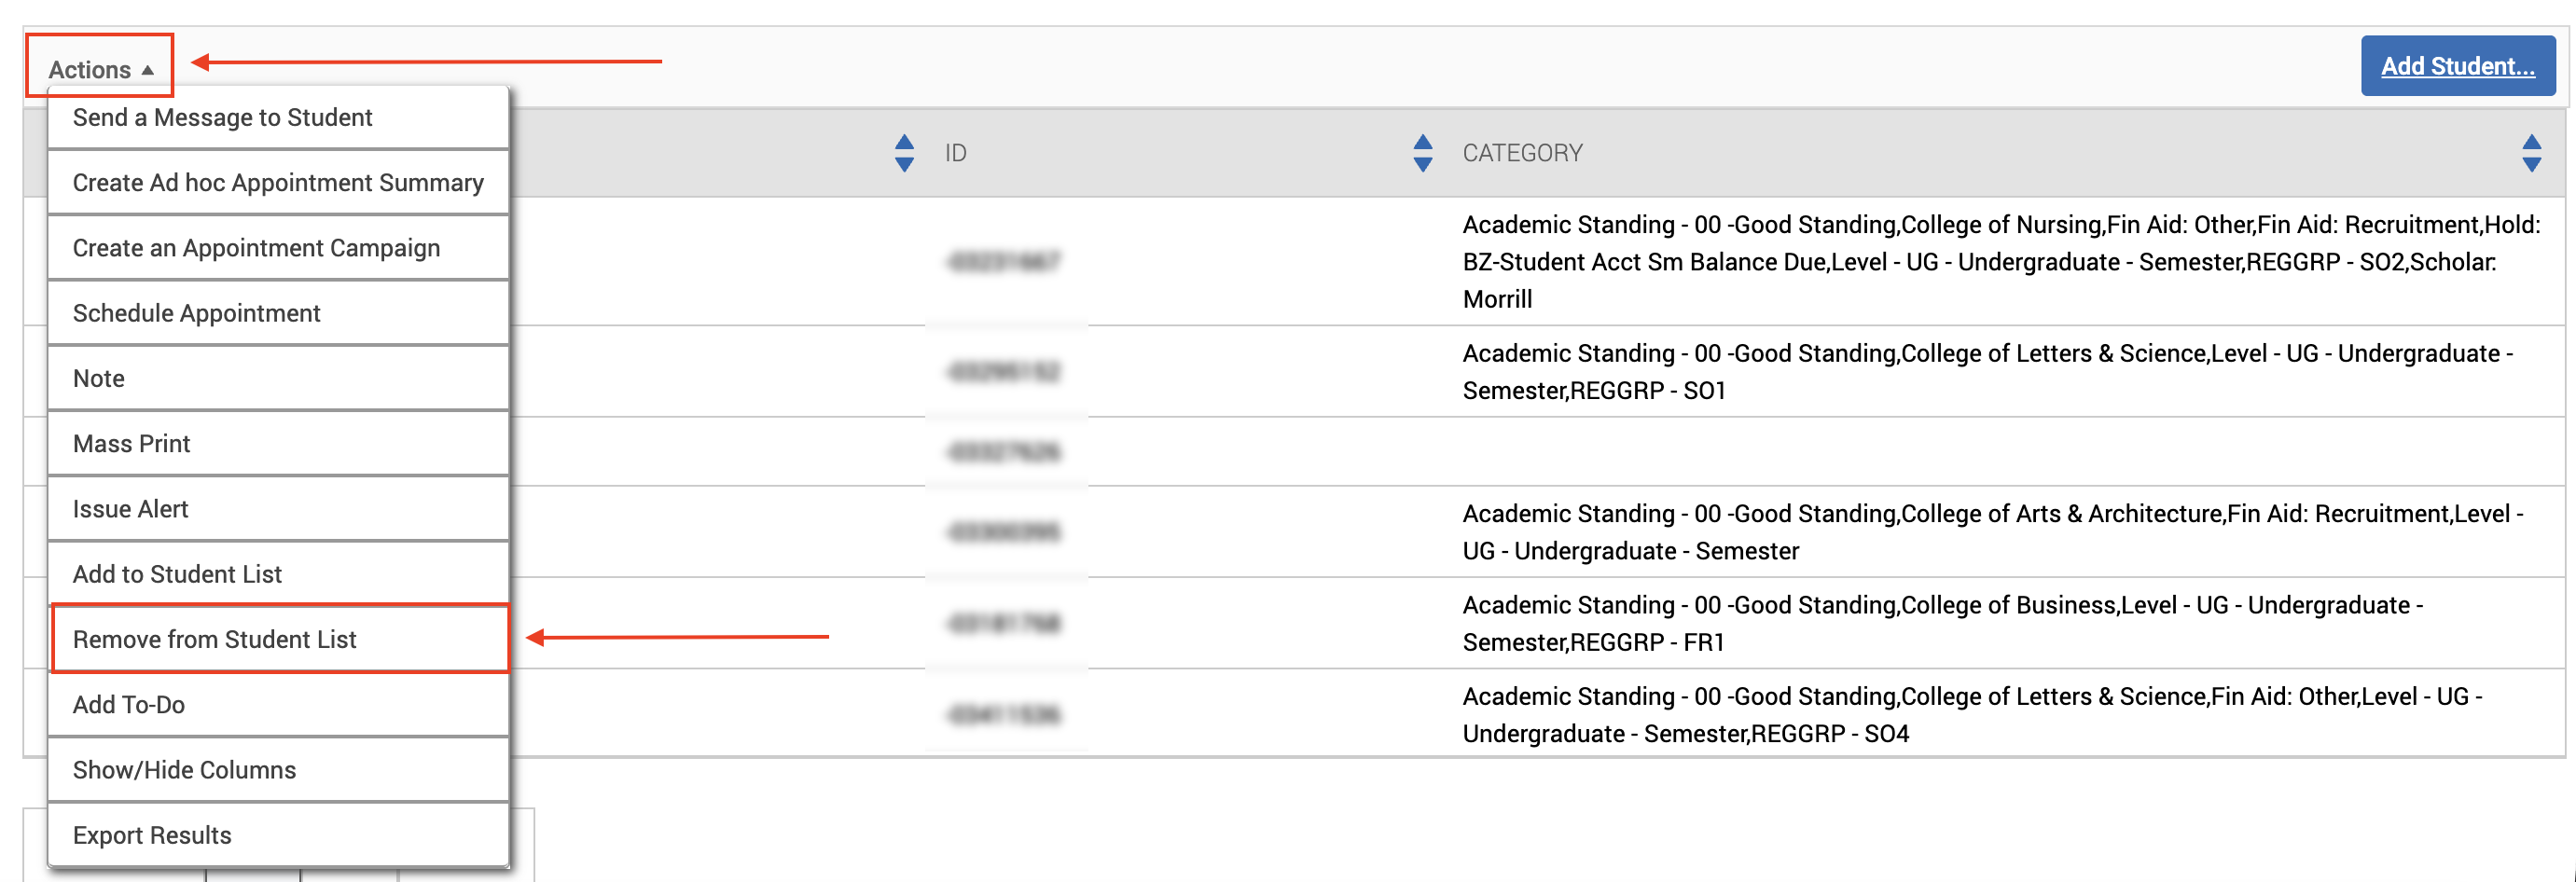
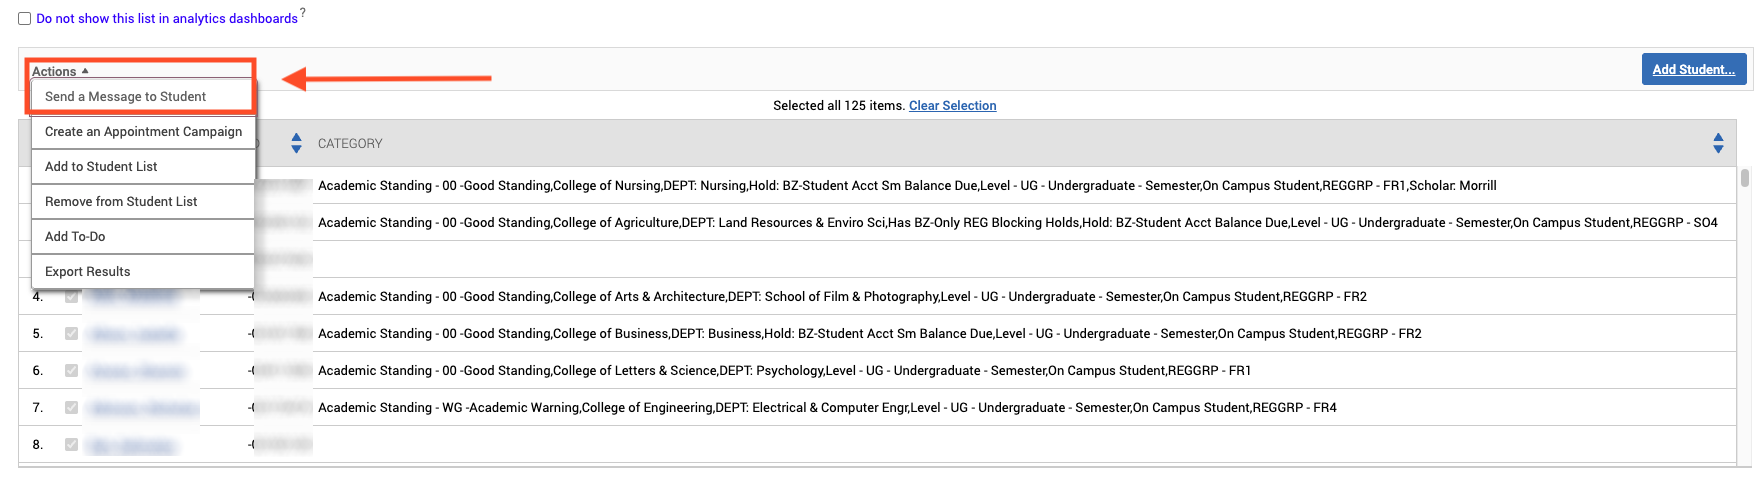
- To remove any students from the list, select the checkbox next to each student’s name, navigate to the Actions dropdown menu, and select Remove from Student List.
- To select every student in the list, click the checkbox next to Name, then choose Select All.
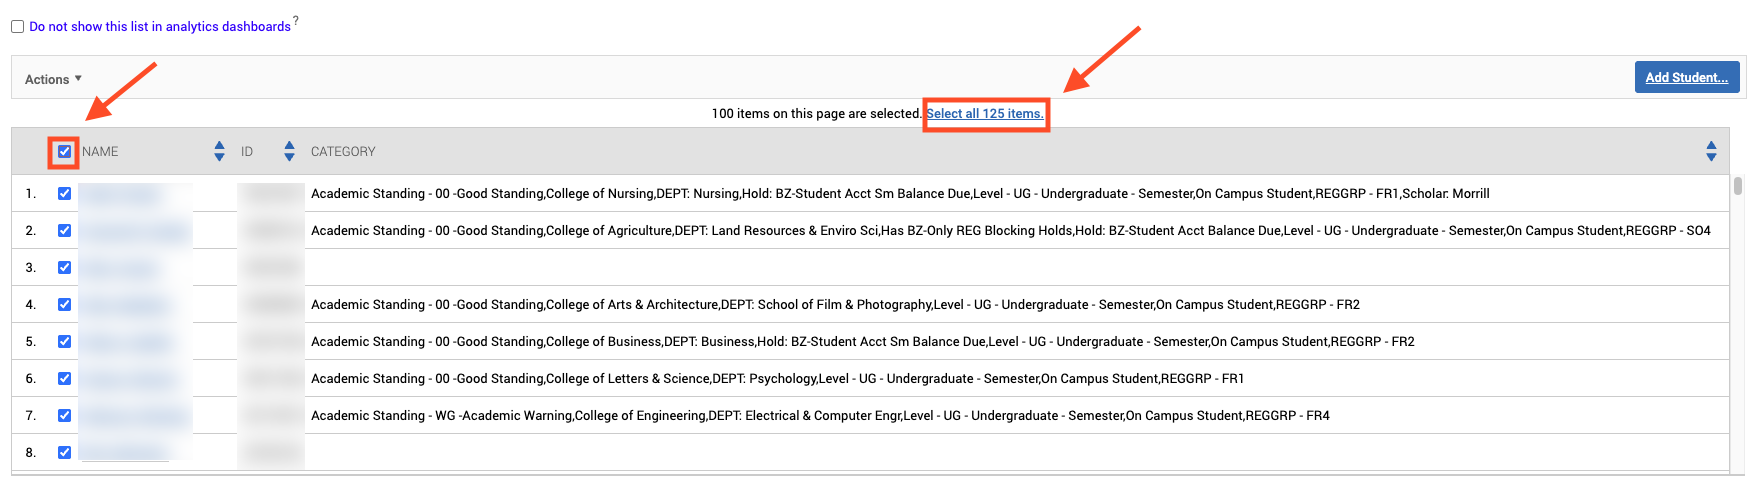
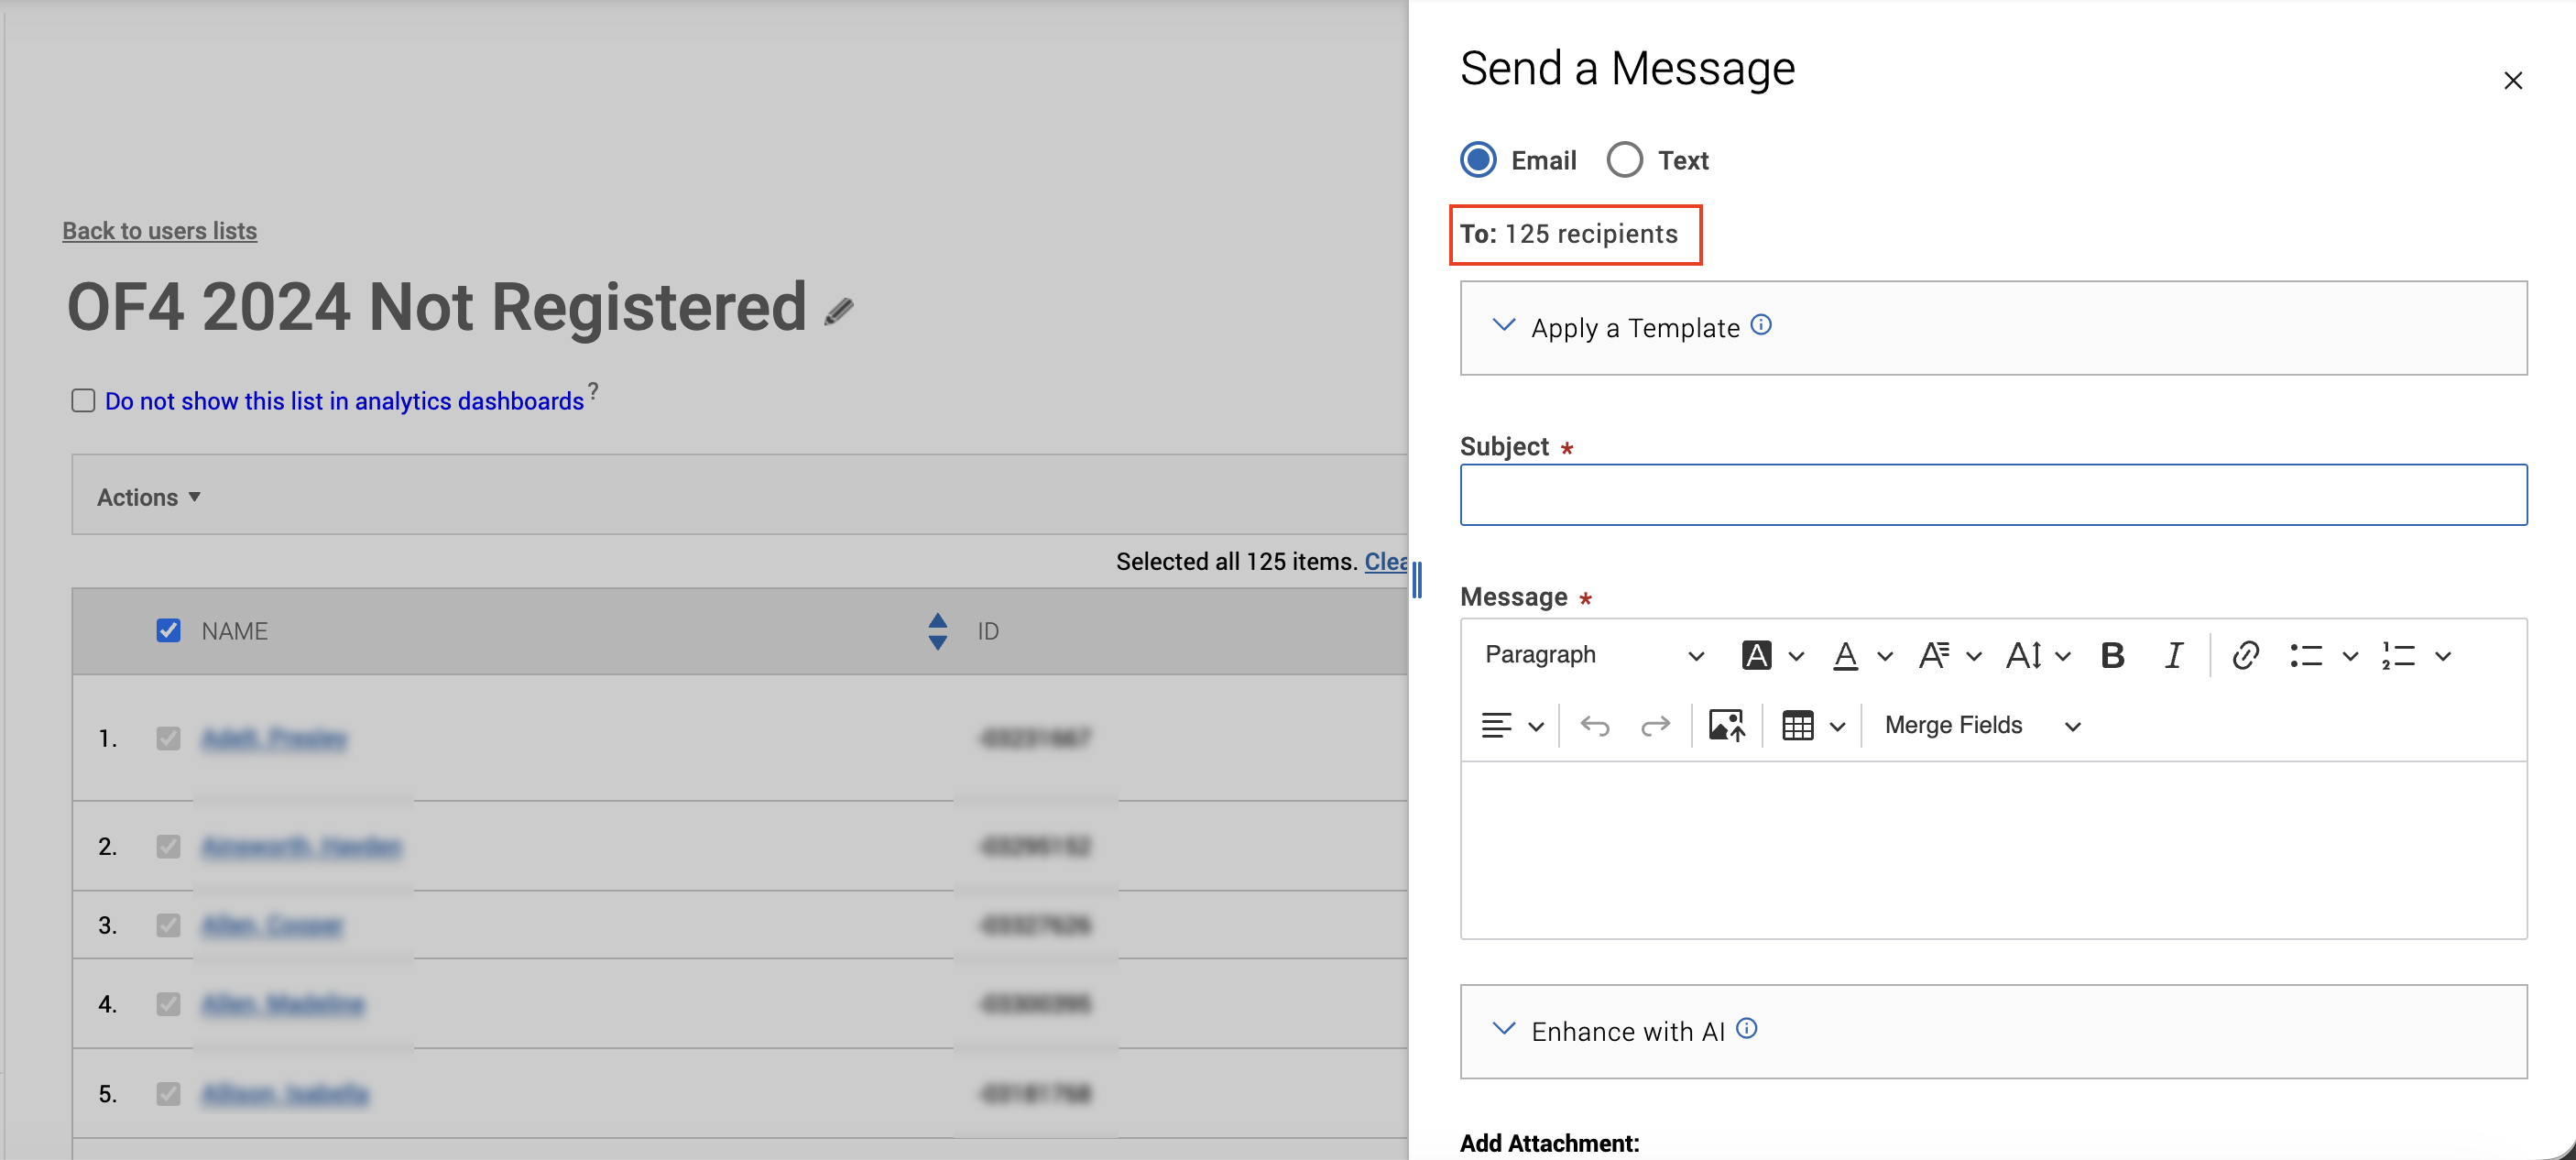
- Once all students have been selected, click on the Actions drop down menu. If you wish to send a message to all students, select Send a Message to Student.
- The message composition template will open on the right side of the screen. There, you can review and confirm the total
number of recipients who will receive the message.