
navMSU - Manage Appointment Campaigns
After an appointment campaign has been launched, it remains fully editable and can be refined as needed. Campaign details—including configuration settings, nudges, and assigned students—can be updated at any time. Campaign performance metrics can also be reviewed to monitor progress. For instuctions on launching an Appointment Campaign, review the Create Appointment Campaigns documentation.
Edit Campaign Details
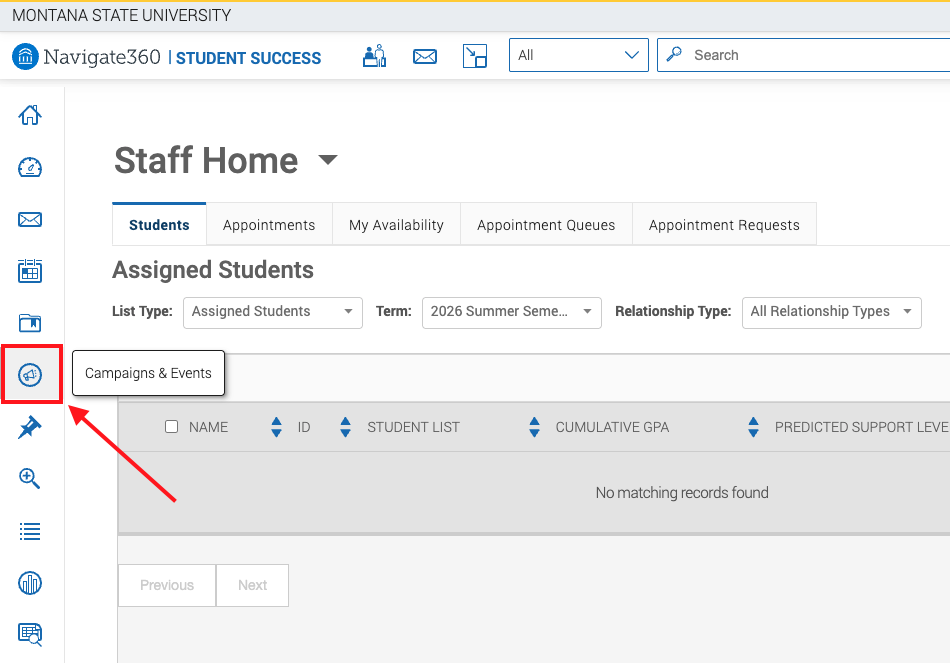
- Select Campaigns & Events on the left-hand sidebar.
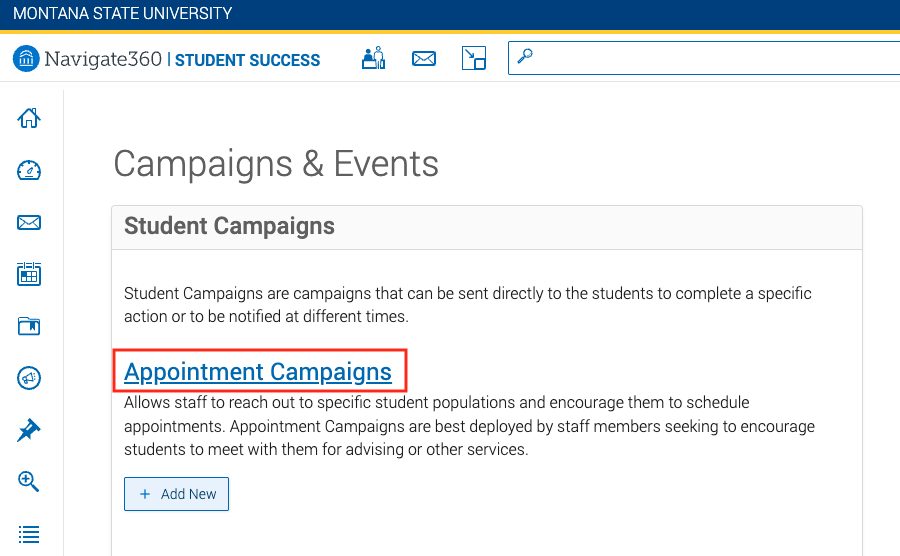
- Click the Appointment Campaigns link.
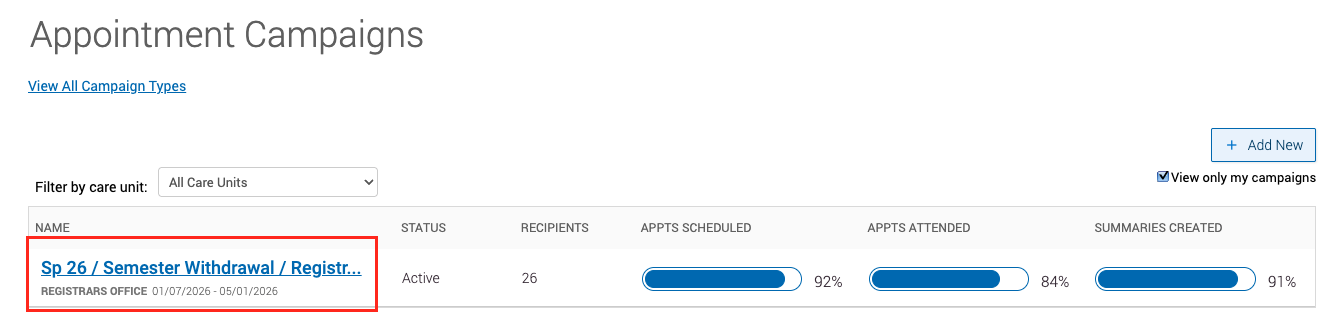
- Select the appropriate campaign from the available list.
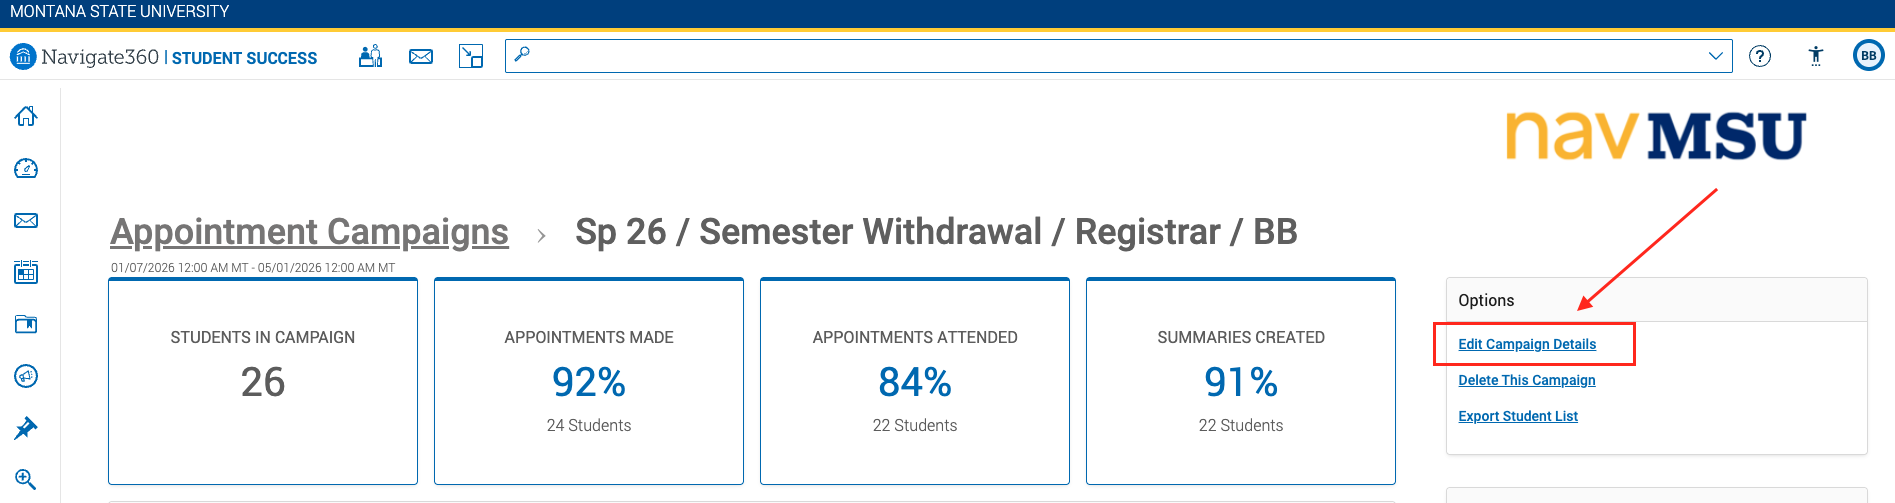
- Click the Edit Campaign Details link on the right-hand side of the screen.
- Under the Define Campaign section, the campaign configuration settings can be edited. This includes updating
the campaign name, appointment length, notifications, and scheduling window.
To edit the staff assigned to the campaign, click on the Select Staff section. To review and modify the welcome message and nudges, select the Compose Nudges section. Refer to the next section for instructions on adding or removing students from the campaign.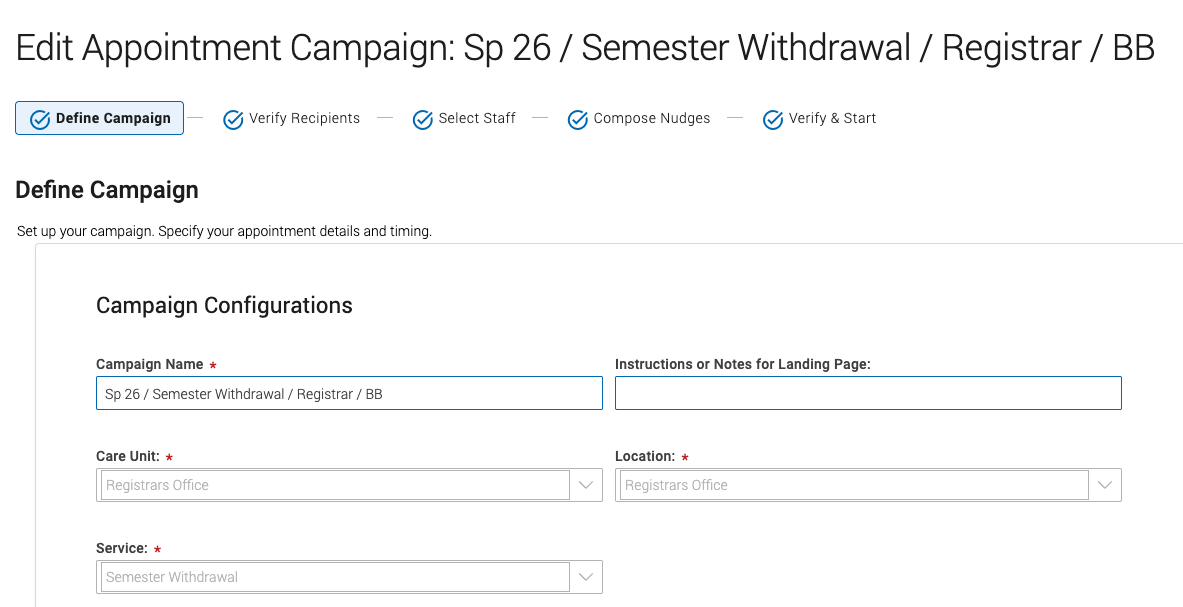
Adding Students to an Appointment Campaign
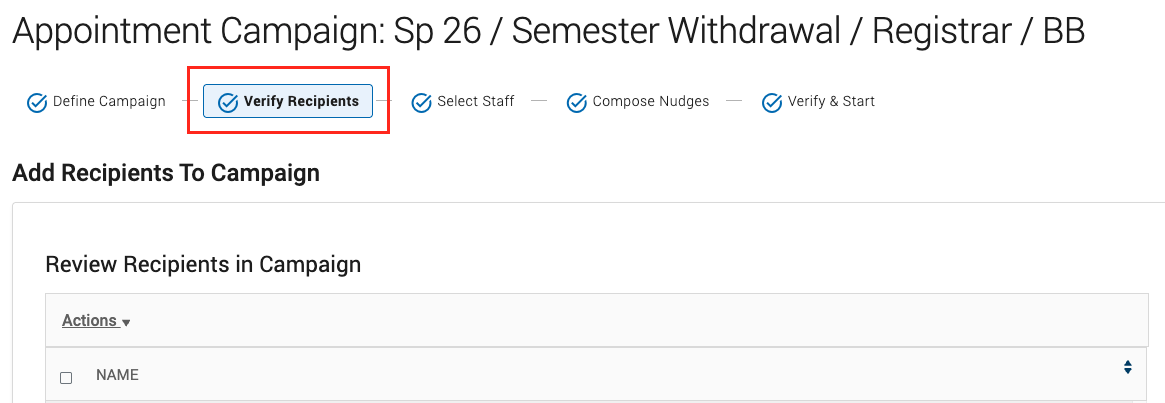
- Select the Verify Recipients section under the campaign title.
- Scroll to the bottom of the page and select Add More Recipients.

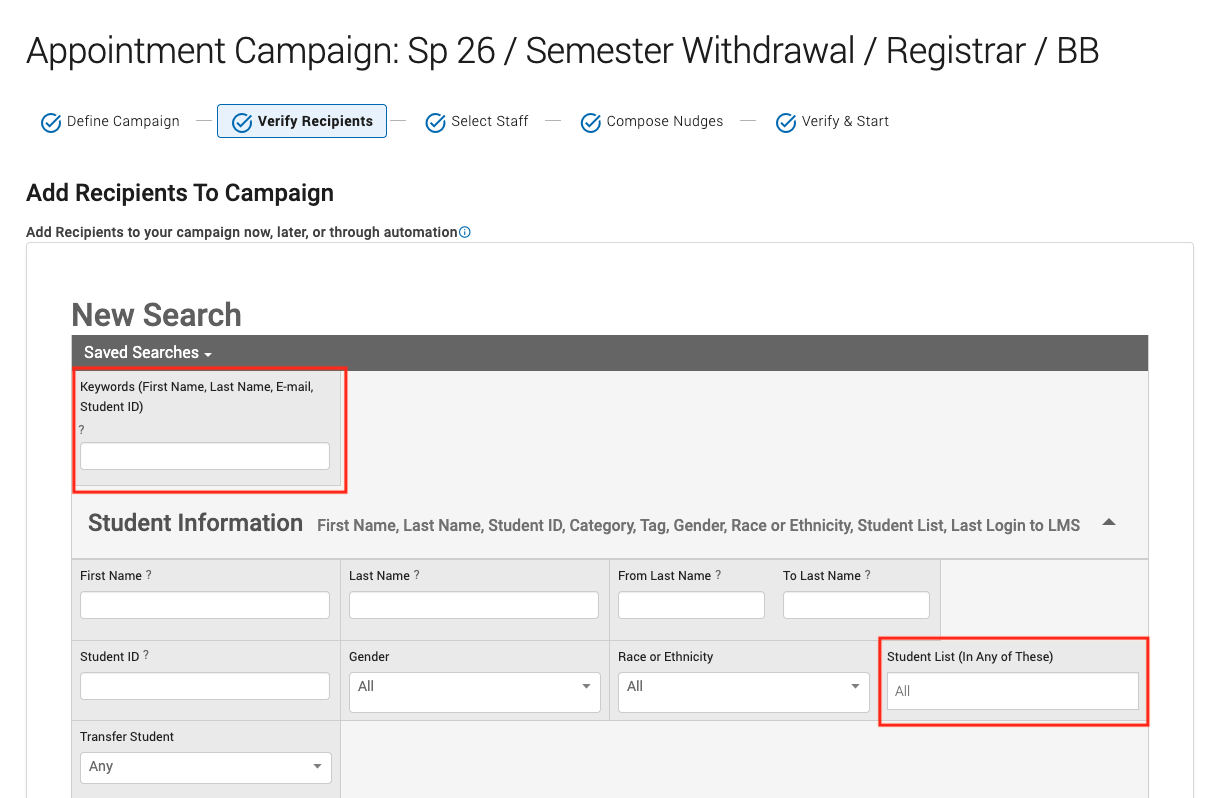
- Use the Advanced Search feature to add an individual student to an active campaign by entering the Student
ID into the Keywords search field. If you need to add multiple students and are unfamiliar
with Advanced Search, we recommend using the V3 Search and Uploading a Student List. To upload a student list, click on Student Information and Student List to choose from your saved lists. Scroll to the bottom and select the blue Search button.
- Select the checkbox next to each student who should be added to the campaign, then click the blue Continue button at the bottom of the page.
If you don’t want to send students the welcome message, click Save and Exit after the new list of students is displayed. This may apply in situations where a student has already attended an appointment and needs to be added to the campaign for tracking purposes.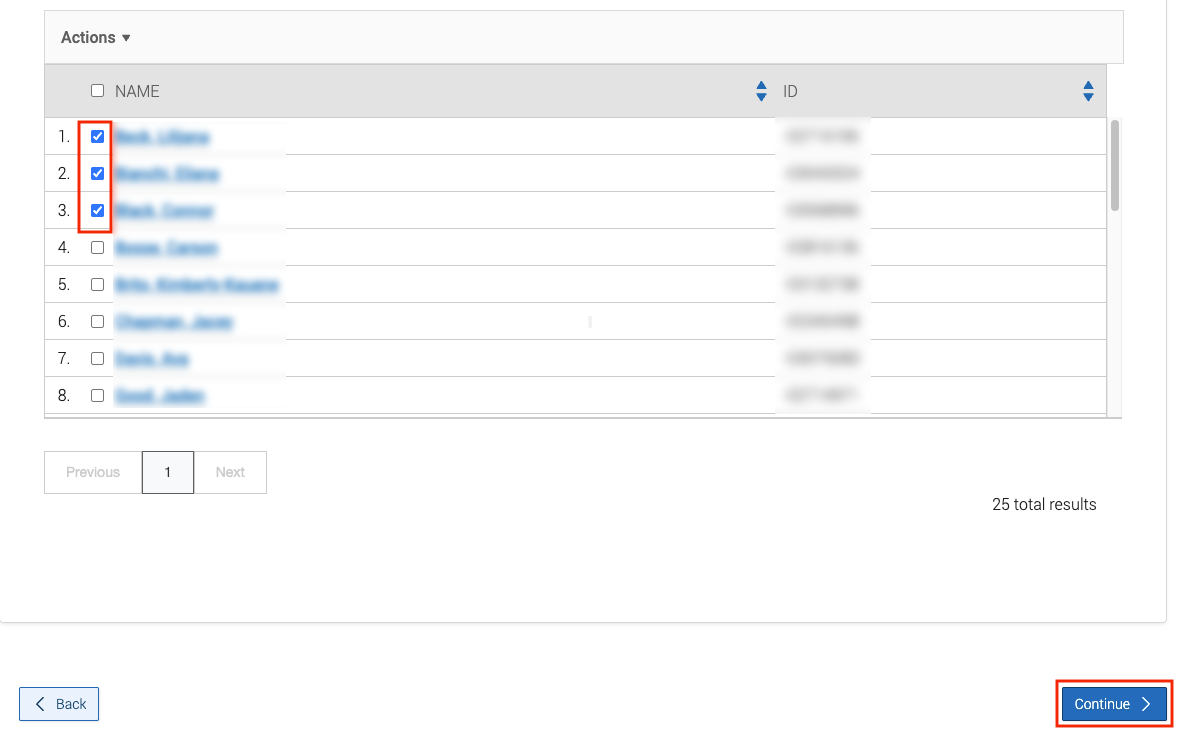
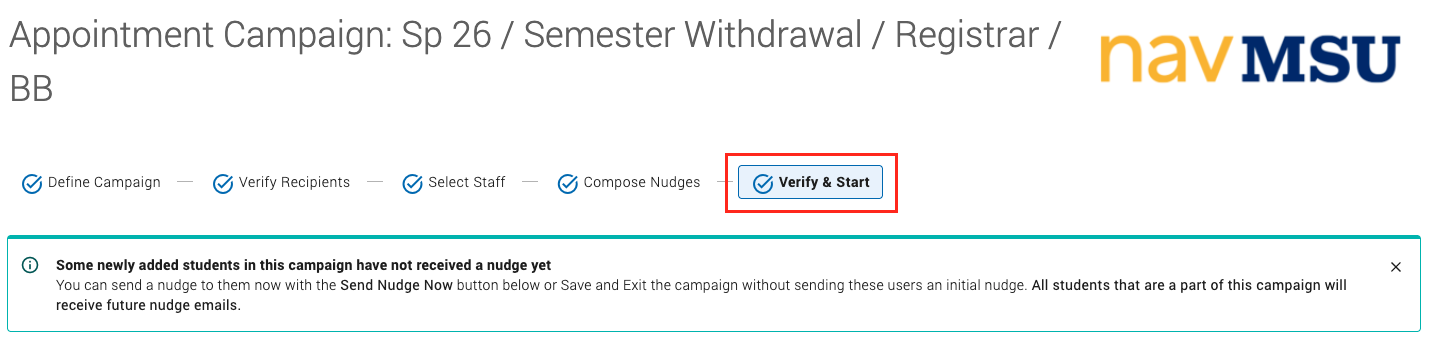
- To send new students the welcome message, which includes the scheduling link, select
Verify & Start under the campaign title. Scroll to the bottom of the page and select Send Nudge Now.
Removing Students from an Appointment Campaign
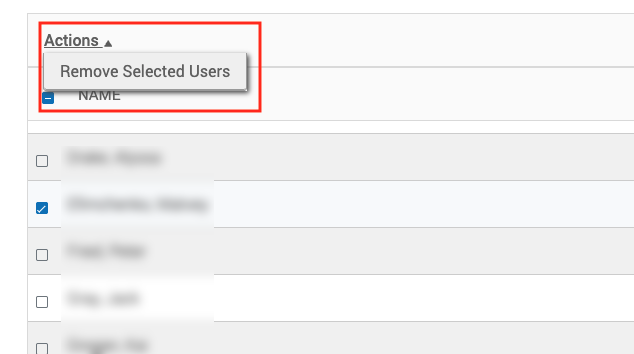
- Under the Verify Recipients tab, select the checkbox next to the relevant student names. Click the Actions drop down menu and select Remove Selected Users.
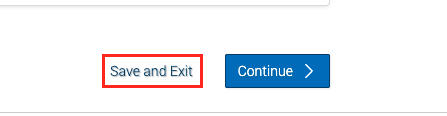
- After the page refreshes, scroll to the bottom of the page and select Save and Exit.
Appointment Campaign Metrics
The main page of an appointment campaign displays metrics on the number of students
in a campaign, appointments made, appointments attended, and summaries created. Nudge
metrics also display for email and text communication.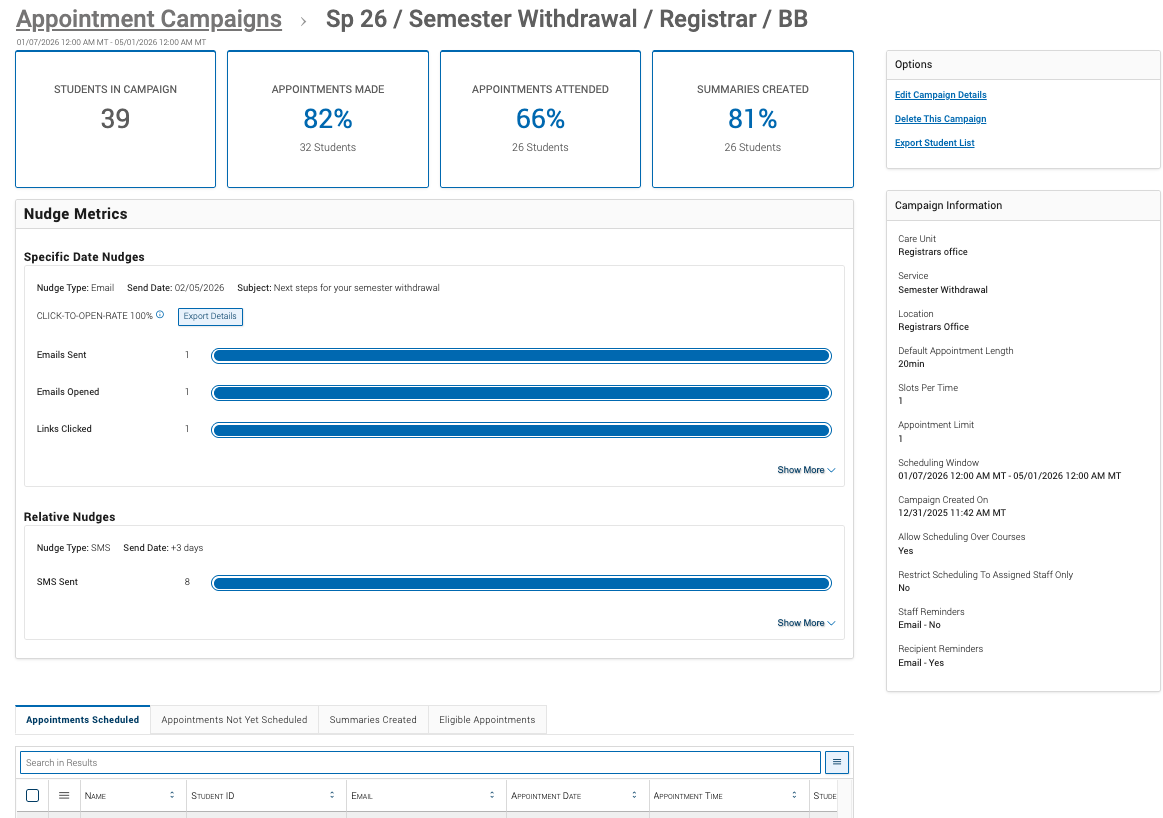
Associate Eligible Appointments
The bottom of the metrics page includes several tabs that display individual student information for appointments scheduled, appointments not yet scheduled, summaries created, and eligible appointments.
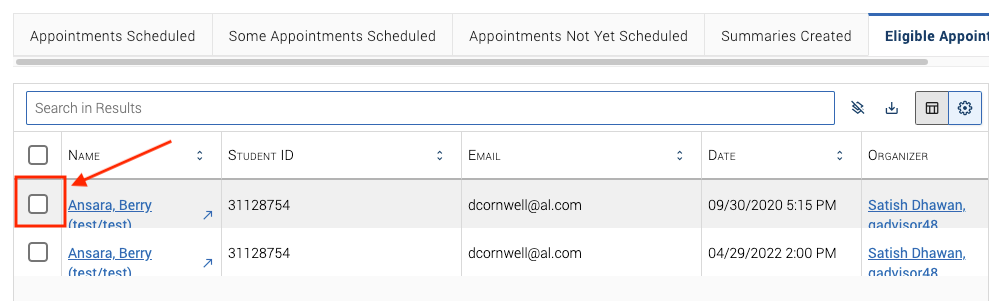
If you have availability set for both general appointments and appointment campaigns, a student included in a campaign may schedule using your general availability link instead of the appointment campaign. When this occurs, the appointment will appear under the Eligible Appointments tab.
To ensure these appointments are properly associated, monitor the Eligible Appointments
tab. Click the checkbox next to the student's name and a box will appear titled Associate Campaign. Selecting this box will move the student’s appointment to the Appointments Scheduled
tab.