
navMSU - Create Appointment Campaigns
Appointment campaigns allow staff to reach a targeted group of students by inviting them to schedule an appointment within a defined timeframe. Campaigns automate student outreach while offering flexibility to customize appointment length, reminder frequency, and other scheduling options. Campaigns also provide tools to track scheduling activity and student engagement. After launching an Appointment Campaign, review the Manage Appointment Campaigns documentation for details on editing and maintaining accurate campaign data.
Appointment Campaigns are intended for students who are already part of your programming, such as advisees, affinity groups, or students in an assigned class. This tool is not designed to recruit or schedule meetings with prospective students for a program.
Create an Appointment Campaign
Appointment campaigns can be set up by individual staff or faculty members or managed centrally by leads and supervisors.
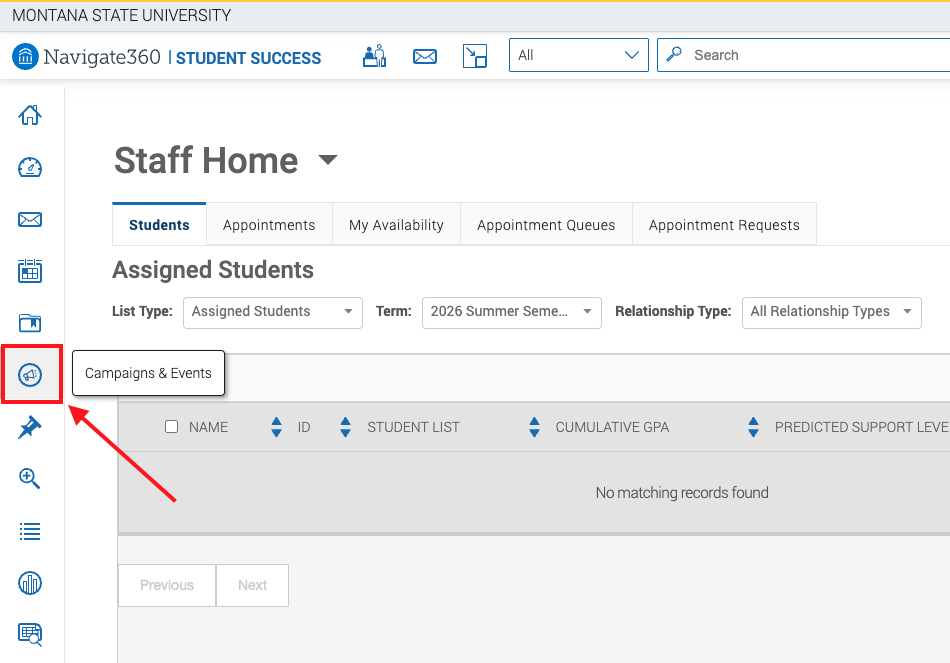
- Select Campaigns & Events on the left-hand sidebar.
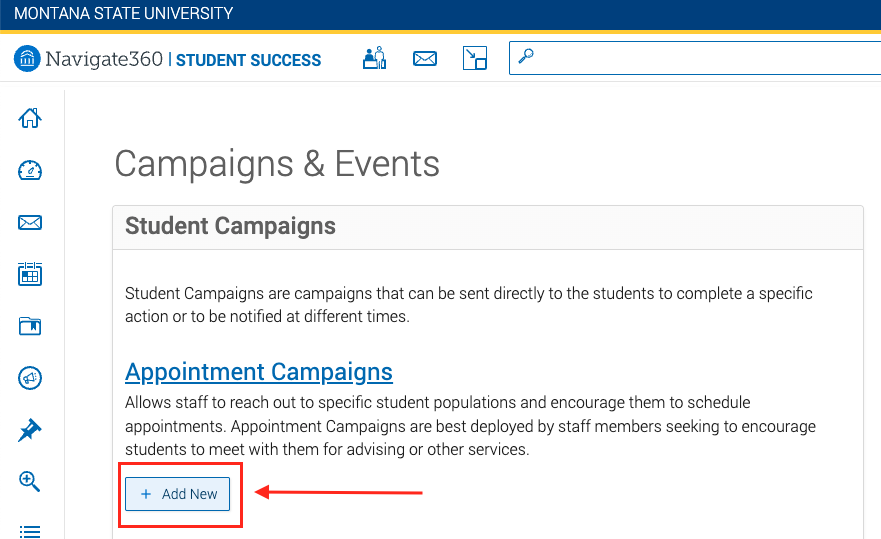
- Click the Add New button under Appointment Campaigns.
- Enter the Campaign Configuration details.
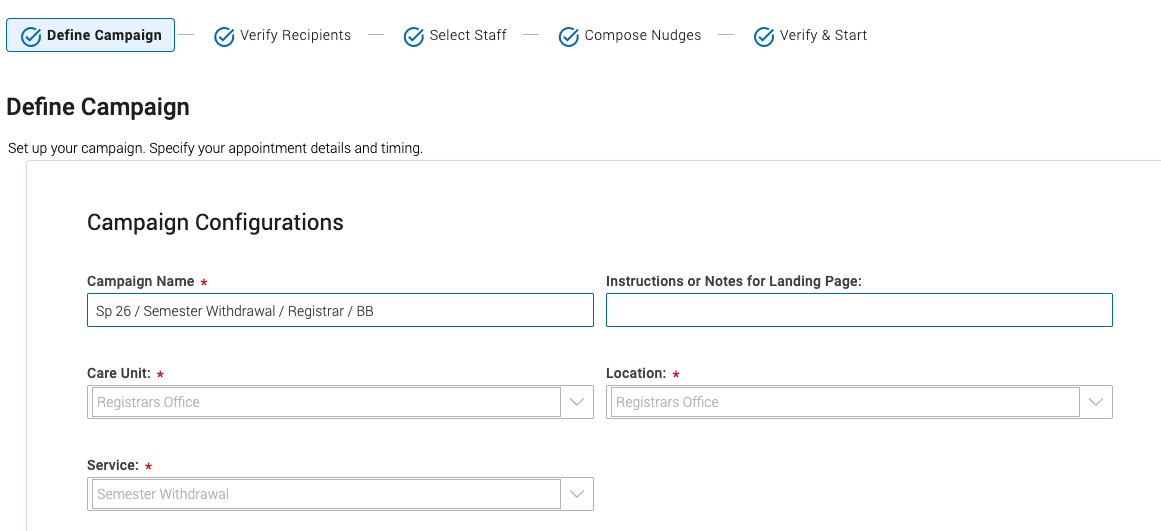
- Campaign Name: This name is only visible to staff. We recommend the following naming convention: Term Year / Purpose / Dept / Creator Initials. Following this format makes it easier to locate campaign reporting details and helps other staff quickly identify the campaign when viewing a student profile.
- Instructions or Notes for Landing Page (Optional): Instructions are visible to students when they open the campaign notification. Keep this text short and descriptive.
- Care Unit, Location, Service: Select the relevant options for the campaign. Please note that only one service and
location may be selected per campaign.
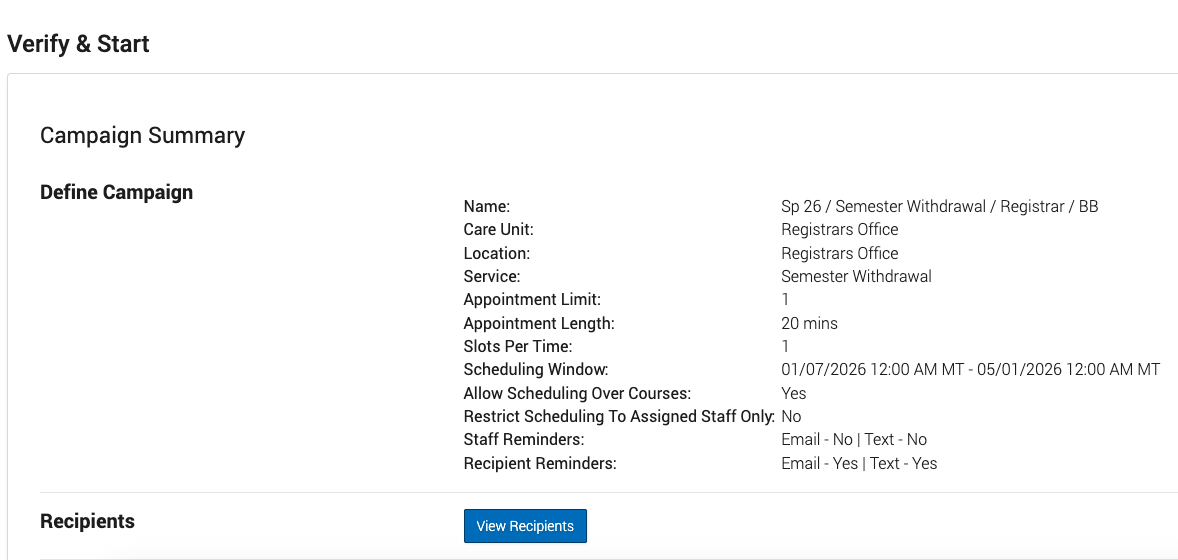
- Set the Appointment Configurations. These settings allow you to override specific elements of the existing care unit
and service configurations.
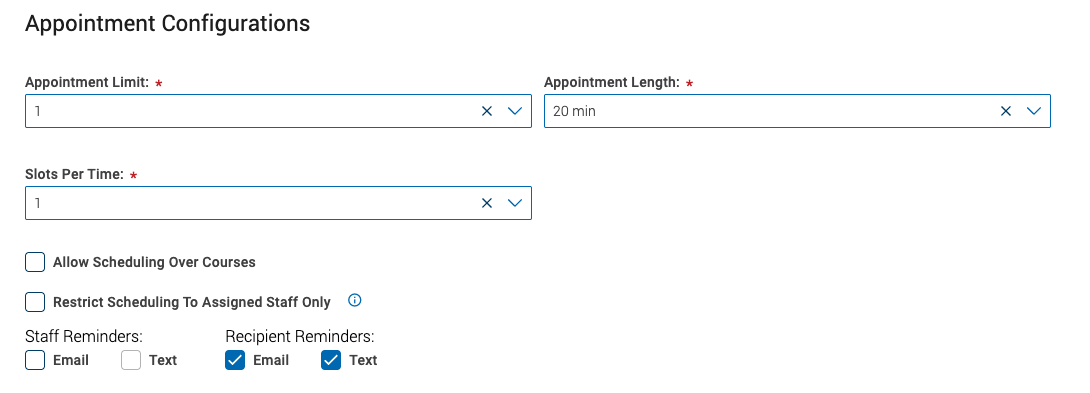
- Appointment Limit: The total number of appointments students may schedule during the campaign timeframe.
- Appointment Length: Select an appointment duration (e.g. 5, 10, 15, 20, 30, 45, 60, 75, 90+ minutes). The selected length overrides the default duration for the chosen service, allowing for more customizable appointment lengths.
- Slots Per Time: The number of students that may book the same available time slot.
- Allow Scheduling Over Courses: When selected, students can schedule appointments during their class times. This option should remain unchecked and only be used in rare circumstances.
- Restrict Scheduling to Assigned Staff Only: Select this option only in cases when students should be limited to scheduling with an assigned staff member.
- Staff Reminders: Notifications can be adjusted for staff, including a 24-hour email reminder and 30-minute text reminder prior to the appointment.
- Recipient Reminders: Notifications can be adjusted for students, including a 24-hour email reminder and
30-minute text reminder prior to the appointment.
- Set parameters for the Scheduling Window and click the blue Continue button. Please Note: Your appointment availability must be set during the selected timeframe.
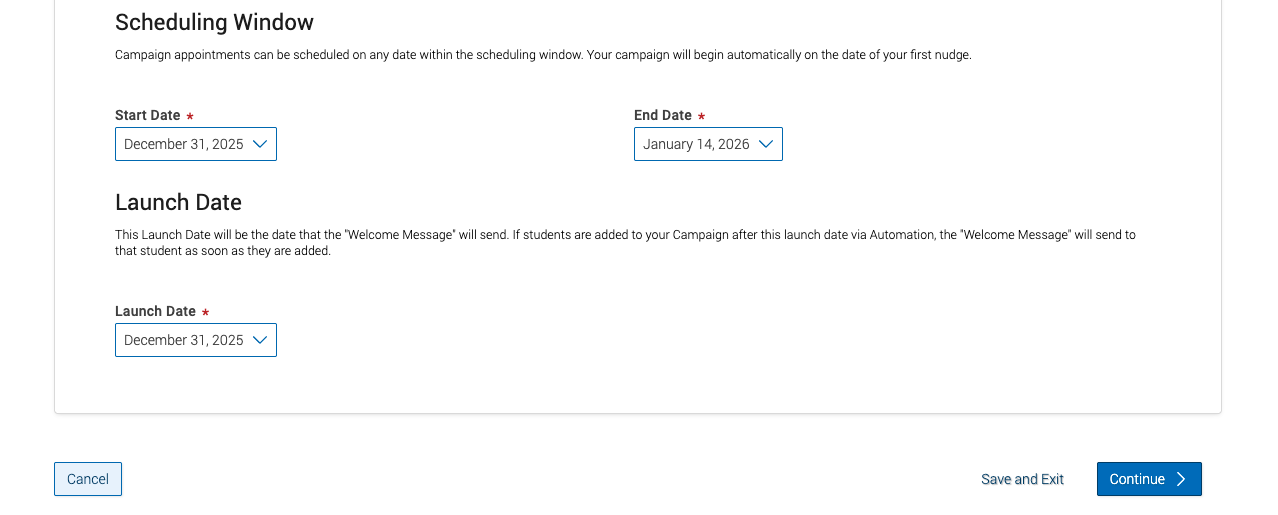
- Start & End Date: The date range during which students may schedule appointments.
- Launch Date: The date the welcome message is sent to students. Students added to the campaign after
the launch date will receive the welcome message upon being added.
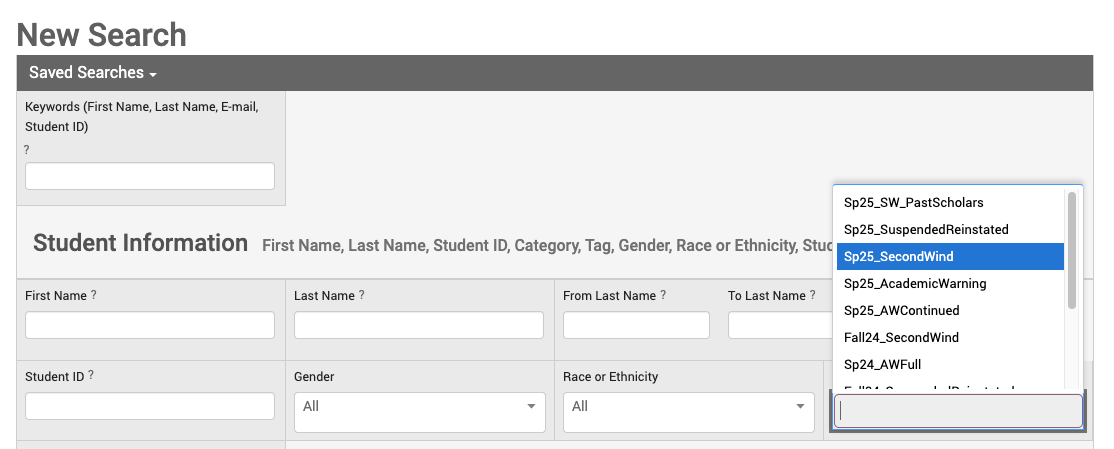
- Students may be added to a campaign at this stage using the Advanced Search feature. If you are unfamiliar with Advanced Search, we recommend using the V3 Search and Uploading a Student List. To upload a student list, click on Student Information and Student List to choose from your saved lists. Scroll to the bottom and select the blue Search button.
- Select from the list of students that you want to add to the campaign. To add all students in the list, select the
Name button and Select all XXX items and continue to the next stage to review the recipients.
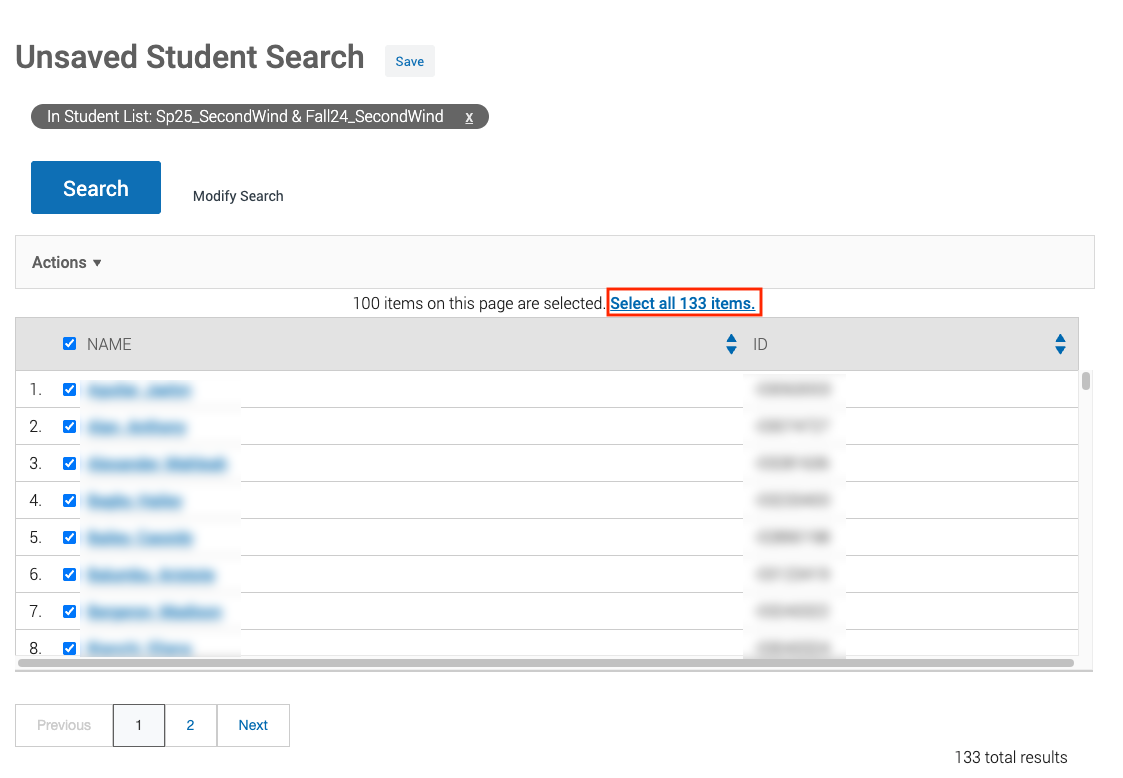
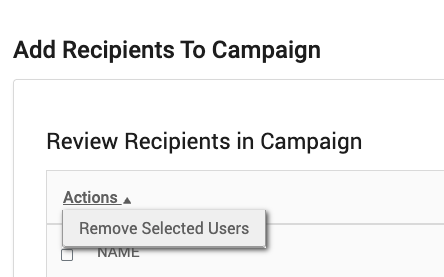
- If students need to be removed from the list, select the student’s name, click the Actions drop down and Remove Selected Users. Select the blue Continue button to proceed to the next step.
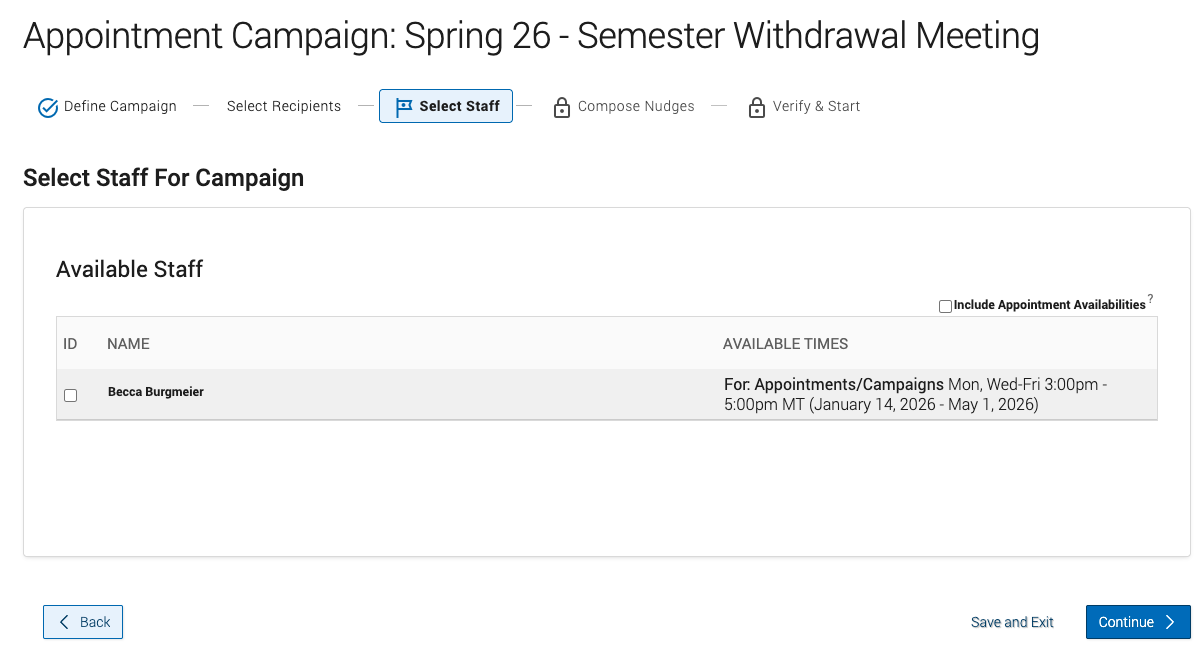
- Add staff members to the campaign. At a minimum, the creator or the campaign must be selected, but additional staff
may also be included. Please Note: For any staff member to appear as available, the appointment availability
must include campaigns and the relevant service.
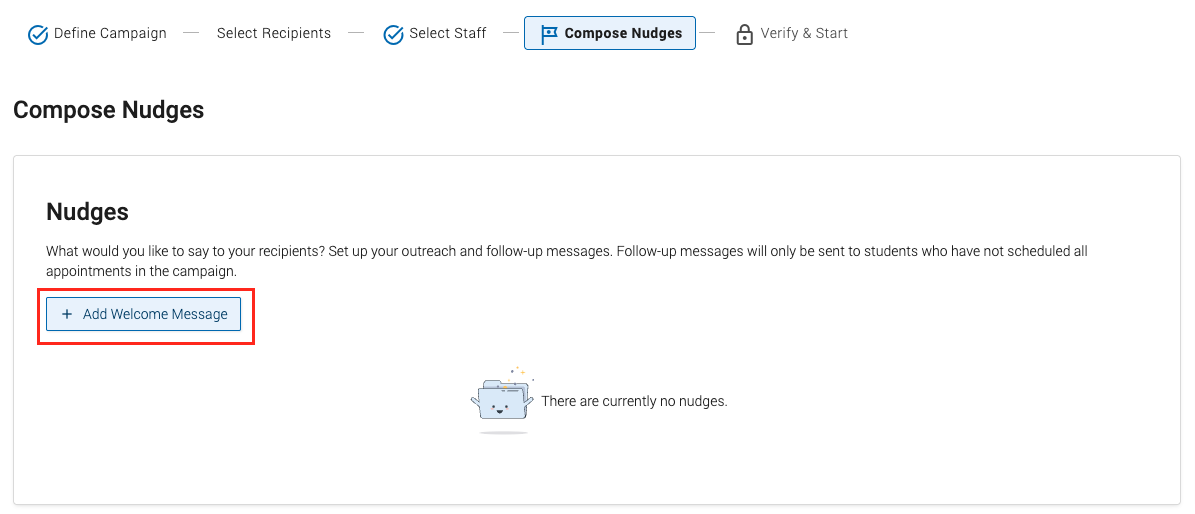
- Create a welcome message in the nudge section. This message is required and is sent at the start of the campaign
or when a student gets added. Click on the Add Welcome Message button.
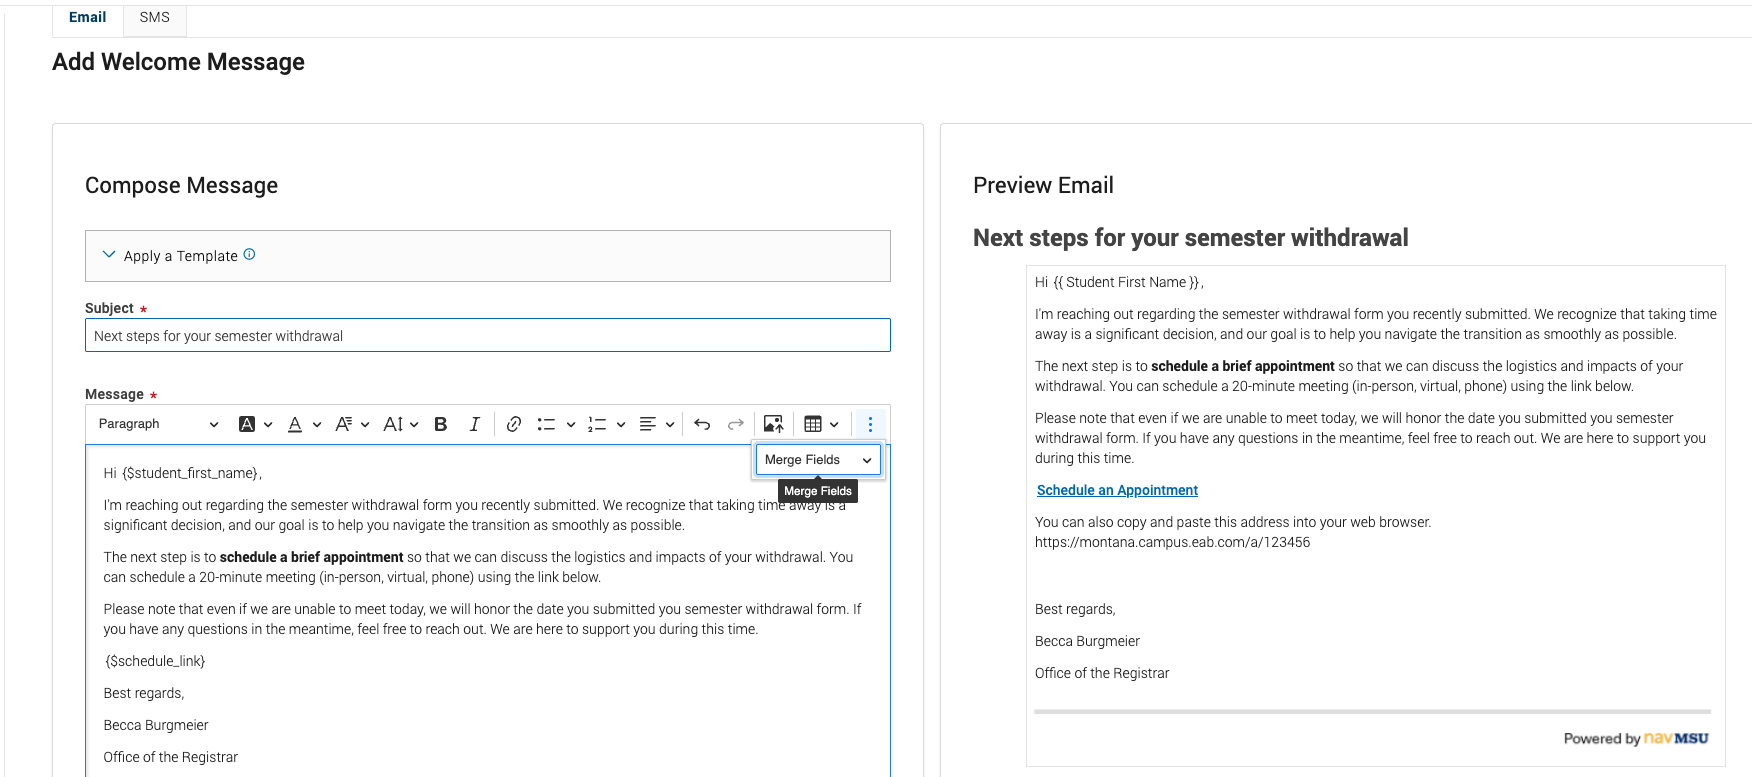
- The welcome message can be sent as either a text or email. A template may be applied, or the message text can be edited. Merge tags are available under the three dots on the right-hand side of the message field, and
attachments may also be included. Please note, merge tags are only available for email.
- Additional nudges can be created by selecting the Add Nudge button. This allows staff to set up automated communication for students who have
not yet scheduled an appointment. Students who have already booked an appointment
will not receive the additional nudges.
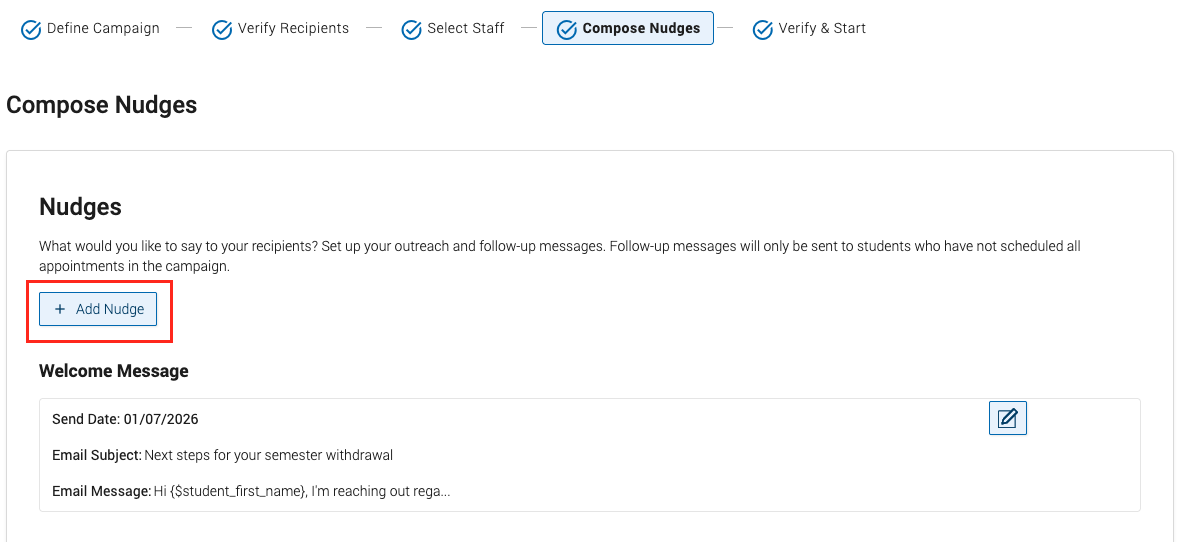
- Nudges can be created for email or text message. You also have the option to pick a specific date to send a nudge or a relative date
after a student is added to the campaign. Please note, merge tags are only available
for email nudges.
Students may be included in multiple appointment and messaging campaigns across campus, so please be mindful of the cumulative impact of notifications when considering how many nudges to include in a campaign.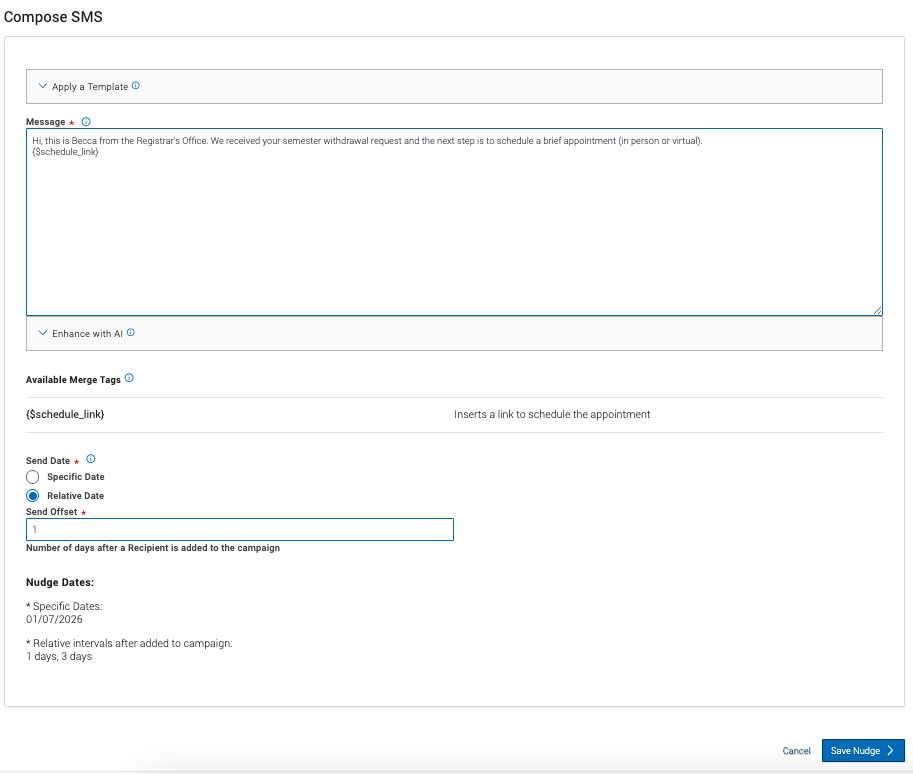
- The final step is to review and verify all campaign details. Once confirmed, the campaign can be saved to return to later or started immediately.