
navMSU - Outlook Calendar Configurations
The first step in setting up your availability is syncing your Outlook calendar with navMSU. Appointments created in navMSU will automatically sync to Outlook, ensuring your availability aligns with your professional calendar. Review the Sync Calendar documentation for further instructions.
Once your calendar is synced, it’s important to understand how your settings affect availability in navMSU. Your ‘Show As’ status in Outlook determines whether you appear as busy or available in navMSU. You can also create a nosync category to appear as busy for colleagues while still allowing students to book appointments.
‘Show As’ Status – Busy in navMSU
When creating a new event in Outlook, the default ‘Show As’ status is Busy. This status, as well as Tentative, Working Elsewhere, andOut of Office, will appear as busy in navMSU and prevents students from booking appointments during those times.
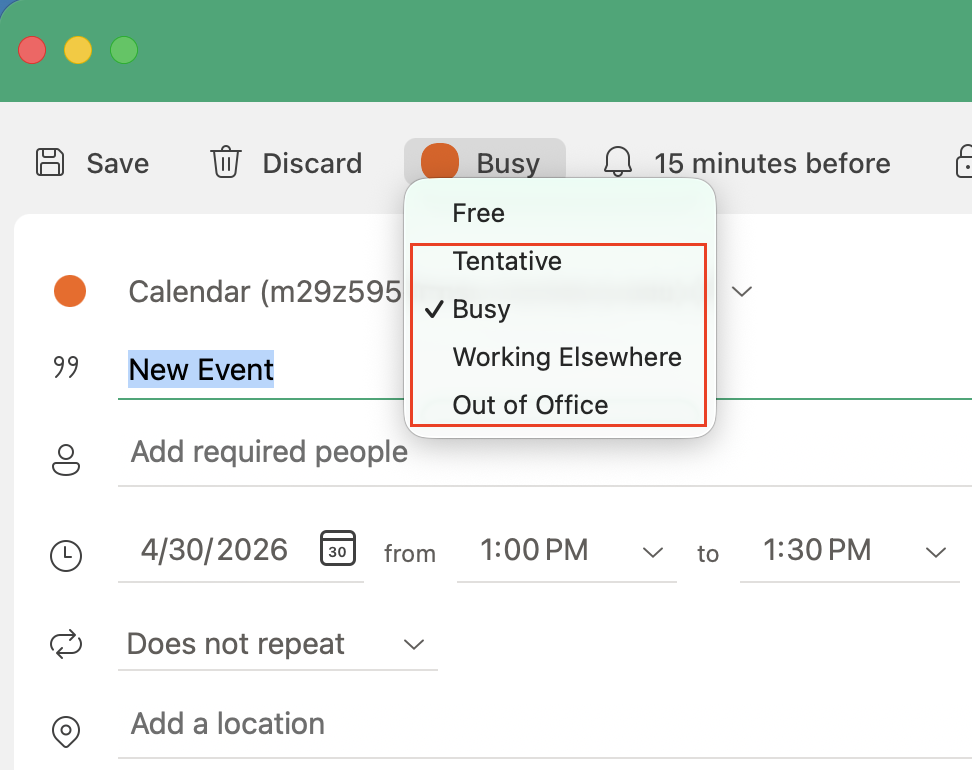
For example, if your availability in navMSU is Friday, April 10 from 12:00-3:00pm
and you have a Busy event in Outlook from 2:00-3:00pm, students will only see availability
from 12:00-2:00pm.

‘Show As’ Status – Available in navMSU
If an Outlook event is set to ‘Show As’ as Free, that time will appear as available in navMSU – provided you also set up availability during that timeframe. Students will be able to book appointments during these times.
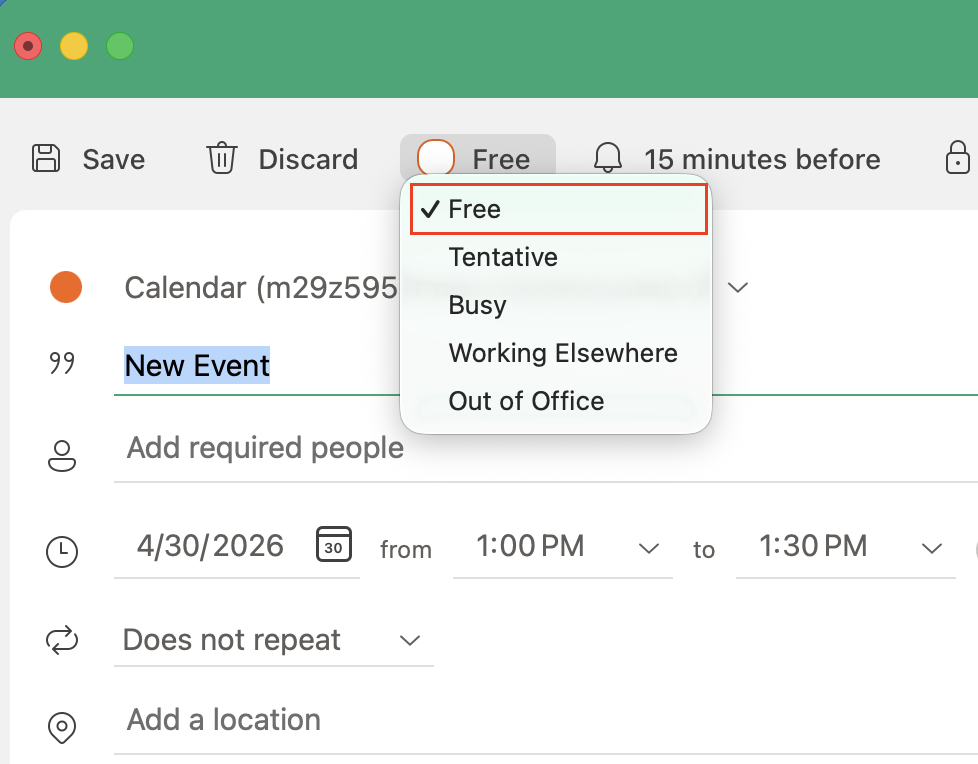
For example, if your availability in navMSU is Friday, April 10 from 12:00-3:00pm and
you have a Free event in Outlook from 2:00-3:00pm, students will see availability
for the full 12:00pm-3:00pm window.

nosync Category – Available in navMSU & Busy in Outlook
This feature allows staff and faculty to reserve time in Outlook for student appointments scheduled through navMSU. Students can book during these times, while colleagues will see this time as unavailable in Outlook, preventing them from scheduling meetings. This helps protect dedicated student appointment time.
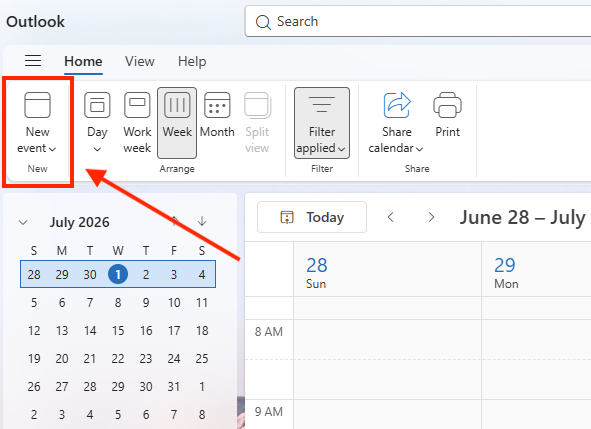
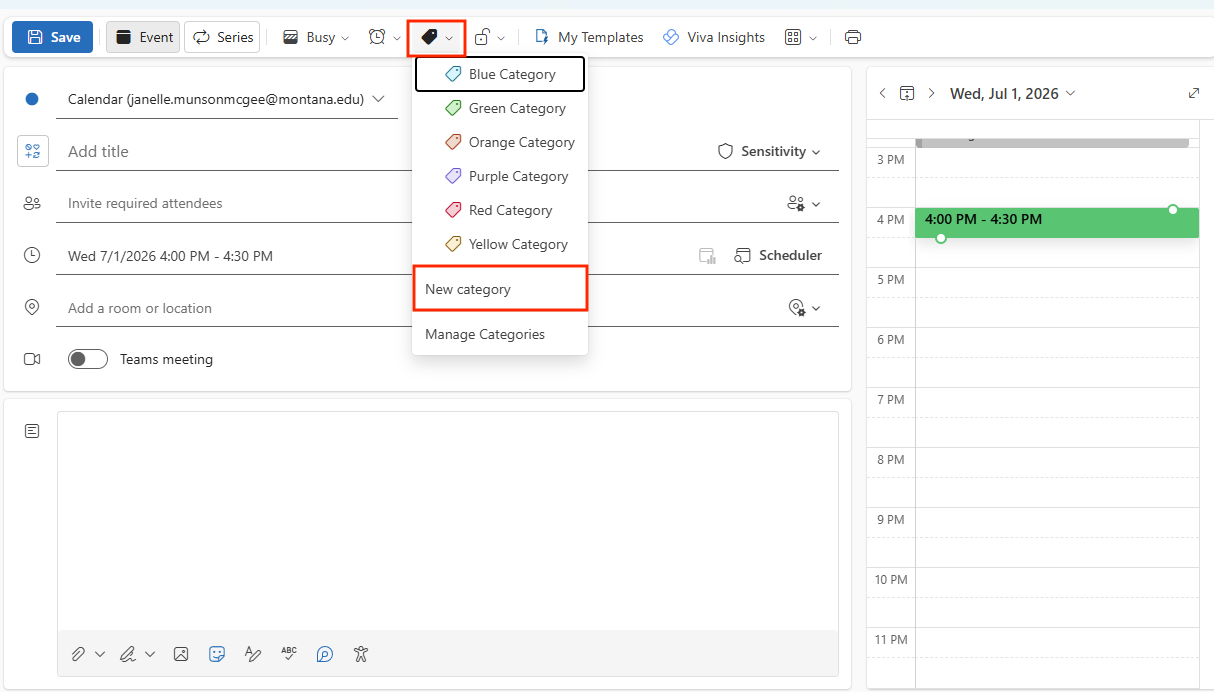
- Open your Outlook calendar view and select New Event.
- Select the Categorize icon and New Category. Mac users may need to customize their toolbar, see instructions at the bottom of
the page.
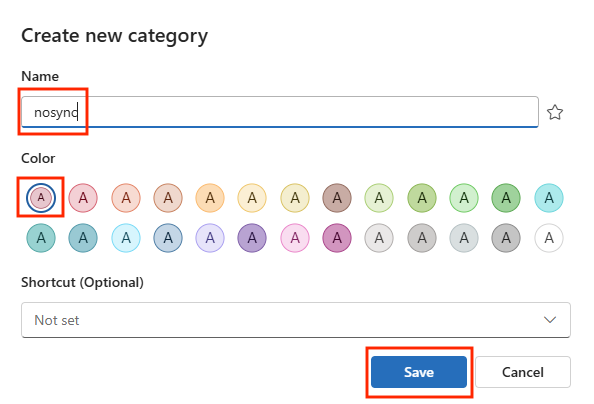
- Type nosync for the name (all lowercase and no spaces). Select a color and click Save.
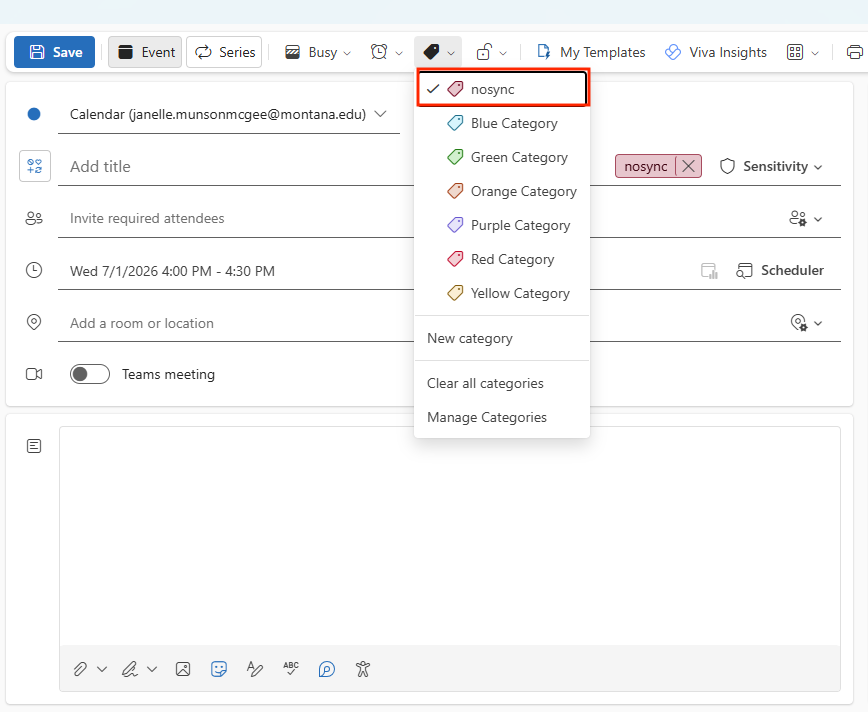
- Use the nosync category if you want to block time in your Outlook calendar to allow students to schedule during that time and prevent colleagues from requesting
meetings.
NOTE: For Mac Users Only
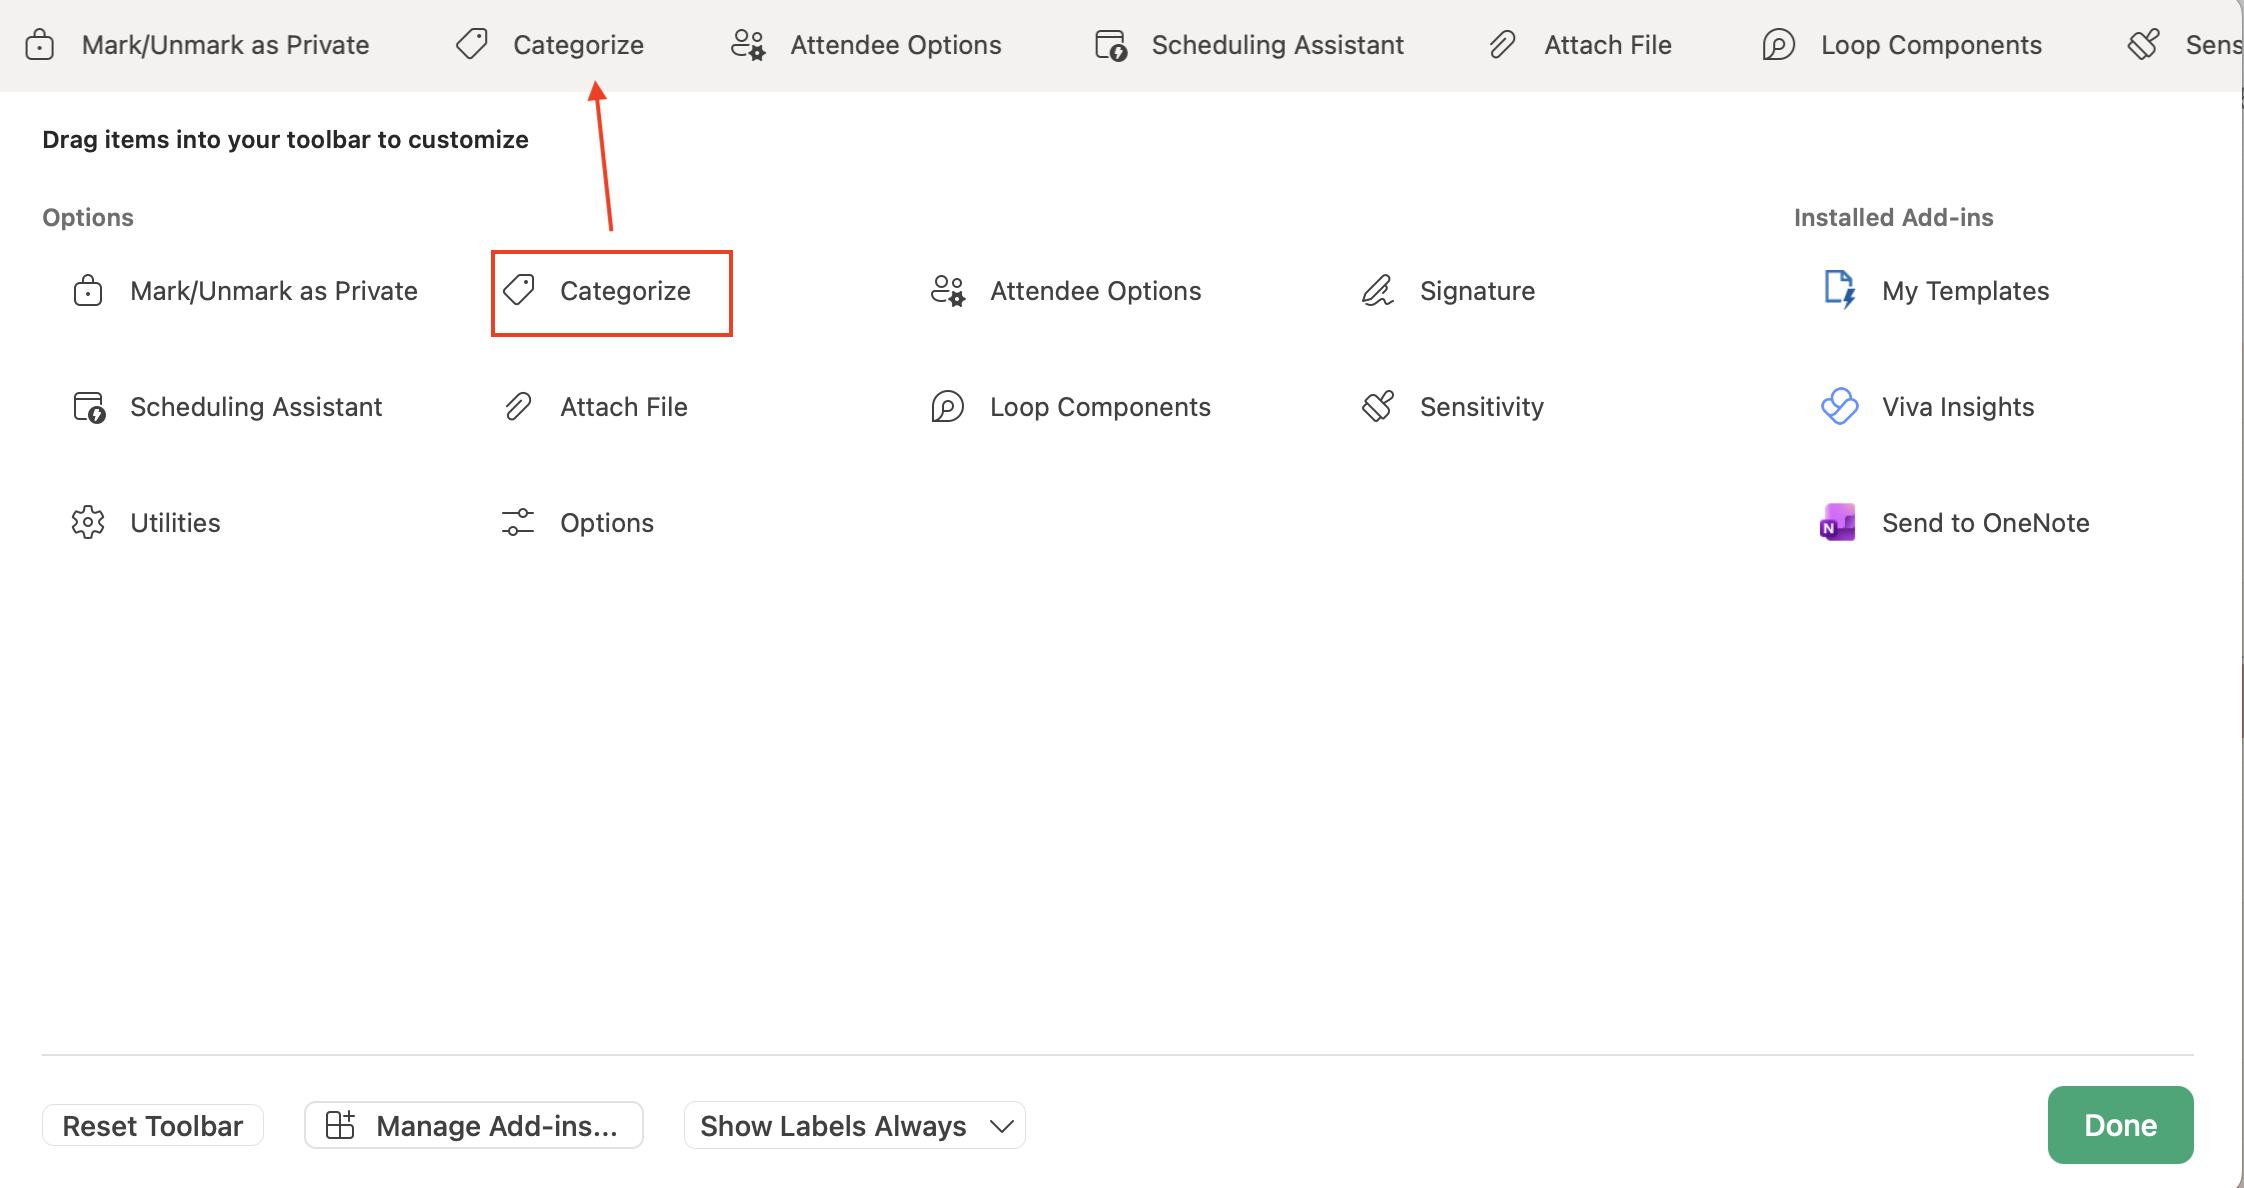
To add Categorize to your Outlook toolbar, click the three dots on the right side of the toolbar. Select Categorize and Manage Categories.
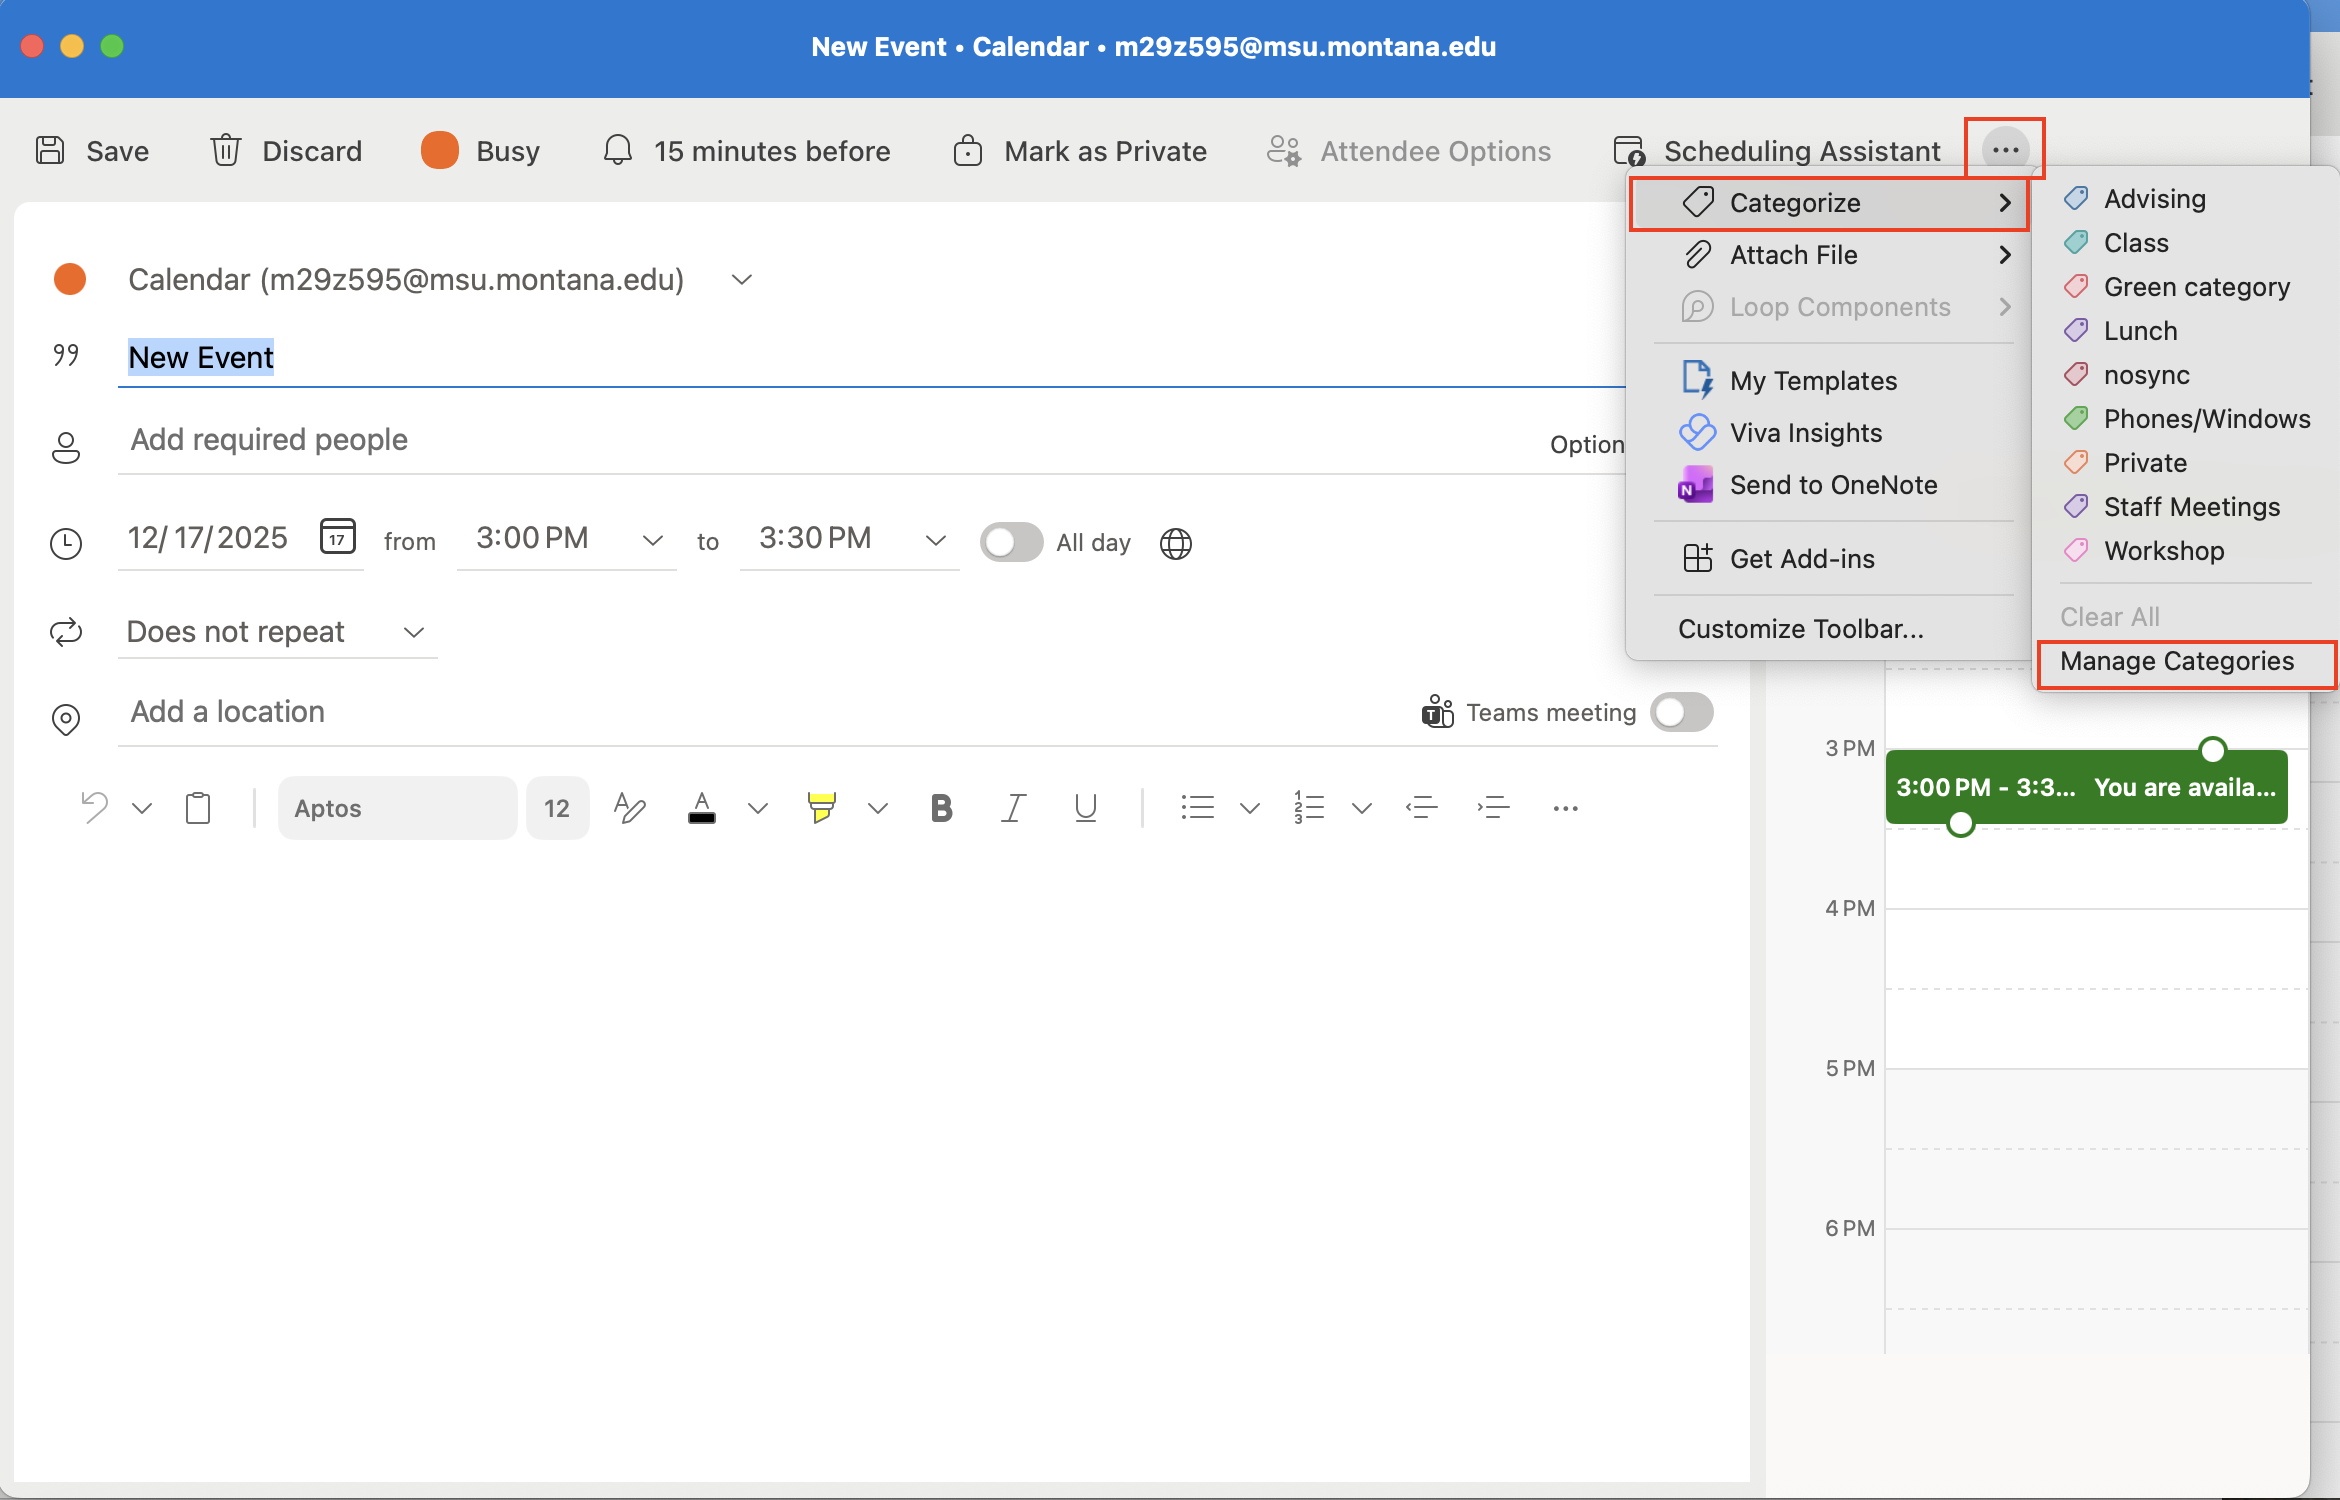
Click on Categorize and drag it into the toolbar. Select Done once you the Categorize option is visible in the gray toolbar at the top of the screen.