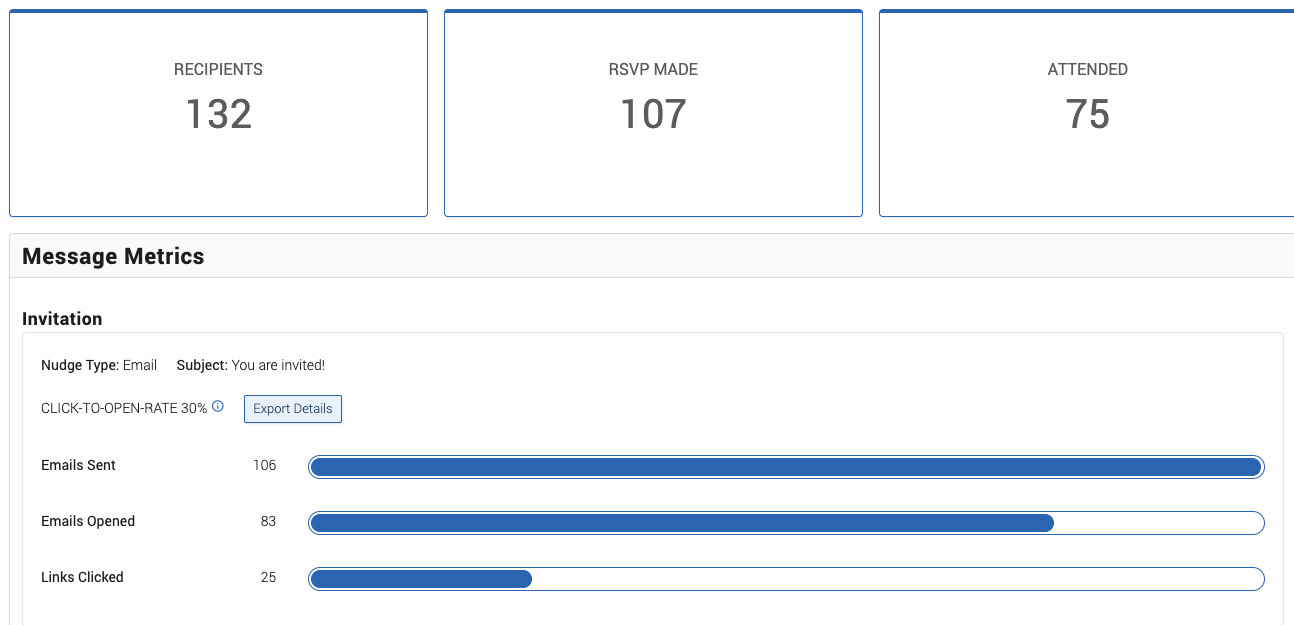

navMSU - Events
The Events feature allows faculty and staff to target specific student populations and encourage participation through event registration and attendance tracking. It includes automated reminders and the option to require RSVPs.
This feature is designed for use with defined groups of students, such as advisees, affinity groups, or students in a particular course or program. It is not intended for events that are open to the entire MSU student population.
Launching an Event
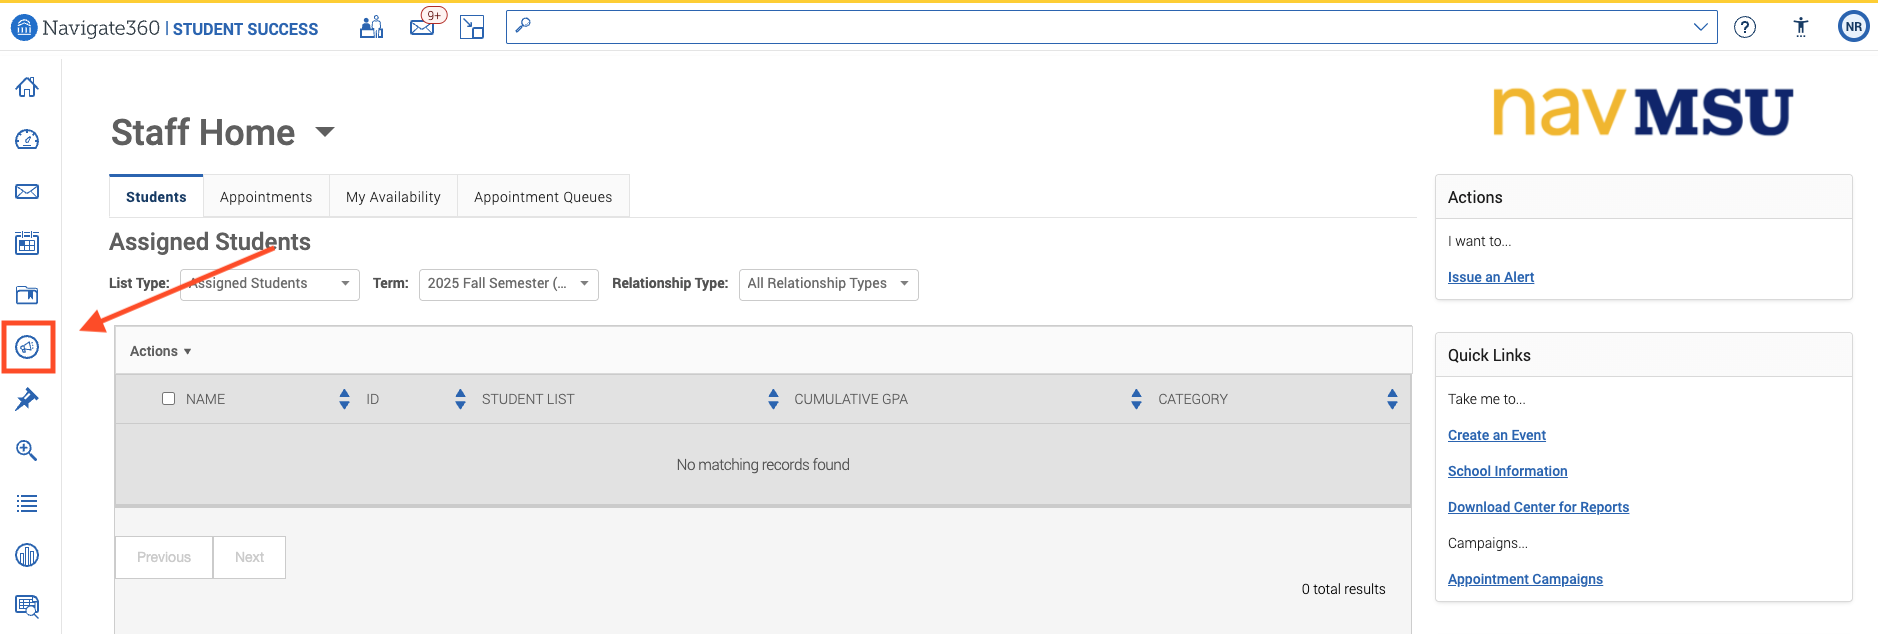
- From the staff home page, click on the Campaigns & Events page.
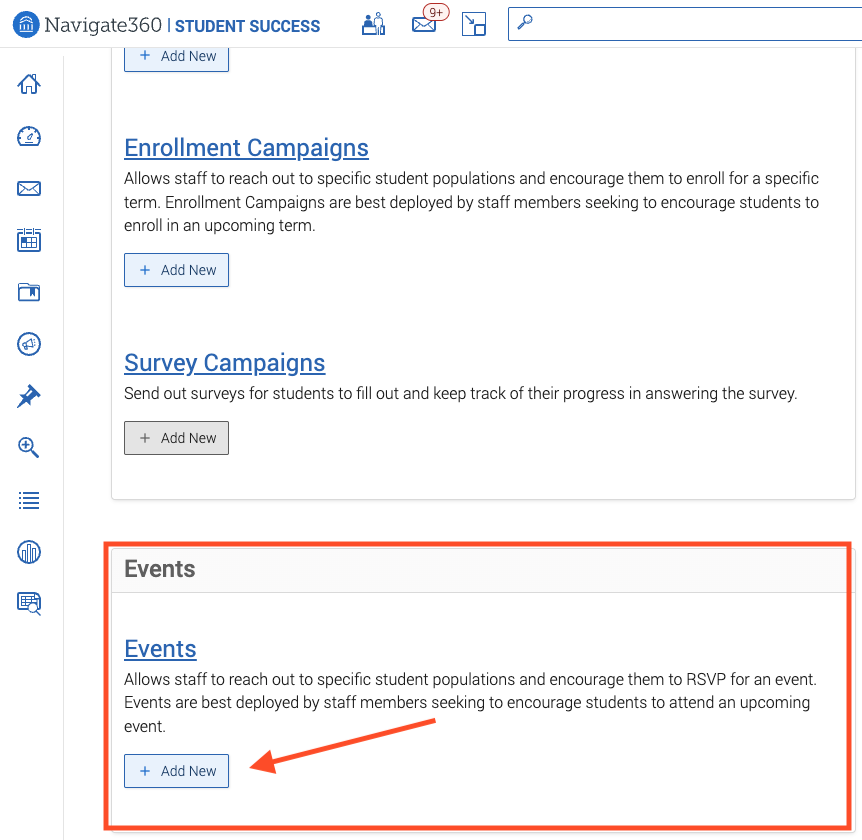
- Scroll down to the Events section and select Add New.
- The Create Event page will open. The fields that must be filled out are listed and defined below. Please note that events must be created at least one day in the future.
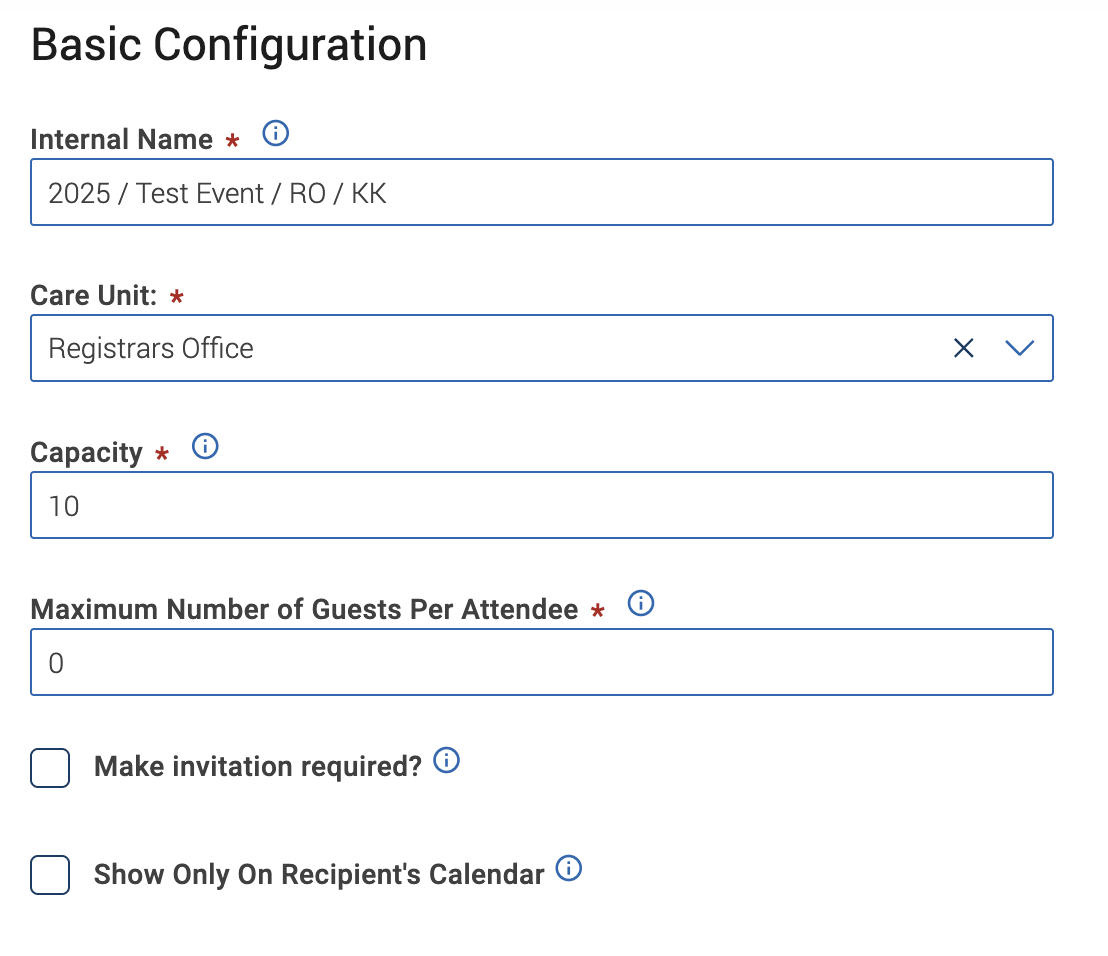
- Internal Name: This is visible to the person creating the event and any other users who have access to view events, but not visible to the student. Please use the following naming convention: Term Year / Purpose / Dept / Creator Initials.
- Care Unit: Events are tied to care units. Select your affiliated care unit.
- Capacity: The maximum number of attendees, both invitees and guests.
- Maximum Number of Guests per Attendees: If guests are included with an invitation, this is the maximum number of guests the invitee can add when responding to the RSVP. Enter 0 if attendees cannot bring guests or if you do not want guests to count in capacity planning.
- Make Invitation Required: This box is checked by default. If this box is checked, only invited students will be able to view the event and RSVP. If this box is unchecked, the Show Only On Recipient’s Calendar option will appear. If you do not require an RSVP, be sure to select the next box so the event does not display on the calendar for all MSU students.
- Show Only On Recipient’s Calendar: Check this box if you do not want to require an RSVP. If this box is left unchecked,
the event will appear on all MSU students’ calendars. Please ensure you check this box so the event only displays for the students you invited
to the event.
- Fill out the required fields in the Event Information:
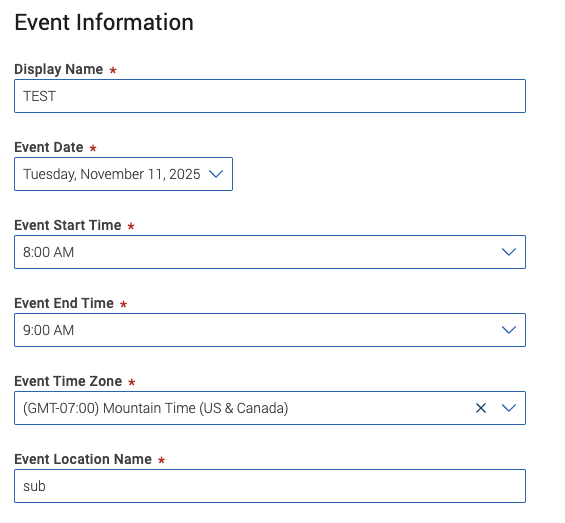
- Display name: The event name that invitees see in the invitation message for the event.
- Event Date: This must be at least one day in the future.
- Event Start Time & End Time: The time the event starts and finishes.
- Event Time Zone: The default setting is Mountain Time.
- Event Location Name: The name of the physical location or virtual meeting link for the event.
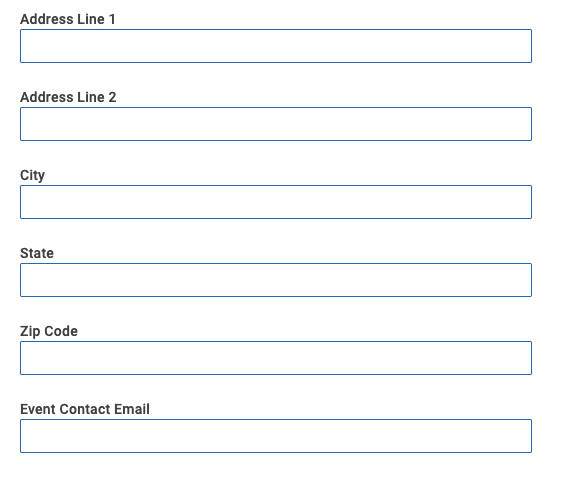
- Fill out the optional fields in the Event Information.
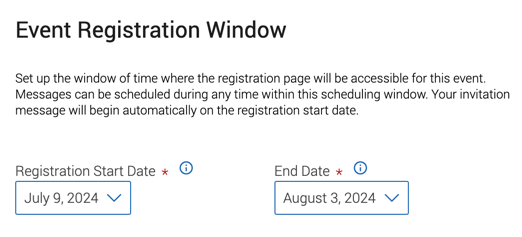
- The next two fields are part of the Event Registration Window, which is the time period where the registration page is accessible for the event.
Messages can be scheduled any time during this window, and the invitation is sent
on the Registration Start Date. Both fields are required. After you select the registration window dates, select
Continue at the bottom of the page.
-
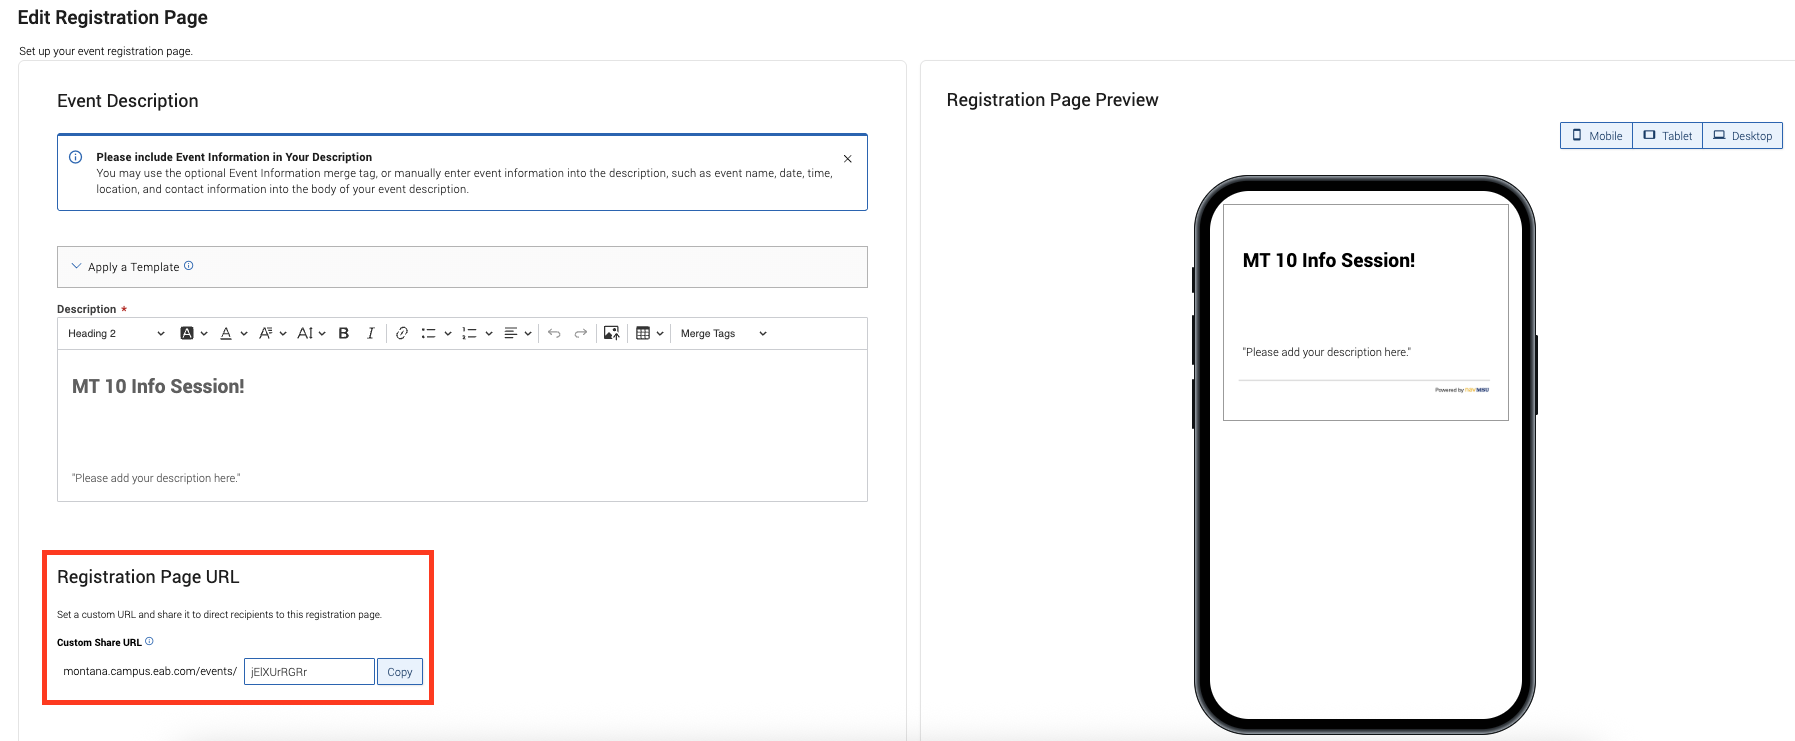
The Edit Registration Page displays to students when they click the event registration link. The registration page is visible to all students when viewing, RSVPing, or checking into the event. This step displays a Registration Page Preview and has a customizable registration page URL.
The only field required is Description, as this field is what displays to students when they open the registration page. Select the Continue button the bottom of the page.
- The next step is to complete the Add Recipients to Event page. Please note that once you publish the event, you will not be able to remove recipients.
Set your V3 report criteria and select Run Report. If you have already uploaded a student list, you may add the list by typing Student List in the field and then selecting your student list.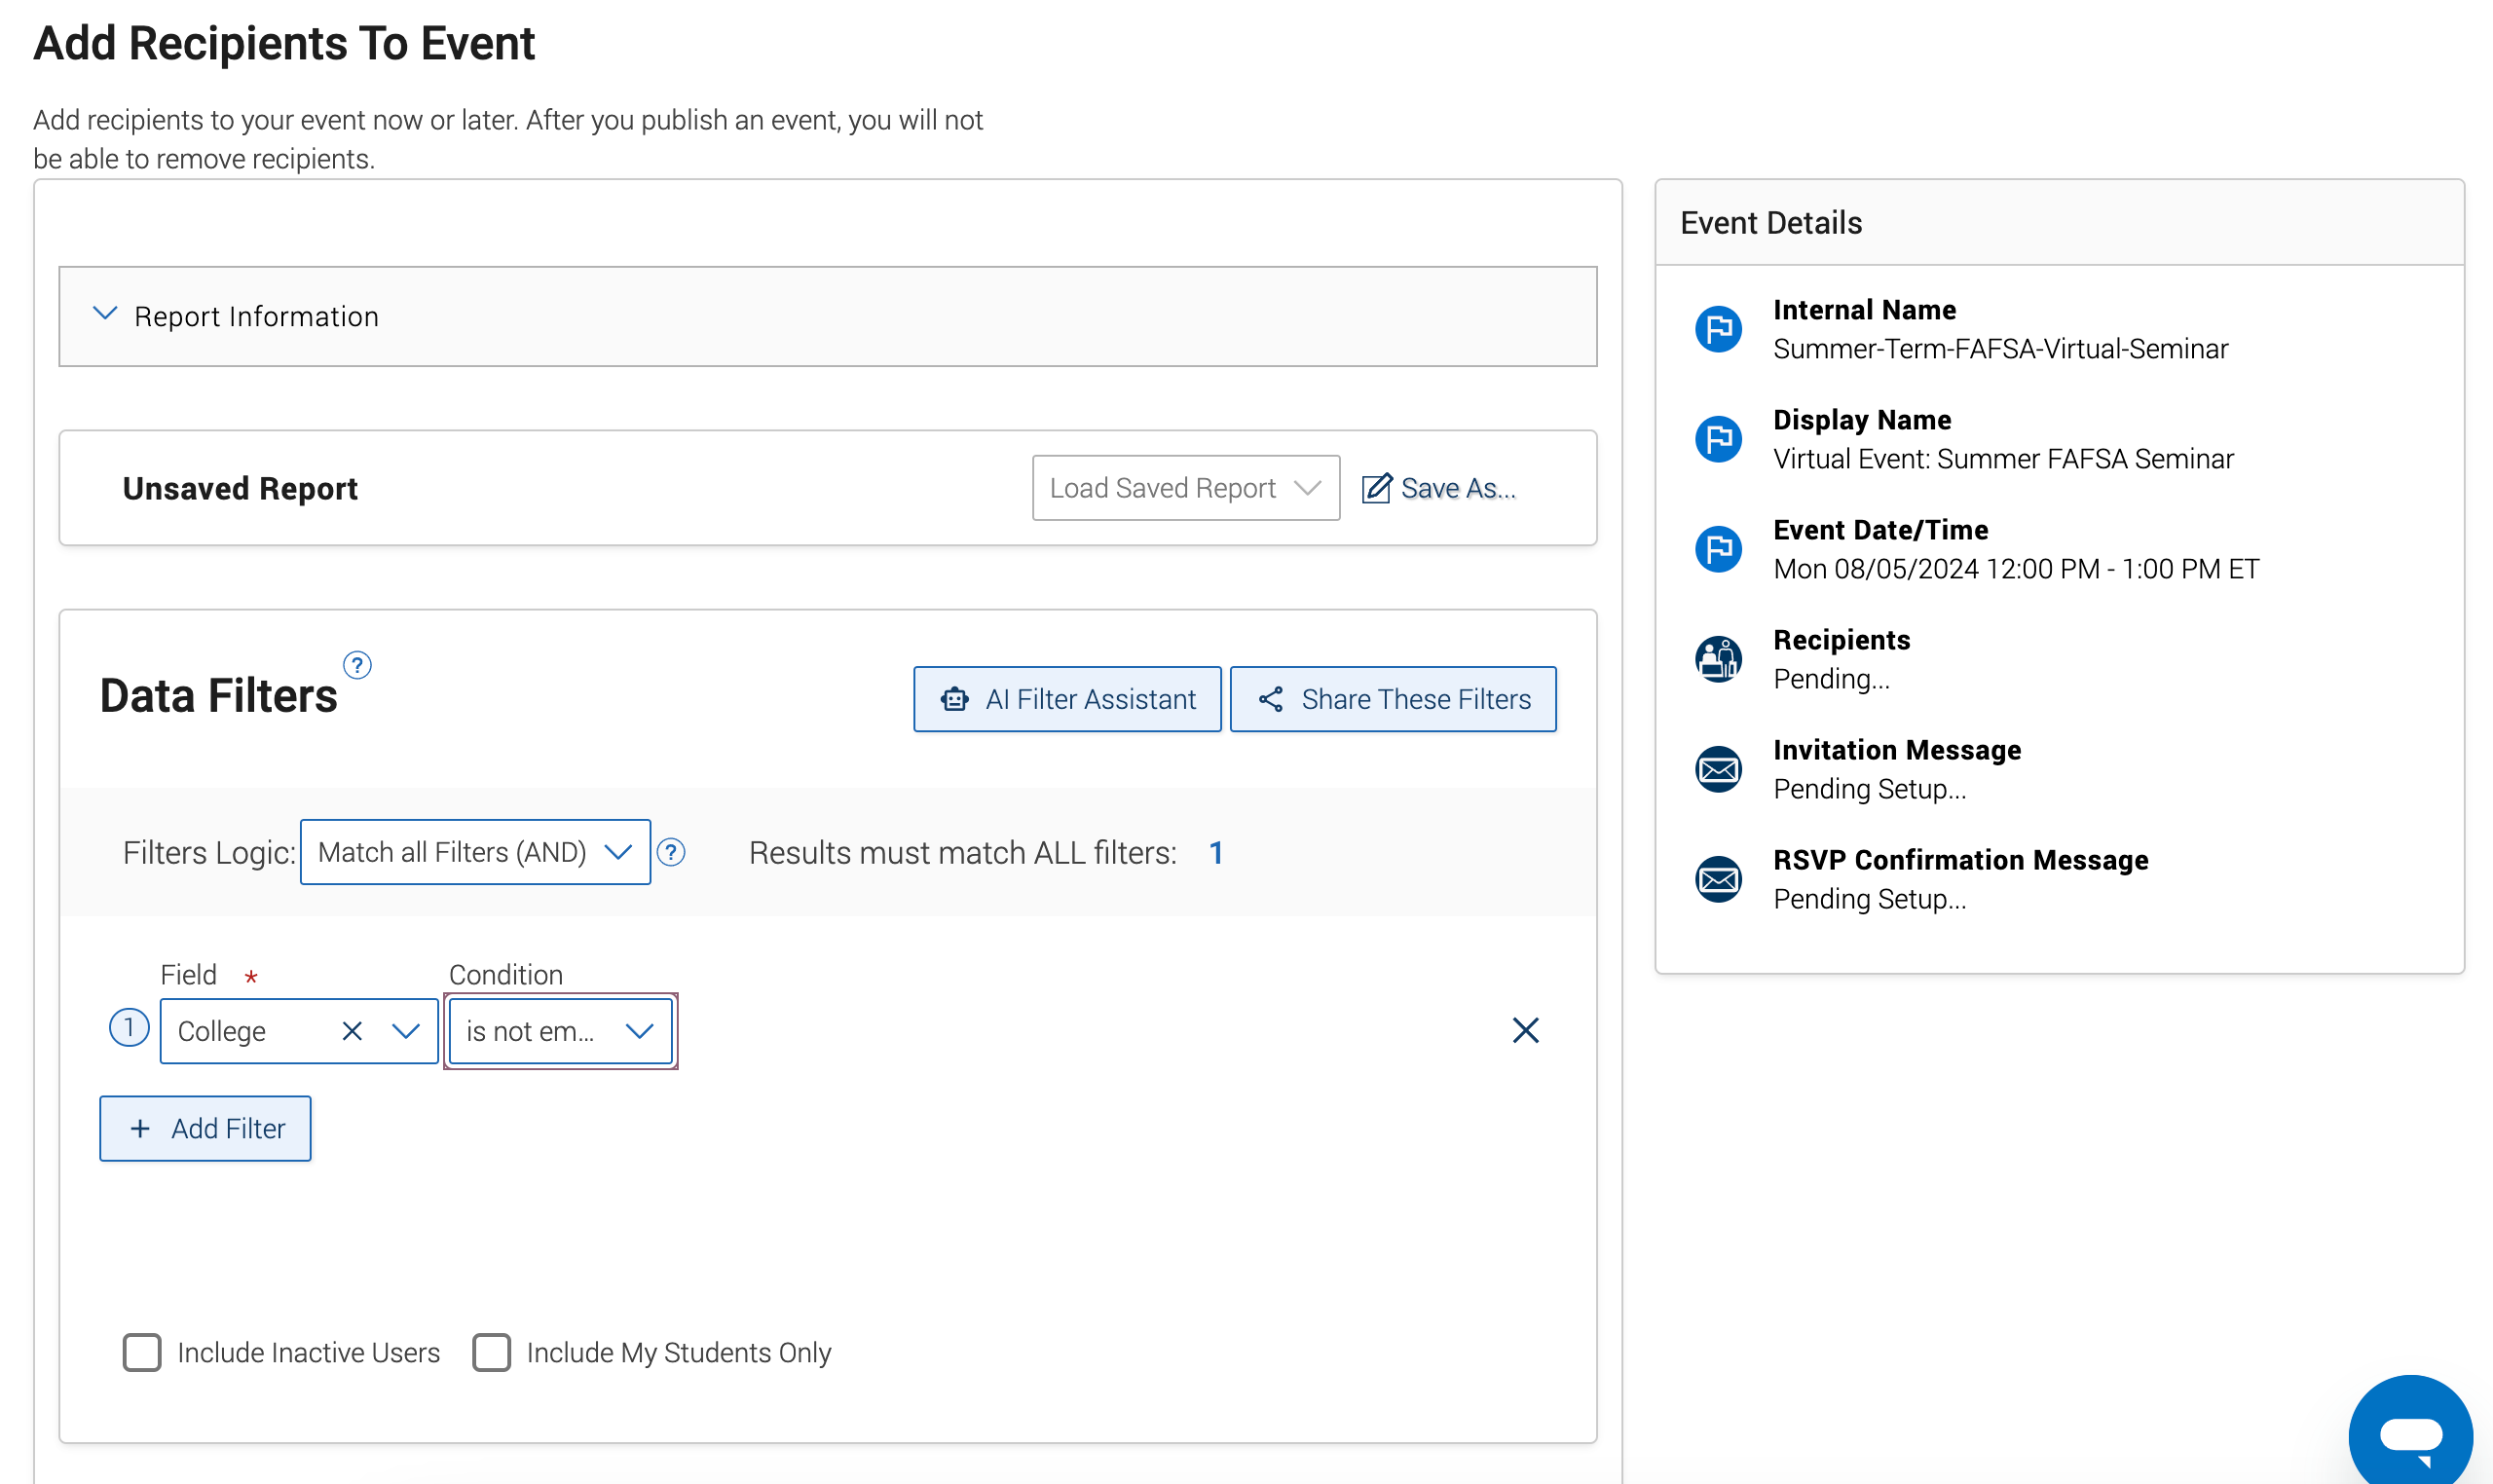
- Once you have run your report, select the students you want to add to the event by
checking the box next to their name, and then click Add Selected Recipients.
If you would like to select all students in the search results, check the box next to Student Name, and click the blue checkmark at the bottom of the page and then click Add Selected Recipients.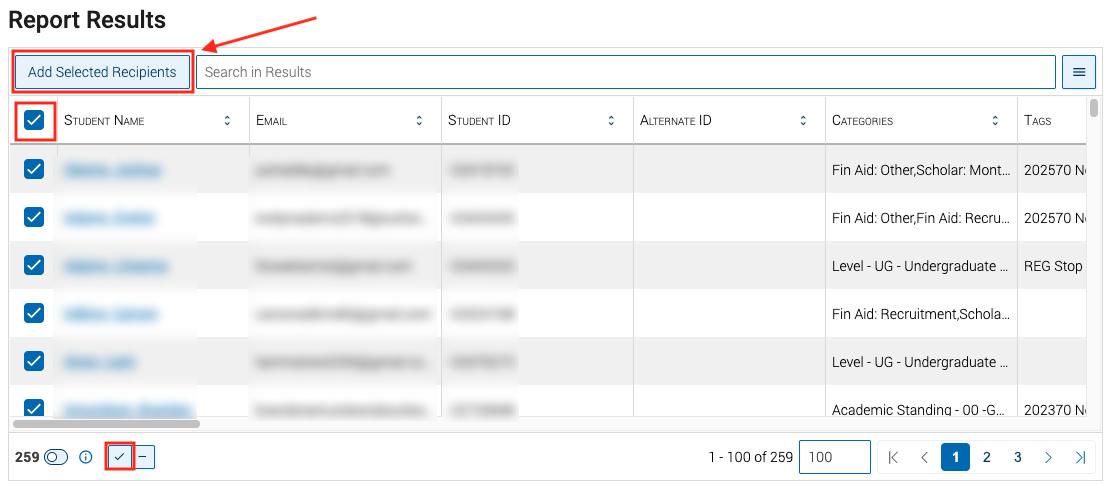
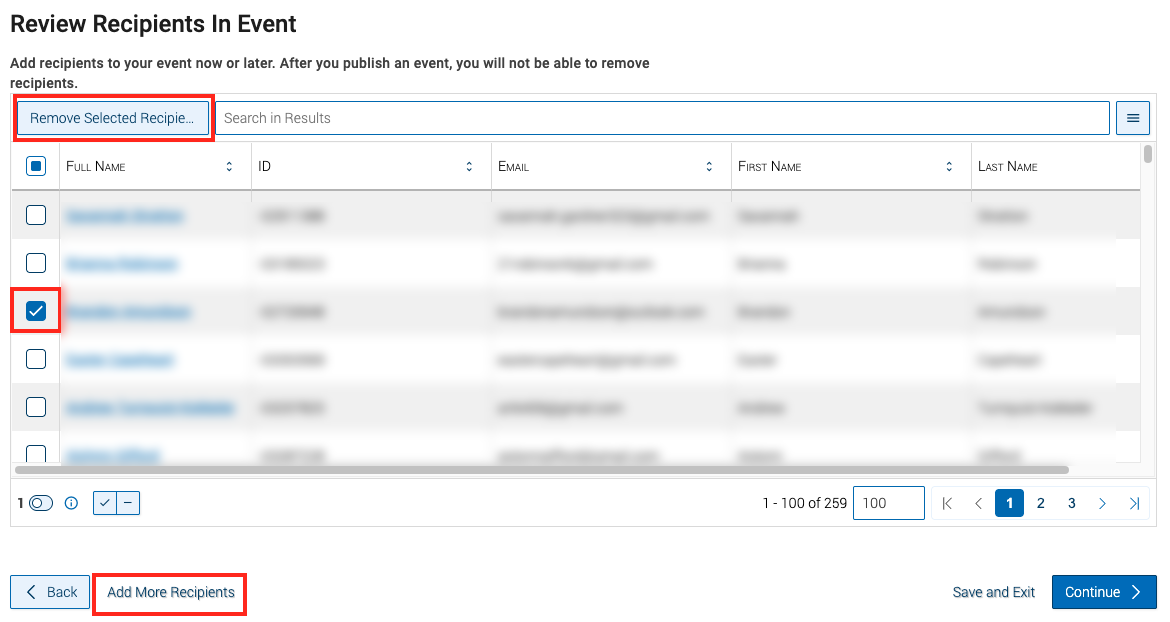
- Next, review the event recipients and edit the list if needed. If a student should not be invited to the event, select
the box next to their name and choose Remove Selected Recipients. Add more recipients by clicking Add More Recipients at the bottom of the page. Once the list of recipients is finalized, click Continue.
- Next, compose your messages to event recipients. There are three types of messages for an event: the Invitation
and Reminders to RSVP (required), RSVP Confirmation, and Reminder for Event.
All messages can be sent as either email or SMS messages. Please note that you can only create one message of a single type per day.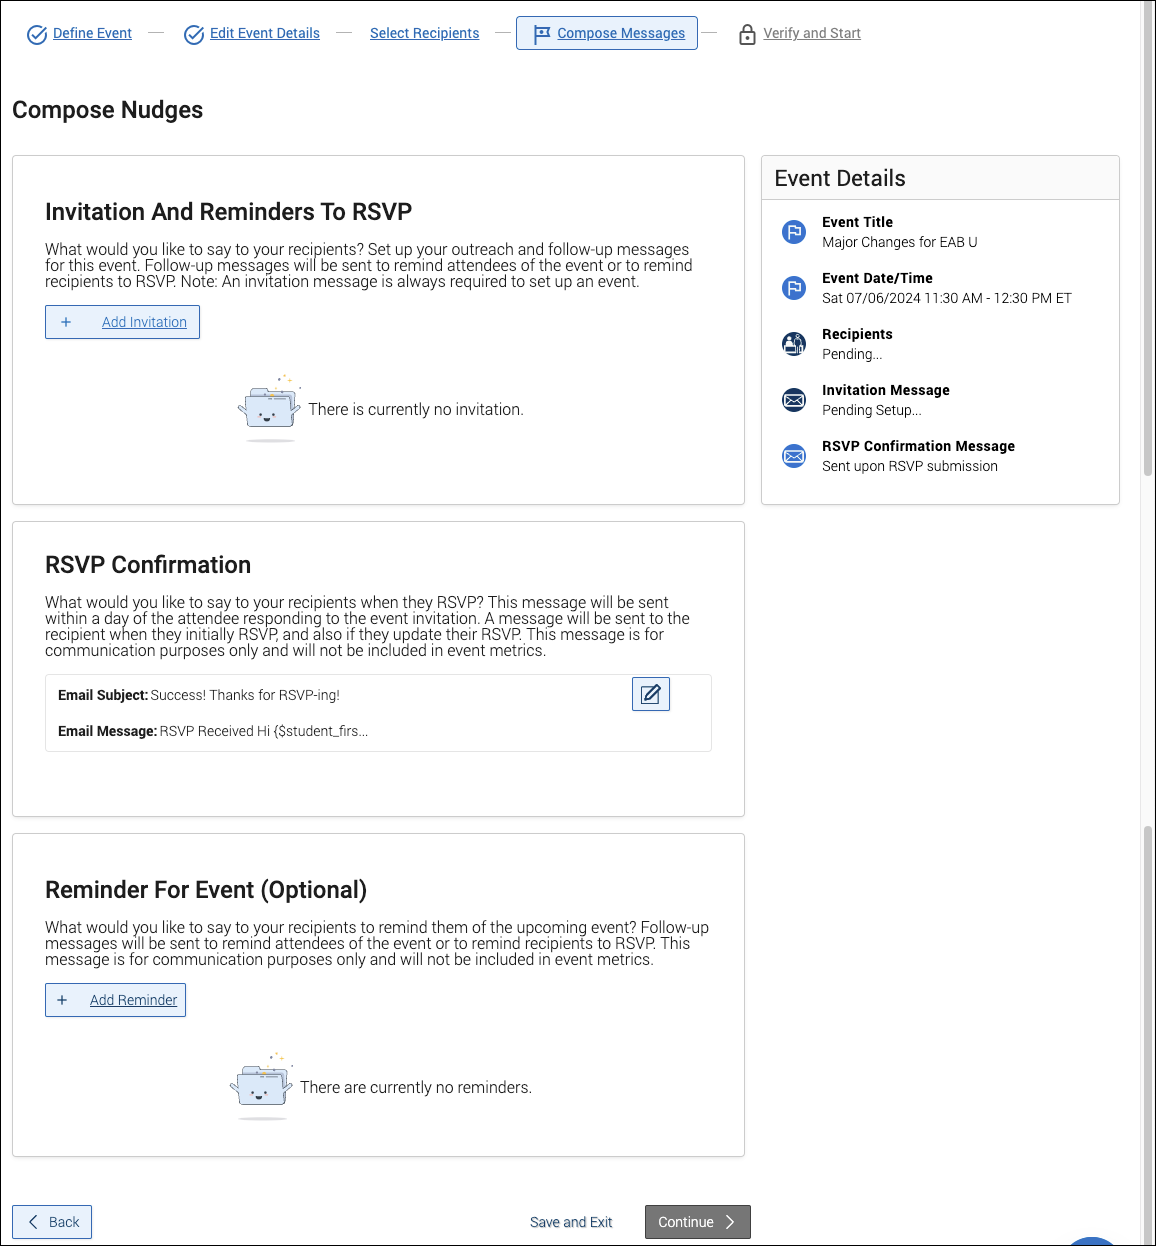
-
Select Add Invitation under Invitation And Reminder to RSVP to create your invitation. You can send the invitation as either an email or SMS message. A preview of the message will appear in the panel to the right of the composition panel.
The invitation will be sent on the first day of the registration window. If you add students to the event later, the send date will be immediately after they are added. Once you have finished creating your invitation, click Save Invitation at the bottom of the page.
Enter the following information for an email invitation:
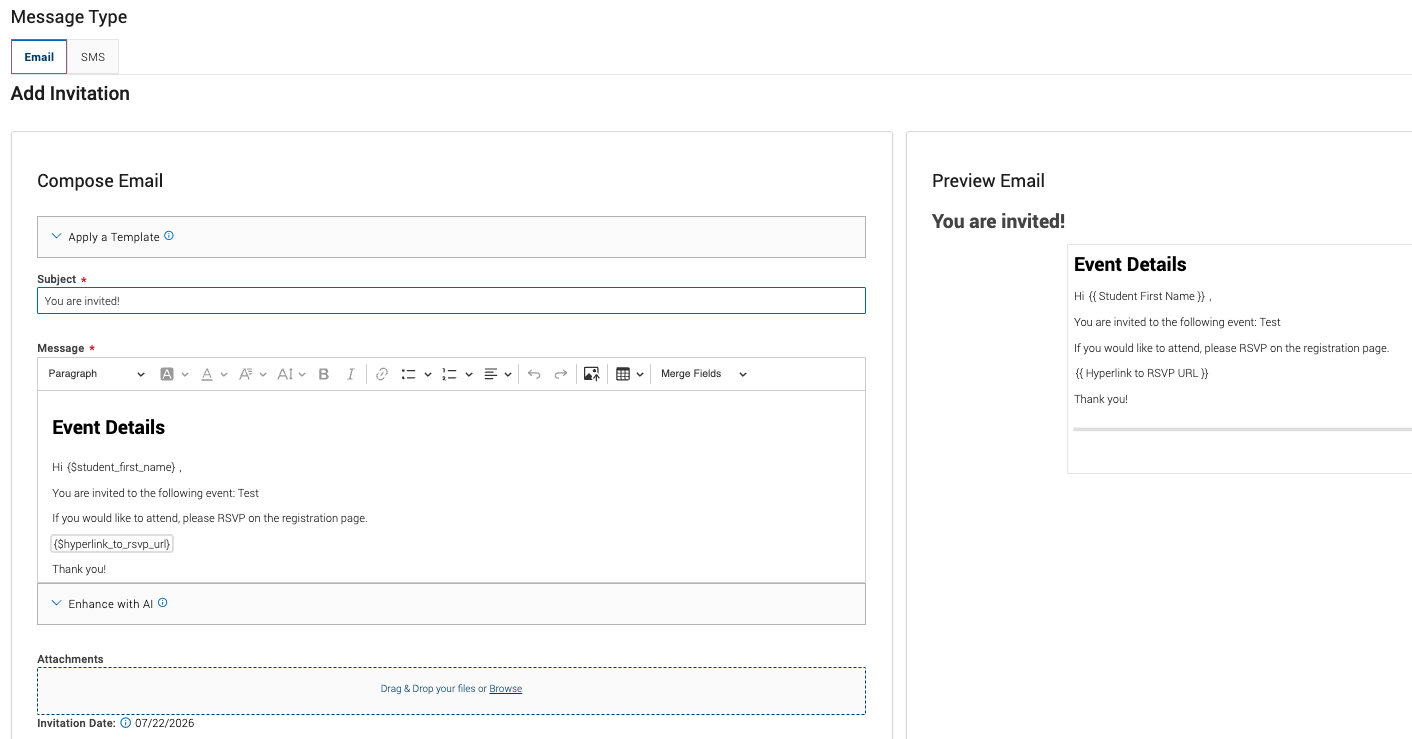
- Apply a Template (Optional): Select from public templates or your personal templates.
- Subject: Enter the email subject line for the invitation.
- Message: Edit the body of the message and add optional merge tags to personalize the email with student information, such as name. The RSVP hyperlink must remain in the body of the message, regardless of if an RSVP is required.
- Attachments: Add optional attachments if needed.
- Enter the following information for an SMS invitation:
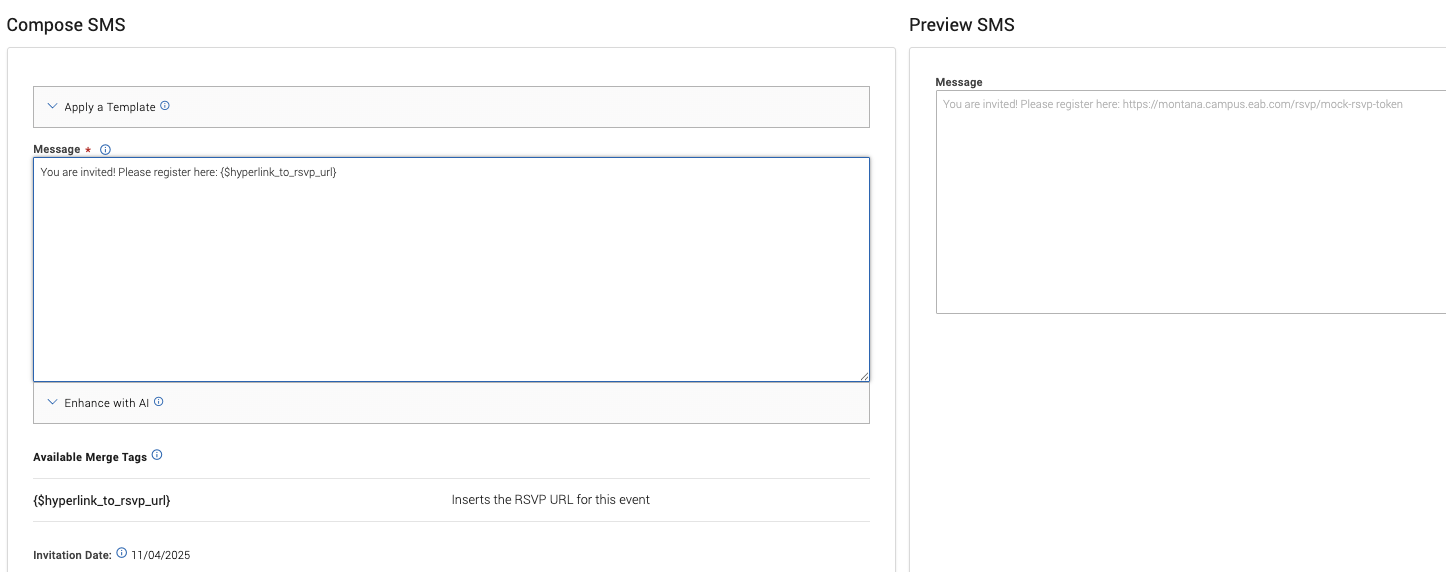
- Apply a Template (Optional): Select from public templates or your personal templates.
- Message: Edit the body of the message, which has a 300-character limit. The RSVP hyperlink must remain in the body of the message, regardless of if an RSVP
is required.
-
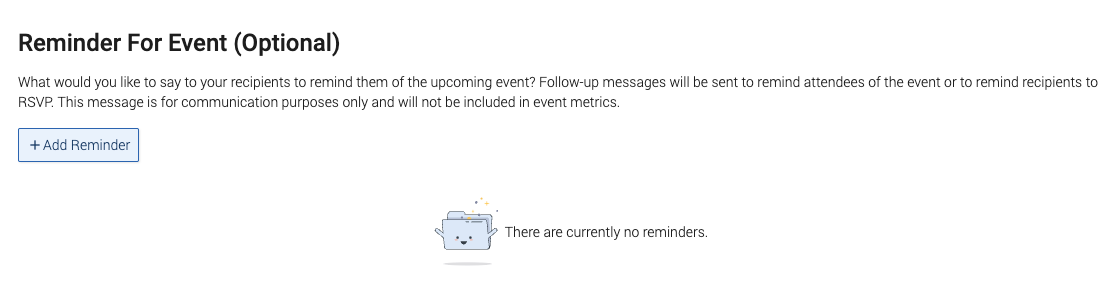
Create Reminder(s)to RSVP for students who have not yet responded to the event. Click on Add Reminder to compose an email or SMS reminder.
You may send multiple reminders as long as they fall within the Event Registration Window and the one message-per-day limit. Please use discretion to avoid overwhelming students with too many messages.
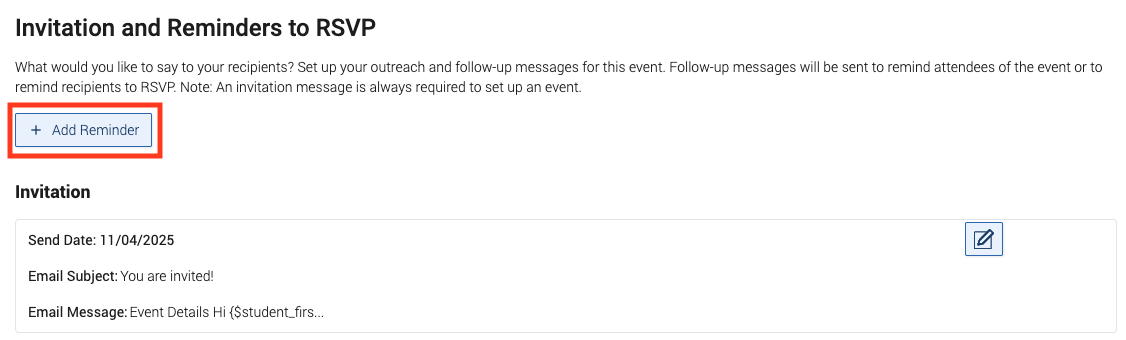
- Compose the reminder message and select the reminder date. After the message and date are selected, click Save RSVP Reminder to add it to your event.
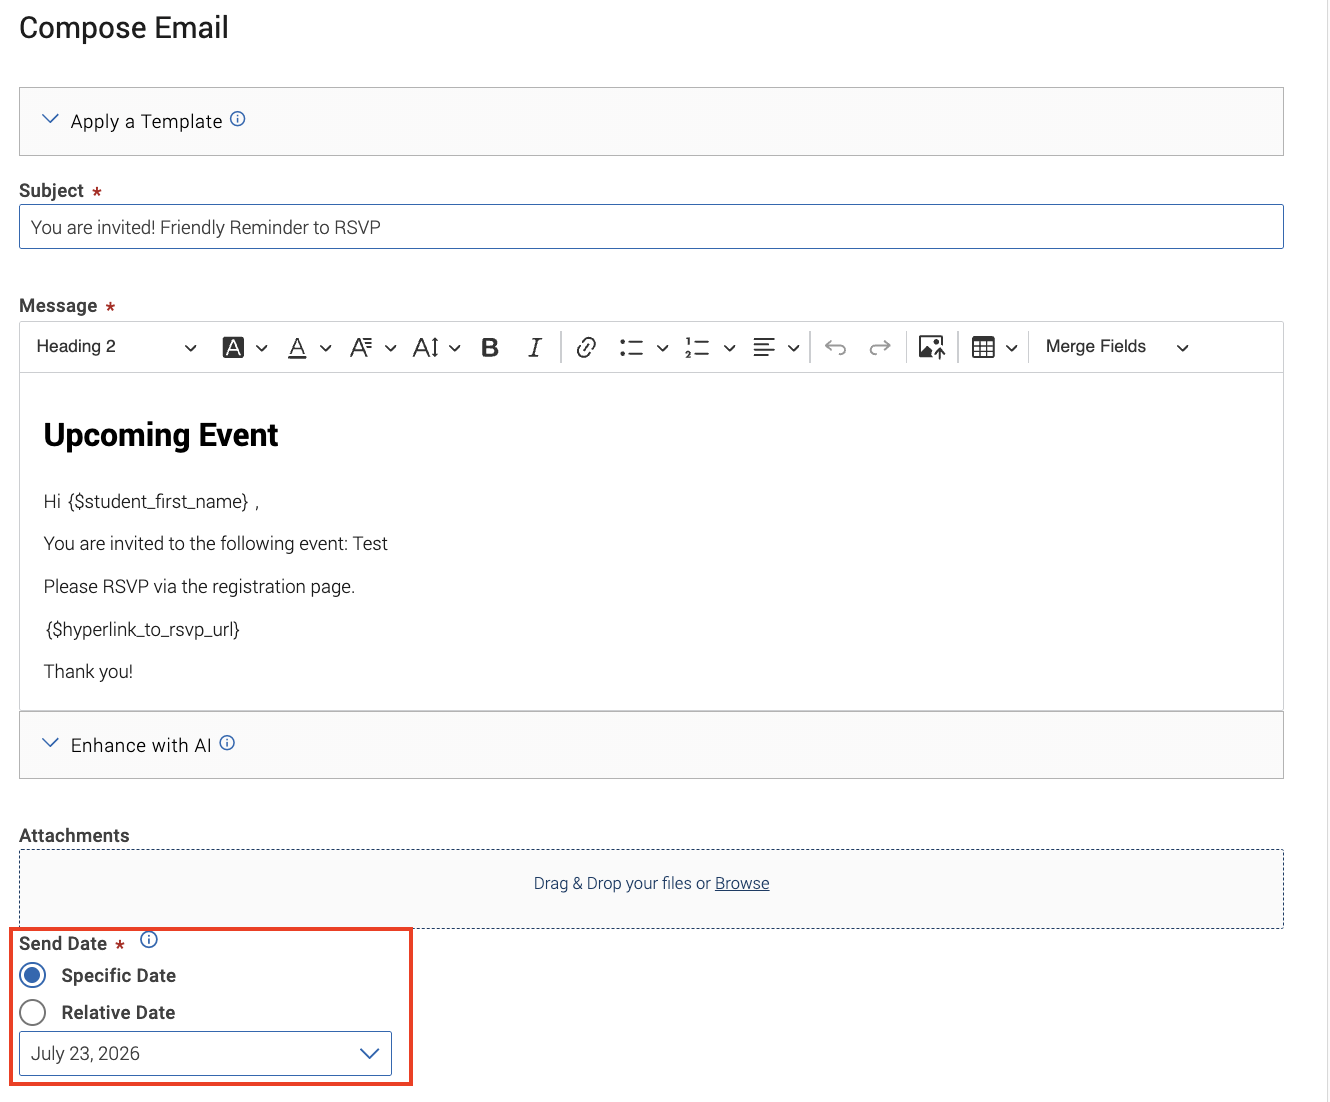
- Specific Date: Useful if you will not be adding many new students. If a student is added after a specific date reminder, they do not receive the reminder.
- Relative Date: Useful if you will be regularly adding students to the event. This allows you to send a nudge after a
specific number of days after being added to the event.
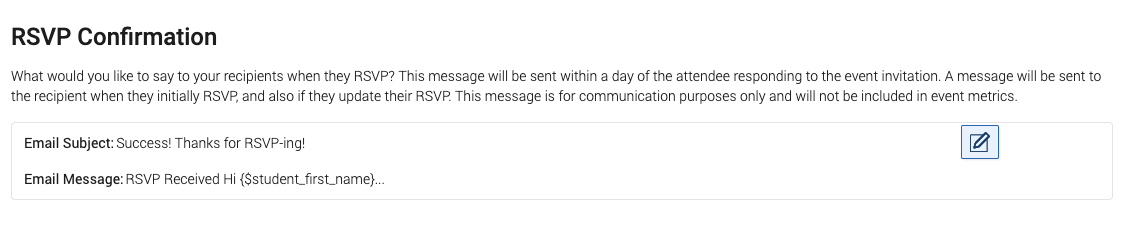
- Create an RSVP Confirmation message to send to students within a day of submitting their RSVP. The message includes
a link for students to change their RSVP if needed, in which case they will receive
another message with the update information. After completing the message, select
Save Confirmation Message.
- Create optional Reminder(s) for Event. This message will go out to students who submitted an RSVP “yes” to the event. Click
Save Event Reminder. Once all event messaging are completed, click Continue at the bottom of the page.
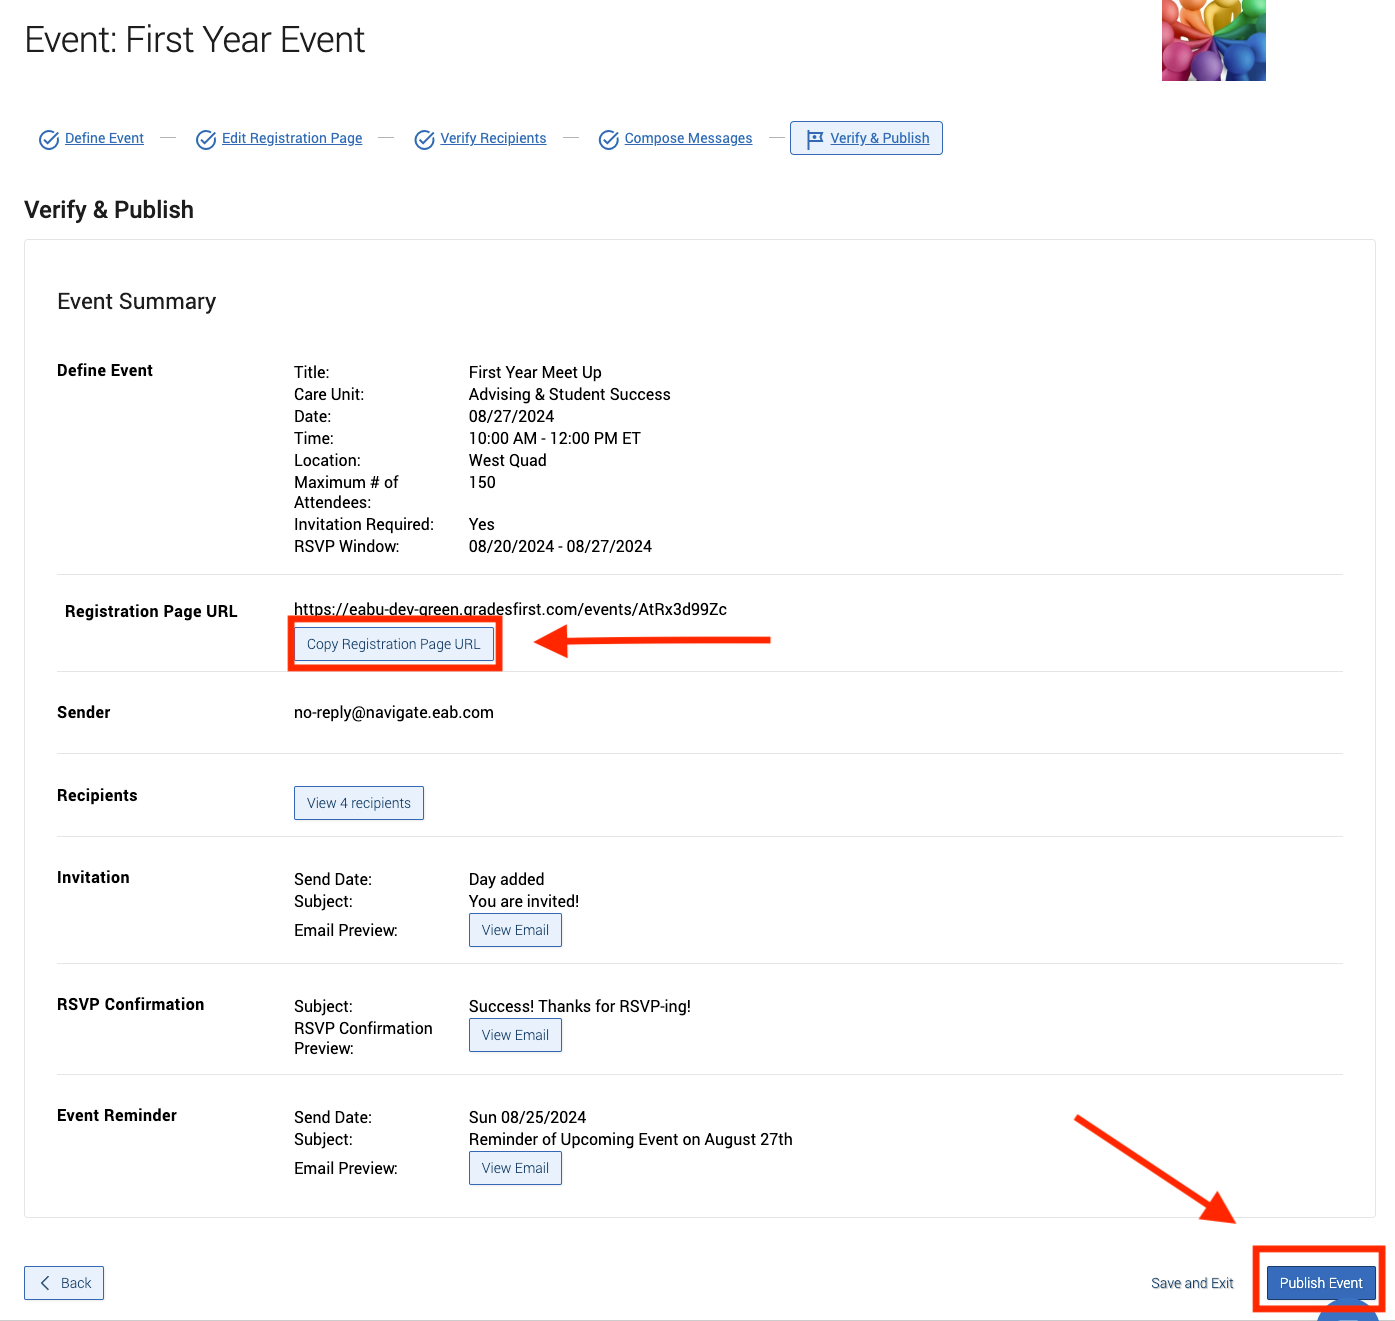
- The final step is to Verify & Publish the event. Select Copy Registration Page URL and paste it into a browser window to preview the page before publishing the event.
Once all details have been verified, click Publish Event when you are ready to send the invites to selected students.
Managing an Event
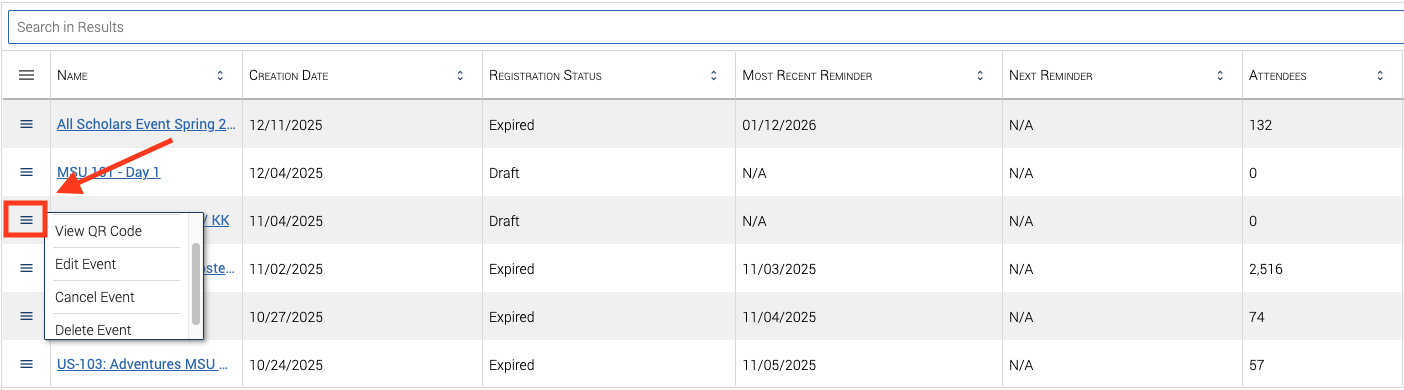
- After publishing the event, you may edit, cancel, or access the event QR code for
students to check-in by returning to the Events page. Click on the 3 horizontal lines next to your event name.
- You can also return to the event page to view RSVP and message metrics.