
navMSU - Appointment Summaries
Appointment summaries allow staff and faculty to record key information for both scheduled and unscheduled appointments, including appointment times, attendance, and case notes. The following summary includes instructions for creating appointment summaries for scheduled appointments, marking students as no-show, and creating summaries for ad-hoc appointments (walk-ins).
Please note: Any information entered into NavMSU pertaining to a student becomes part of their
official student record and may be subpoenaed by that student, as outlined in the
Family Educational Rights and Privacy Act (FERPA).
Creating Appointment Summary for Scheduled Appointments
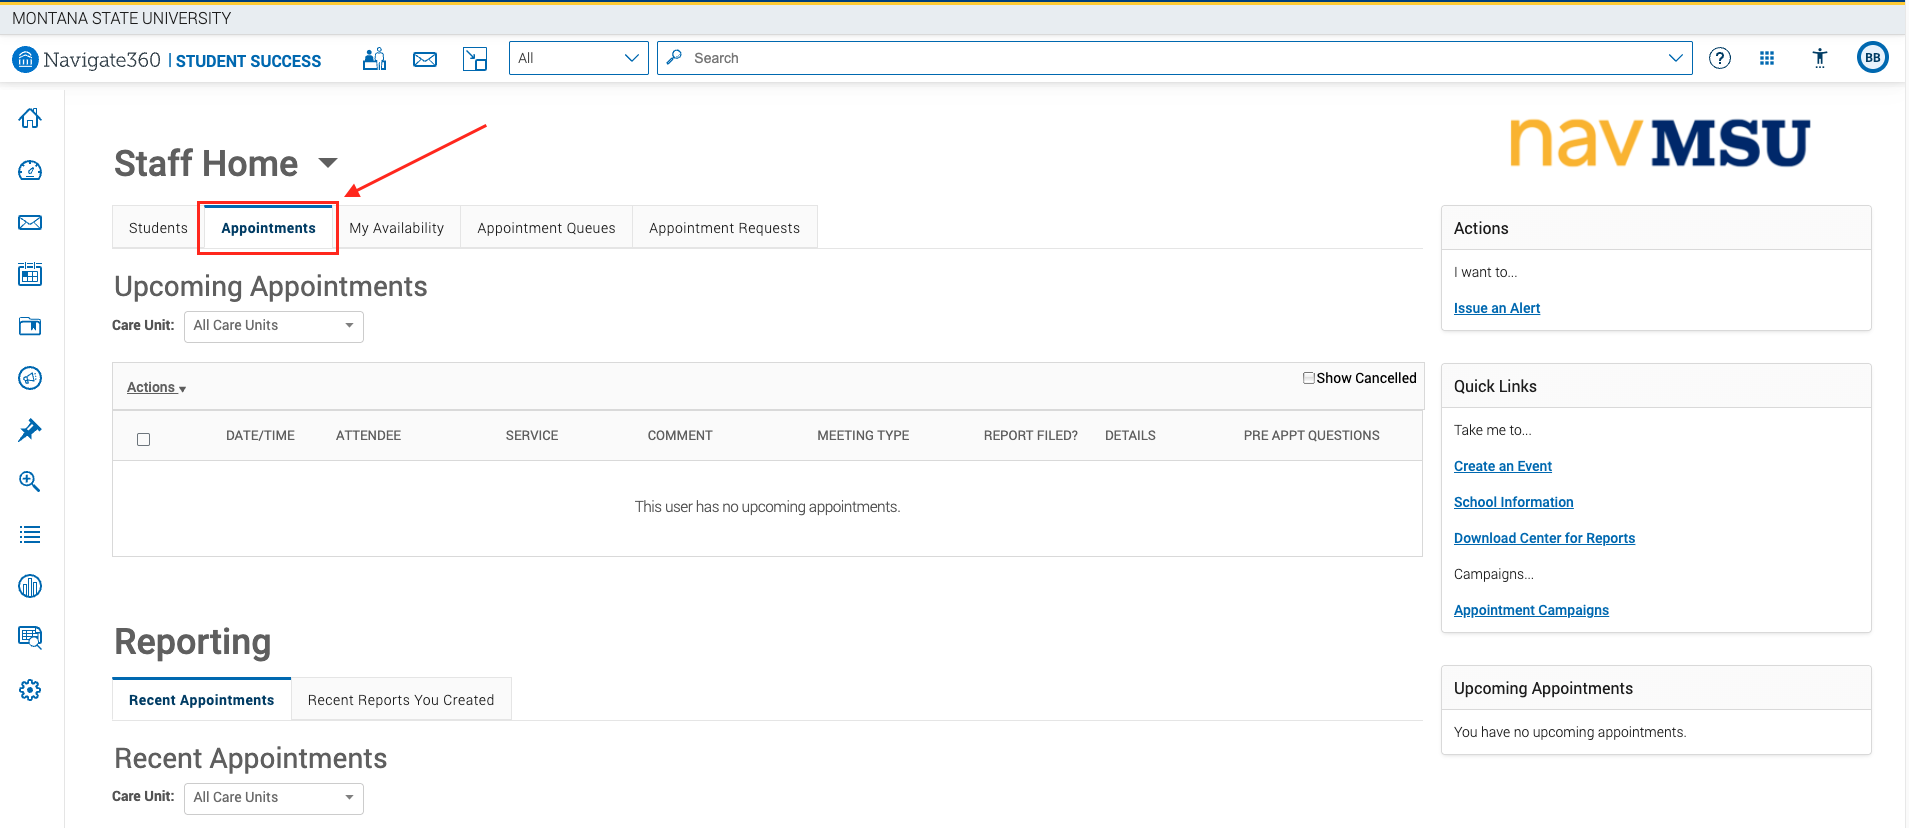
- Navigate to the Appointments tab on your homepage.
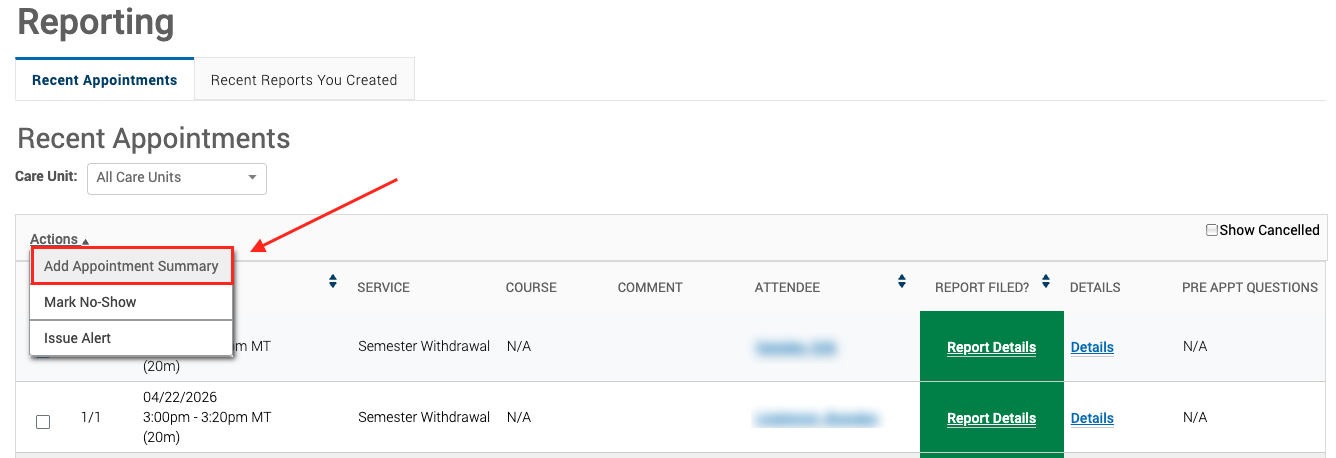
- Scroll down to the Recent Appointments tab under Reporting. Click the checkbox next
to a student, then select Actions and Add Appointment Summary.
- All Appointment Details will auto populate on the left-hand side of the summary screen, including marking
the student as “Attended”. Fill out the relevant Summary Details on the right-hand side of the appointment summary.
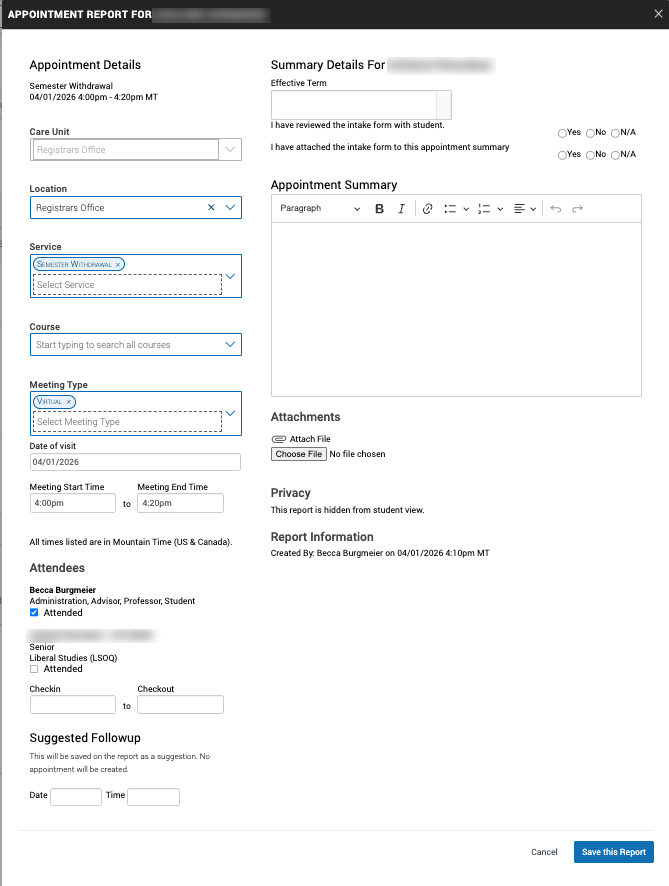
- Appointment Details: Edit if needed (e.g. change the service if a student selected the incorrect one).
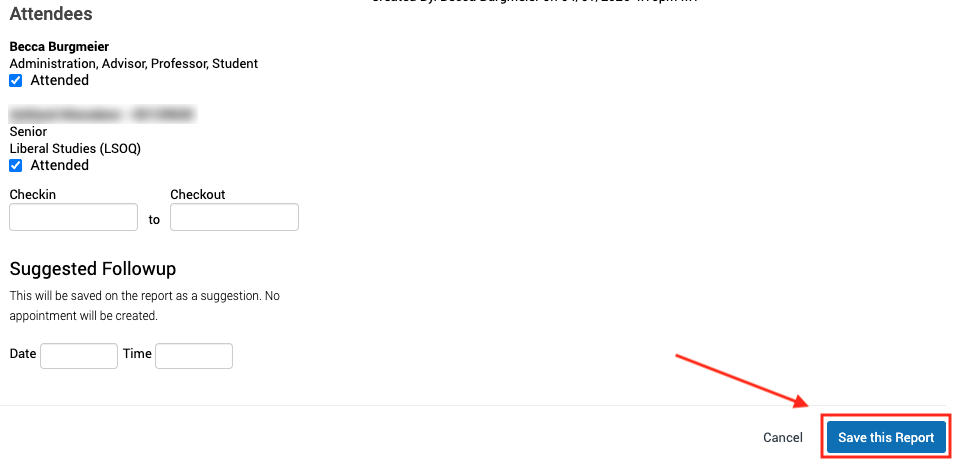
- Attendees: The staff member and student will automatically be marked as attended.
- Check-in/Check-out: These fields are only relevant if students check-in or out via the Appointment Center or Kiosk.
- Suggested Follow-up: These fields are used for your reference only. No appointment will be created by filling out these field.
- Summary Details: If relevant, complete the radio button or text box questions.
- Appointment Summary: Add relevant case notes from the meeting.
- Attachment: Optional attachments can be added to the summary.
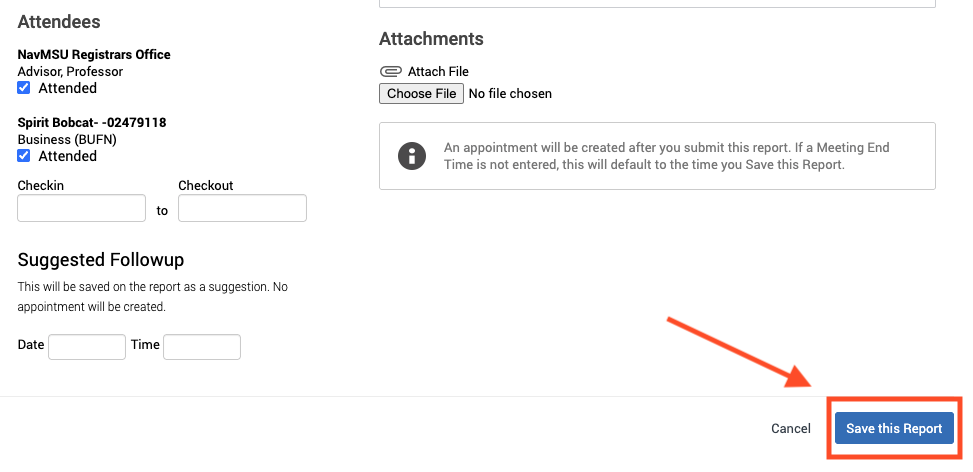
- Once all appropriate fields are completed, click Save this Report at the bottom of the page.
Mark Students as “No-Show” for Appointments
If a student doesn’t attend their scheduled appointment, you can mark them as absent. This generates an appointment summary and leaves the Attended box unchecked. You can complete this action using the same initial steps outlined for creating an appointment summary in the previous section.
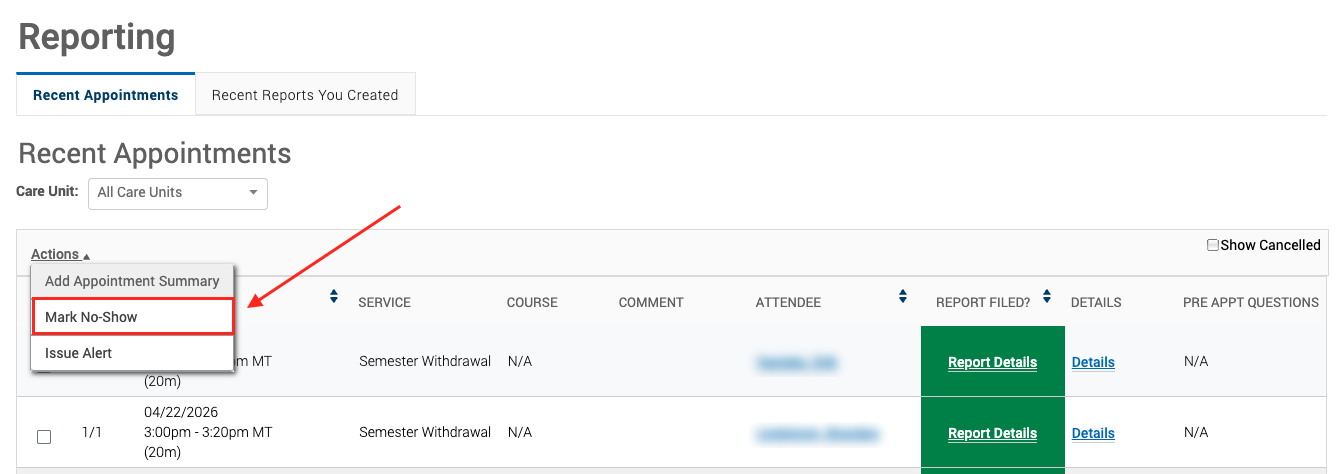
- Navigate to the Appointments tab on your homepage. Scroll down to the Recent Appointments
tab. Select a student, then click the Actions drop down menu and select Mark No-Show. Marking a student as no-show will generate an email to the student, encouraging them
to reschedule.
Creating an ad hoc Appointment Summary from the Student Profile
Ad hoc appointment summaries allow you to document information from unscheduled or walk-in student meetings. Students will not receive any email communication regarding an ad hoc appointment summary.
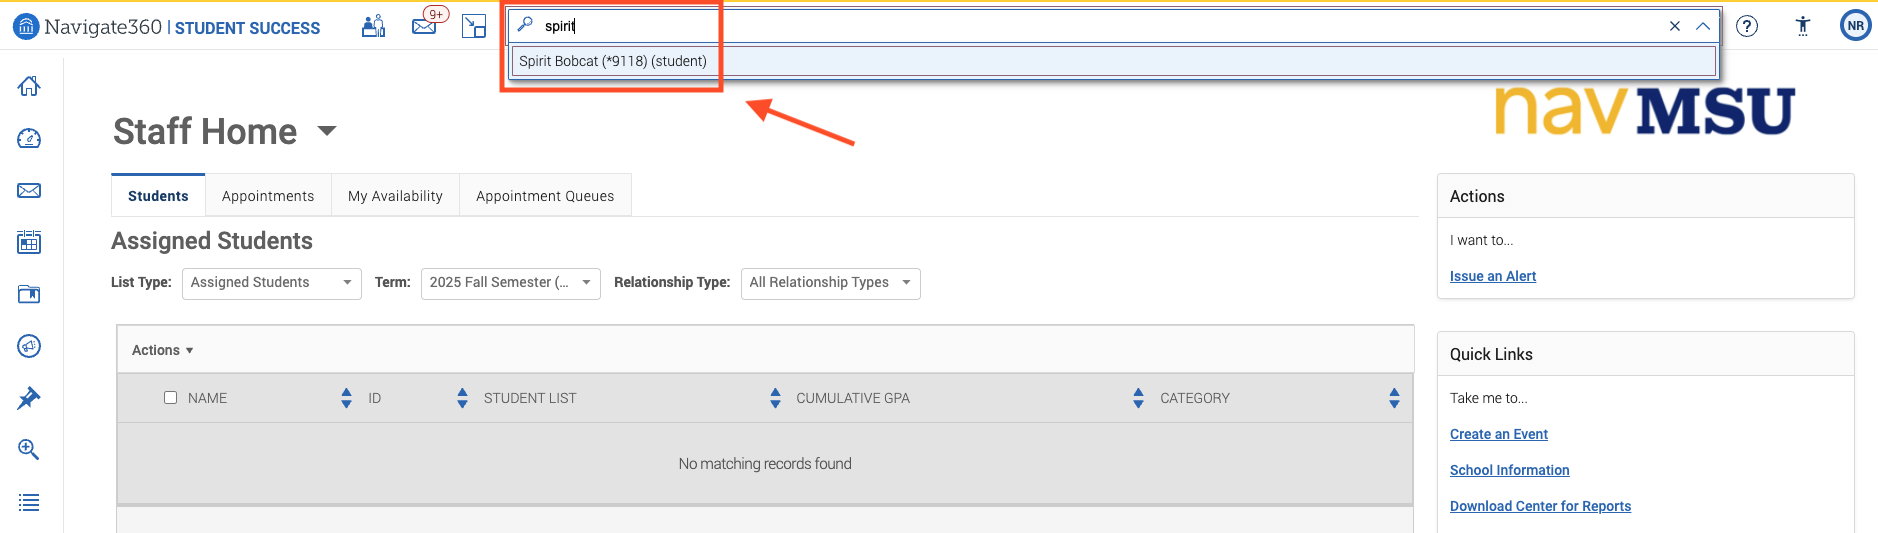
- Navigate to the student’s profile by searching their name in the search bar.
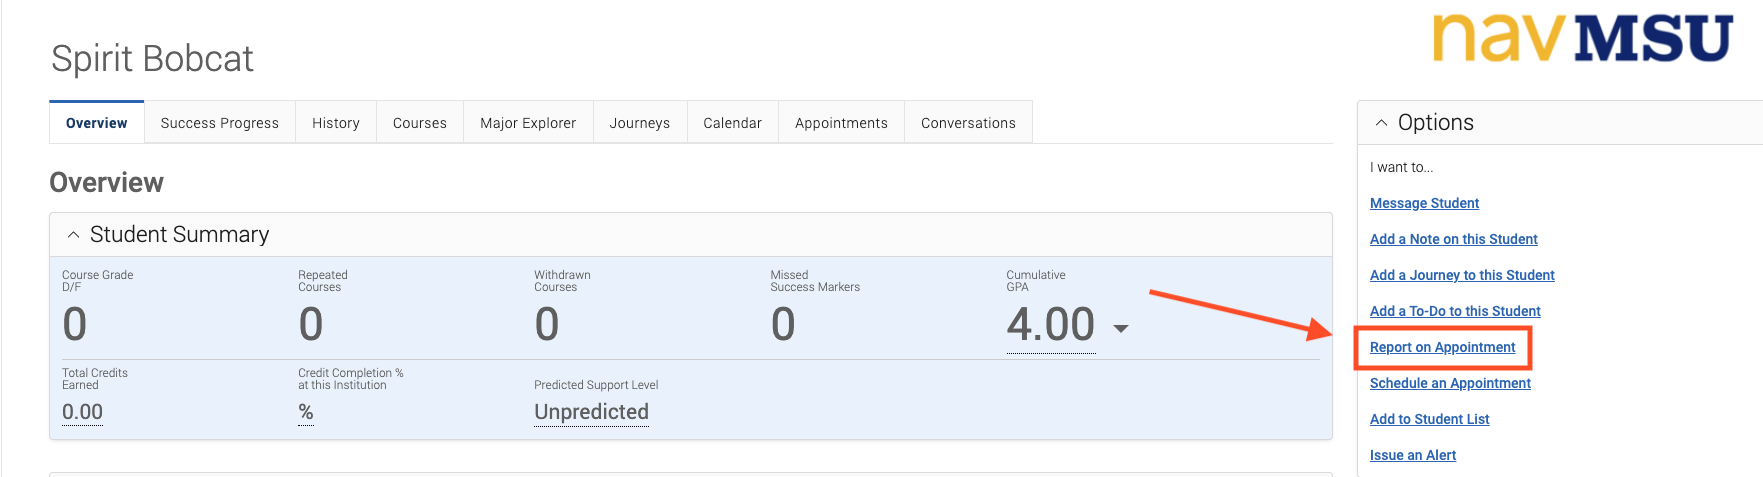
- Select Report on Appointment on the sidebar of the student’s profile.
- Fill out all relevant appointment details:
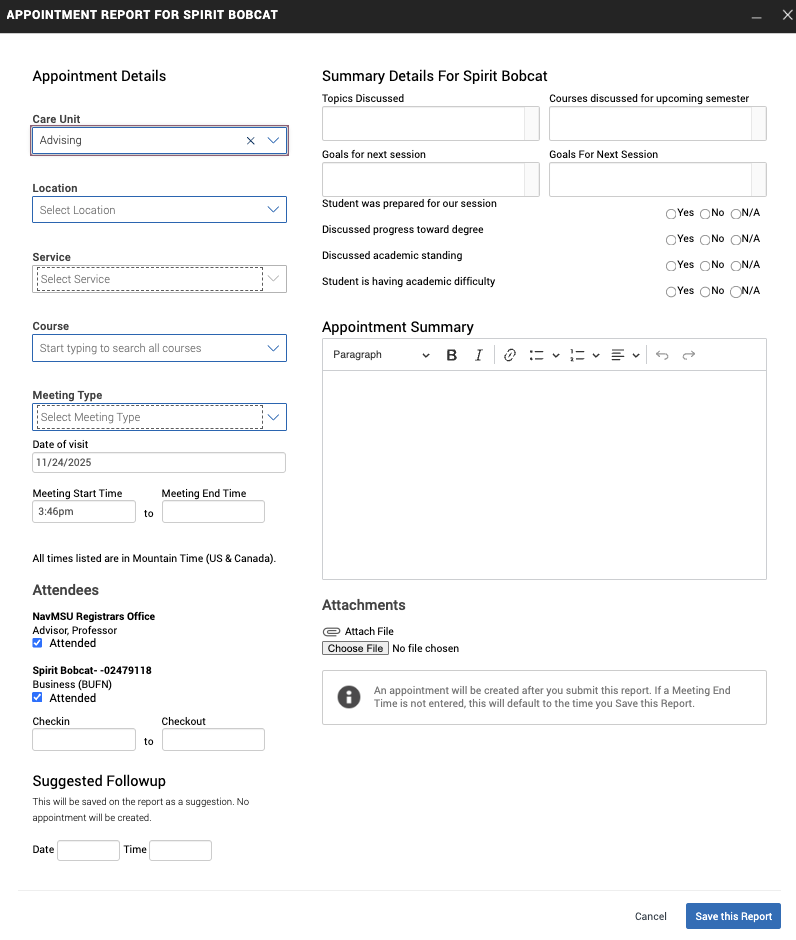
- Care unit, location, and service: Select the relevant details.
- Course: If the appointment was associated with a specific course, you may indicate so here.
- Meeting Type: Indicate if the meeting was in-person, virtual, or phone.
- Date of Visit and Meeting Time: This will default to the date and time you create the summary. Adjust the date and time to align with the actual meeting times. Creating an ad-hoc appointment summary will also create an appointment that syncs to your Outlook calendar in the past.
- Attendees: The staff member and student will automatically be marked as attended.
- Check-in/Check-out: These fields are only relevant if students check-in or out via the Appointment Center or Kiosk.
- Suggested Follow-up: These fields are used for your reference only. No appointment will be created by filling out these field.
- Summary Details: If relevant, complete the radio button or text box questions.
- Appointment Summary: Add relevant case notes from the meeting.
- Attachment: Optional attachments can be added to the summary.
- Once all appropriate fields are completed, click Save this Report at the bottom of the page.