
CNC Machines
There are two CNC (Computer Numerical Control) machines available for use in the Makerspace.
Toolpaths must be checked by a Makerspace employee before use.
PocketNC
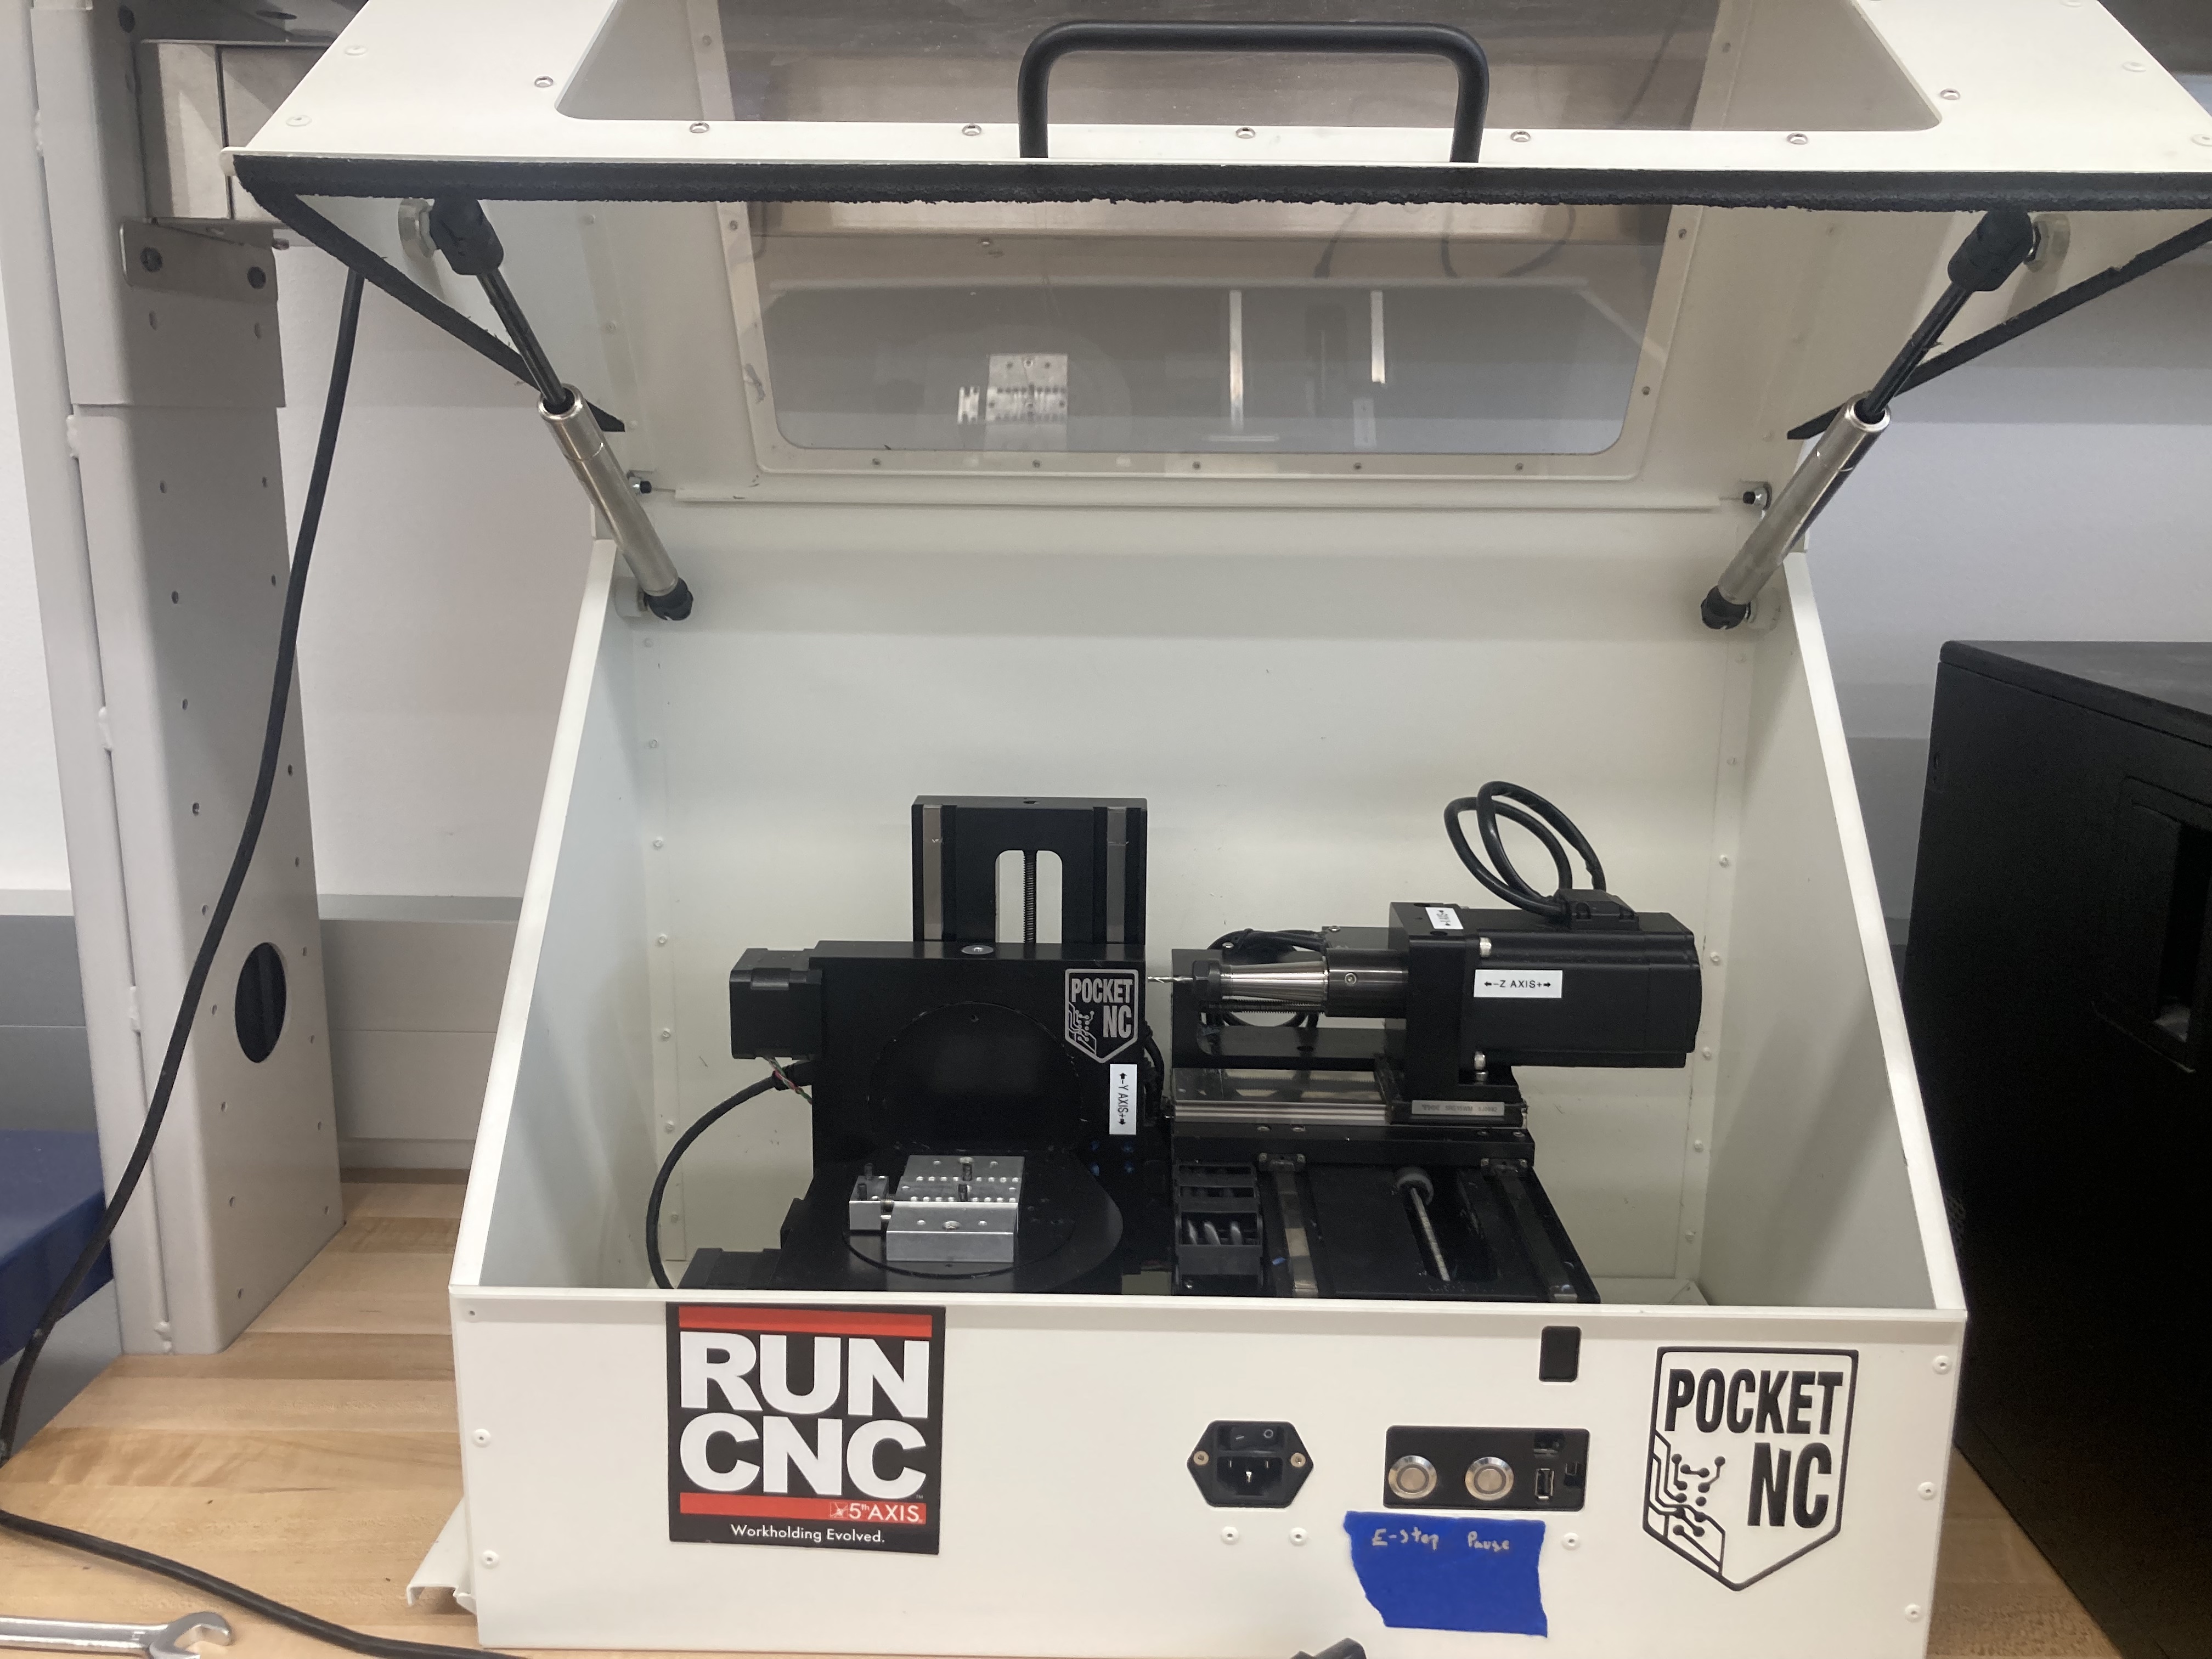
Pocket NC
The PocketNC is a small 5-axis machine suitable for soft materials like plastic, wax, wood, and aluminum. There is 5 inches of travel in the Y direction, 4.55" in the X, and 3.55" in the Z. Tooling in the Makerspace includes flat and ball end mills and some engraving tools.
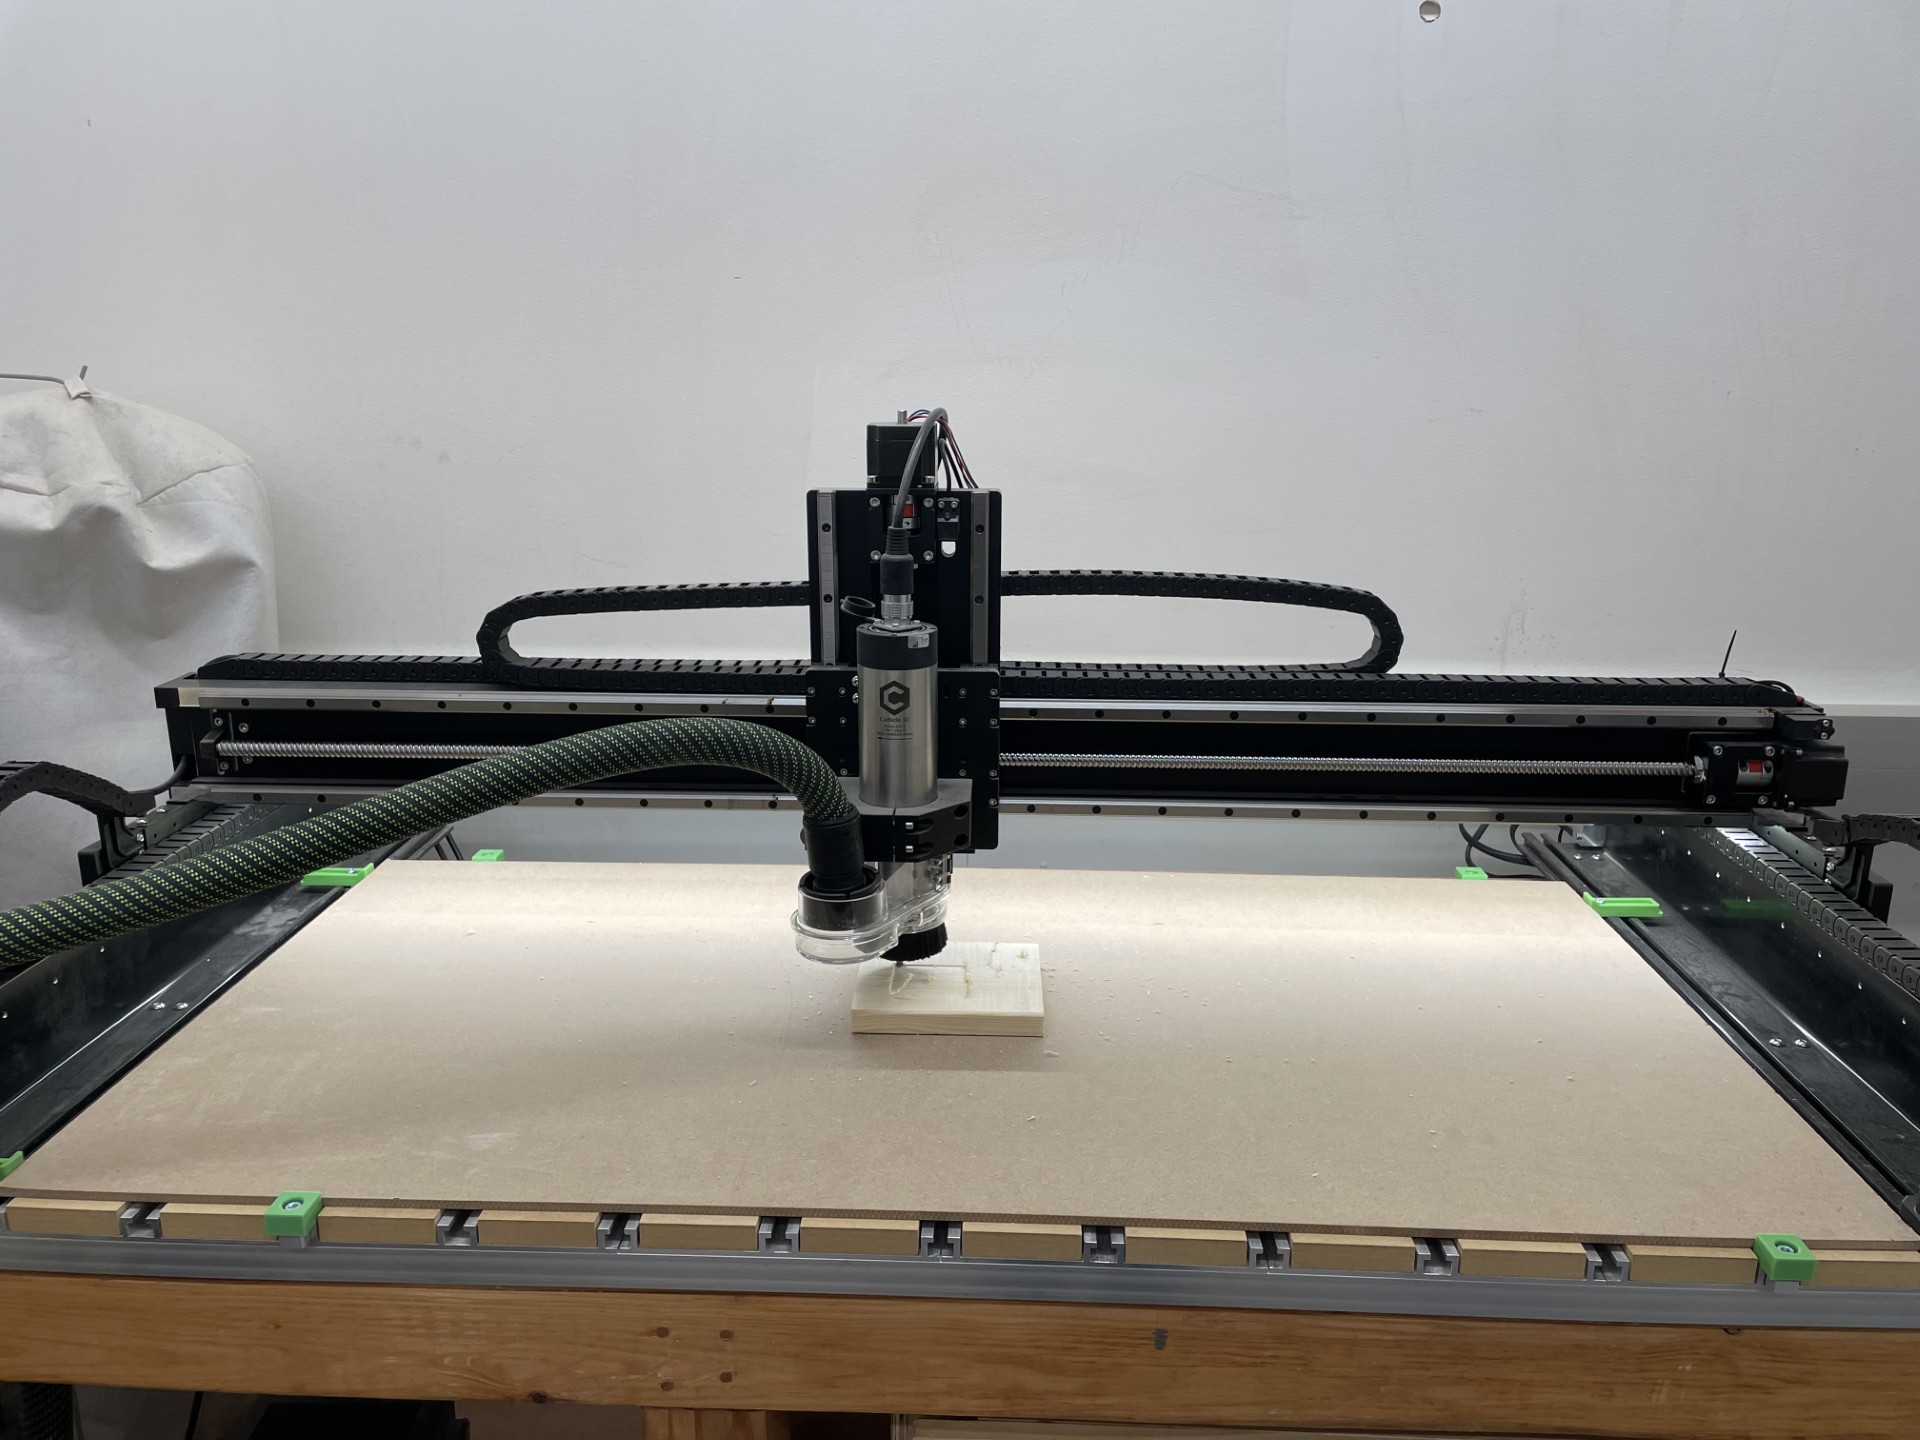
Shapeoko 5 Pro 2'x4'
Shapeoko 5 Pro
The Shapeoko has a 24x48 inch bed for computer aided 3-axis milling operations. Wood and aluminum can be milled on the Shapeoko. The gantry style machine has an MDF deck with various clamps. Sacrificial material must be used for any through cuts.
Training for the Shapeoko 5 Pro 3-axis CNC Router
In order to cut a part on our CNC router, you must complete the following training sequence before an employee cuts your part. Please follow each step below and reach out to Makerspace staff with any questions along the way.
Step 1 - Software
Download Carbide Create, the free software for designing parts made by Carbide 3D, the same company that makes the router itself. This is where you will do the CAD (Computer Aided Design) and CAM (Computer Aided Manufacturing) for cutting your part on our CNC (Computer Numeric Control) machine.
Step 2 - Tutorials
Work through the tutorials linked below before designing your test part. If you are completely new to CNC machining, please start with the video series “Getting Started with CNC” and then continue onto the following series “Getting Started with Carbide Create” when you are done. If you have used CAD and CAM software before and are familiar with CNC toolpath design, you can skip straight to the second series “Getting Started with Carbide Create.”
Getting started with CNC (~45 minutes total)
- Introduction
- Welcome to CNC (2:48 mins)
- What is CNC? (3:50 mins)
- Terminology and Machine Architecture (6:36 mins)
- Setting Expectations for CNC (3:09 mins)
- What if I Need Help? (3:41 mins)
- Introduction to Tooling (3:53 mins)
- Types of Machining (2:52 mins)
- Software Introduction (2:06 mins)
- Information Resources (6:26 mins)
- CNC Workflow (8:23 mins) In this video, employees will handle all of the steps discussed after the time stamp 4:35, but it is still good to watch to see how your part will be made.
- Play is Important (2:17 mins)
Getting Started with Carbide Create (~90 minutes total)
- Introduction
- Welcome to Carbide Create (2:43 mins)
- Job Setup (2:45 mins)
- Shapes (8:29 mins)
- Boolean Operations (9:20 mins)
- Object Manipulation (6:56 mins)
- Offsets (4:14 mins)
- Importing and Tracing Images (9:32 mins)
- Types of Toolpaths (8:13 mins)
- Tabs (5:23 mins)
- Toolpath Simulation (8:10 mins)
- Tool Library (7:20 mins)
- The Expression Editor (3:11 mins)
- Ignoring Tabs (4:35 mins)
- File Notes (1:16 mins)
- Object Arrays (7:42 mins)
- Carbide Create Pro (2:50 mins)
Step 3 - Design a Test Part
Once you complete the video tutorials above, you can go on to design the following test part using your knowledge of the free Carbide Create software. Using the drawing below, create the exact same part by designing and writing toolpaths in Carbide Create.
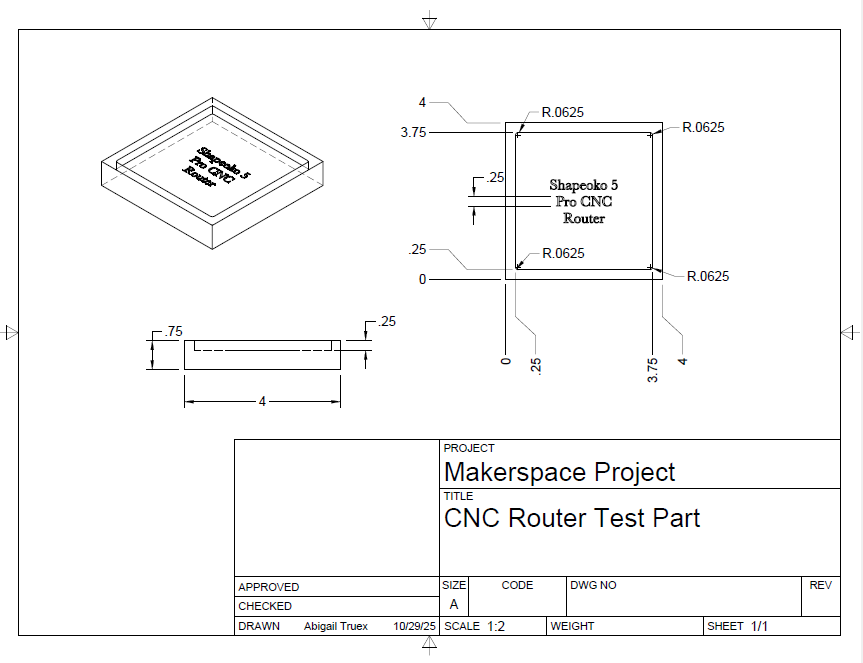

Tips for Designing:
Make sure to set up your design with the right dimensions for the stock material and the bottom left corner as the origin. Your part will be cut out of a piece of wood that is approximately 6"x6", but you should leave your design with the dimensions listed on the drawing.
You can change what the text on your part says as long as the letters are still 1/4" tall and the text is centered.
Use the V Carve toolpath to cut out the text and cut 0.1" into the material using the 90° V cutter tool.
Leave the default feeds and speeds for each toolpath that you design.
Design your part with tabs (of any size and quantity) so that you can cut your piece out of a larger piece of stock without it moving freely during your cut. The Makerspace will provide stock wood that is 3/4" thick.
See the table below for a list of the Carbide 3D brand tools that we have available. You can use the built in tool library to write your toolpaths for these specific tools.
| Image of Tool | Tool Description (all dimensions are diameters) | Tool Number |
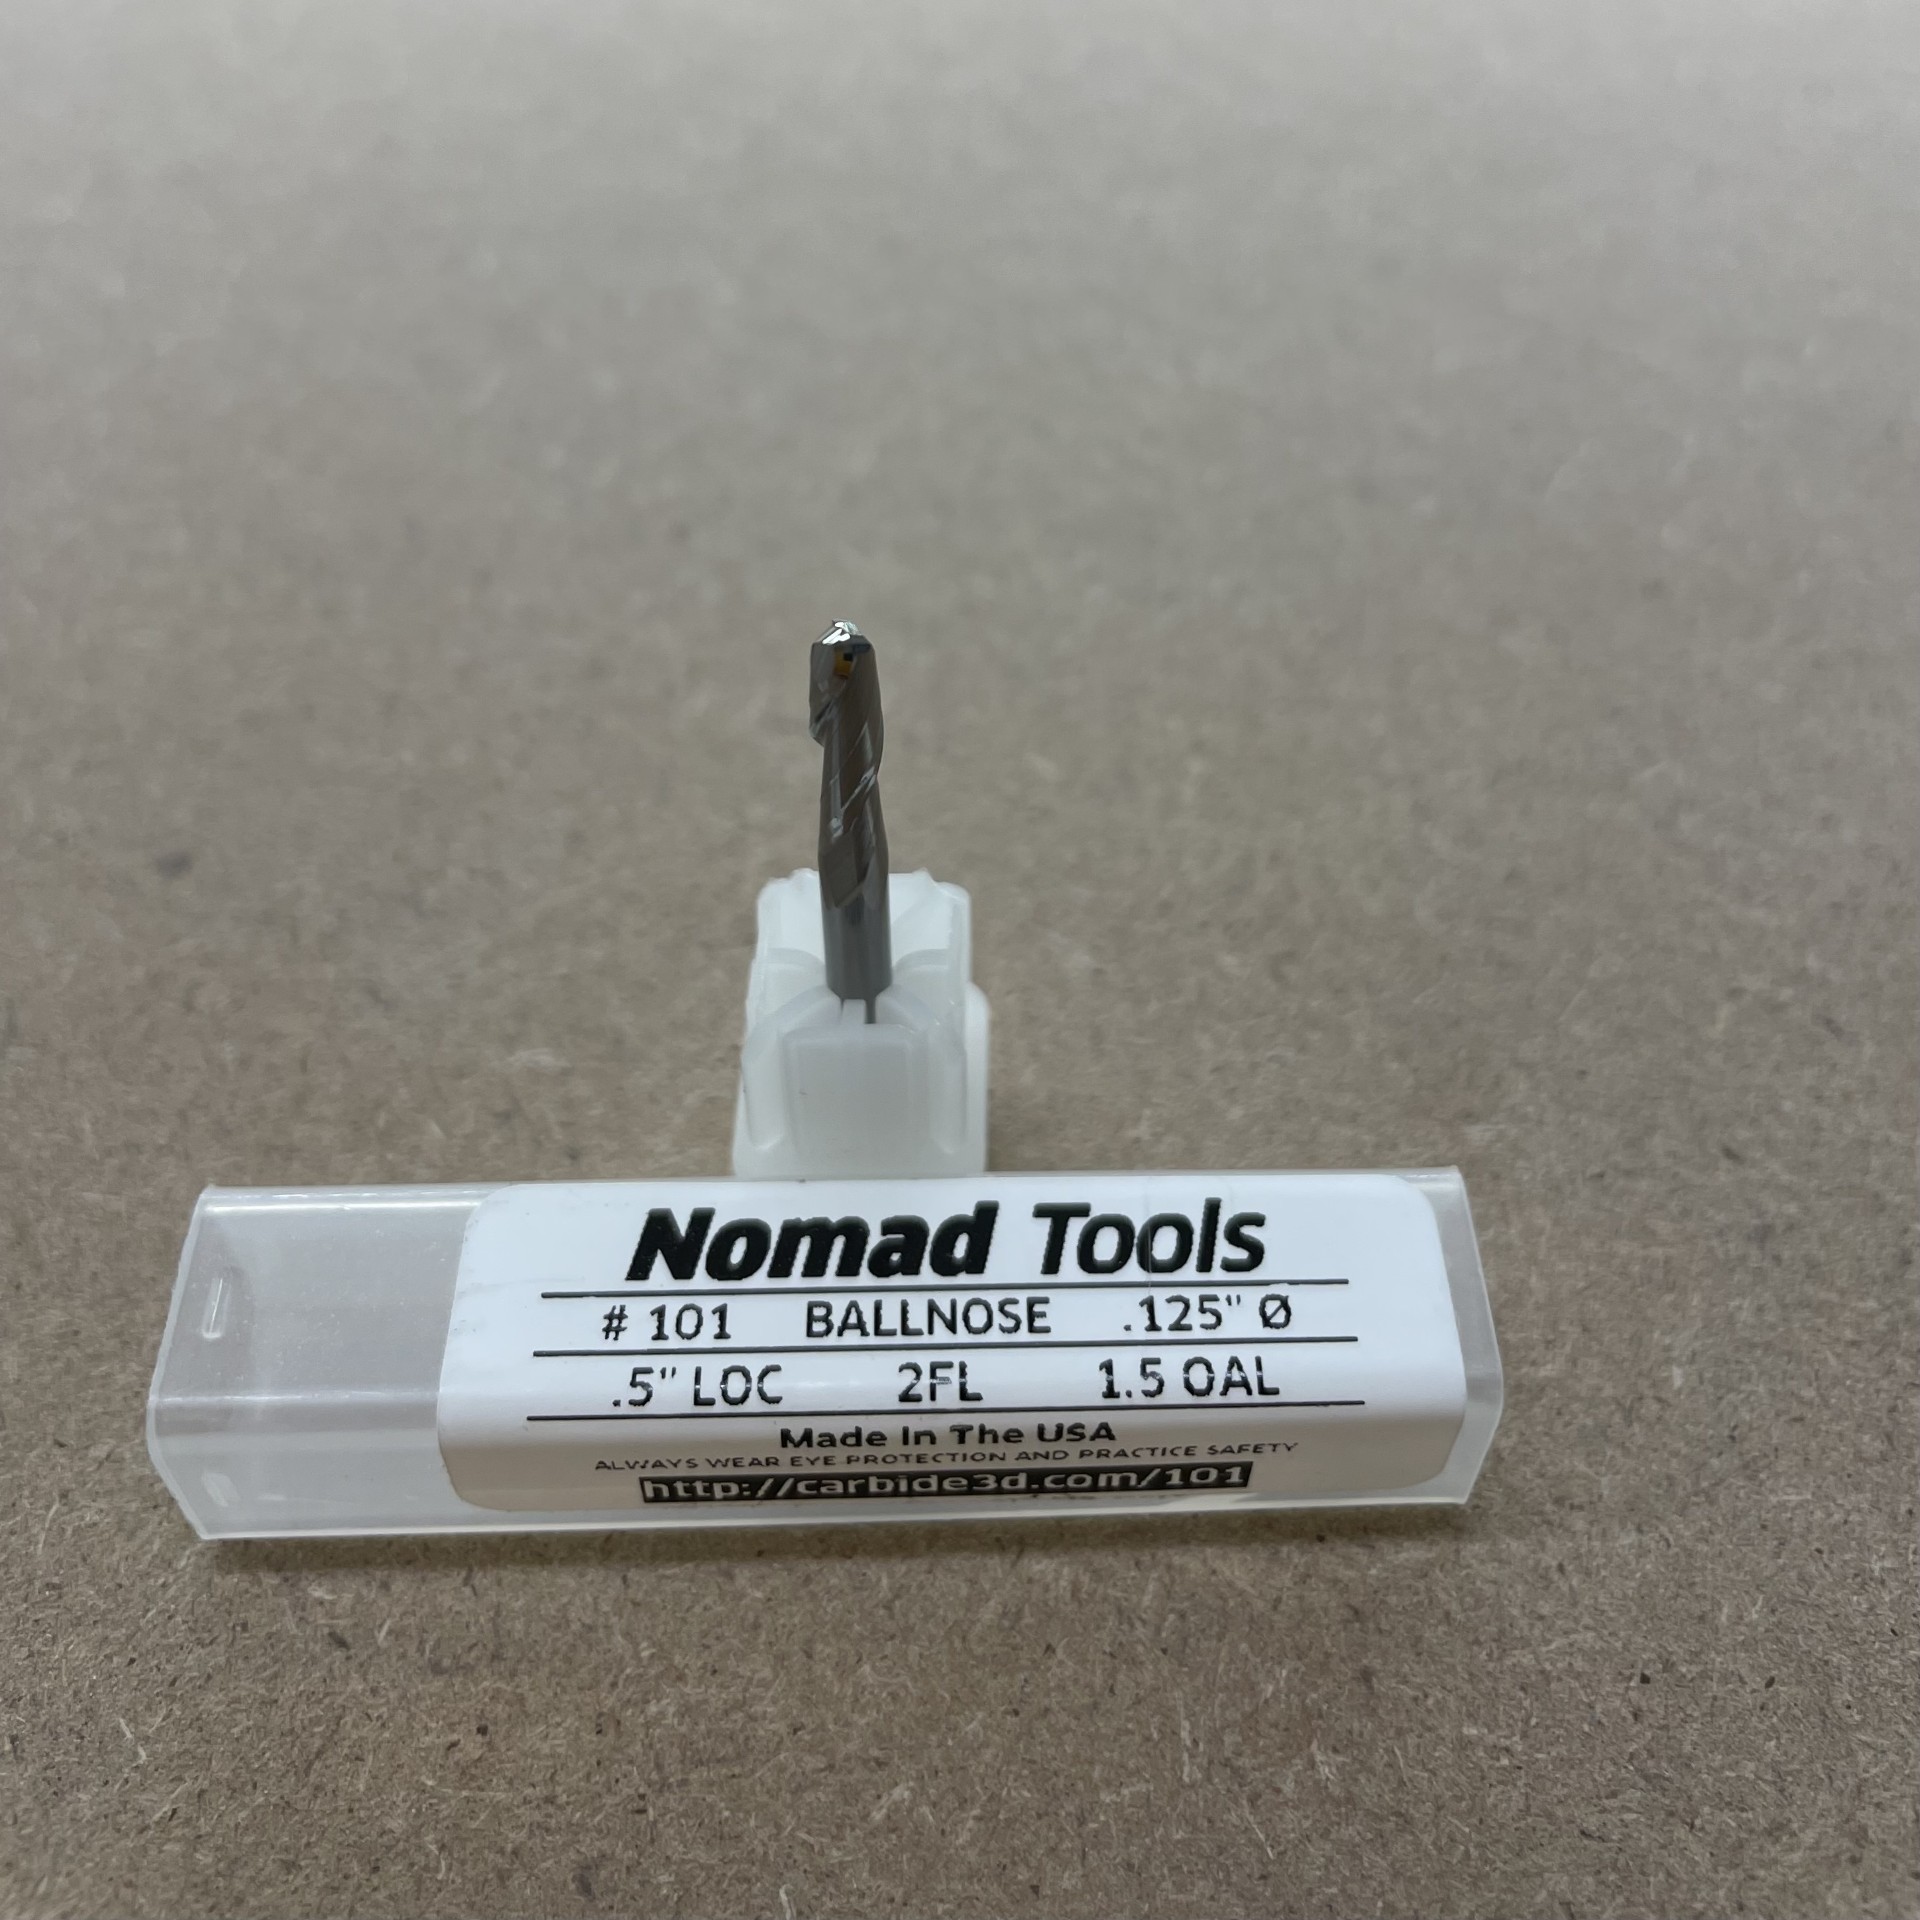 |
1/8" Ballnose End Mill | 101 |
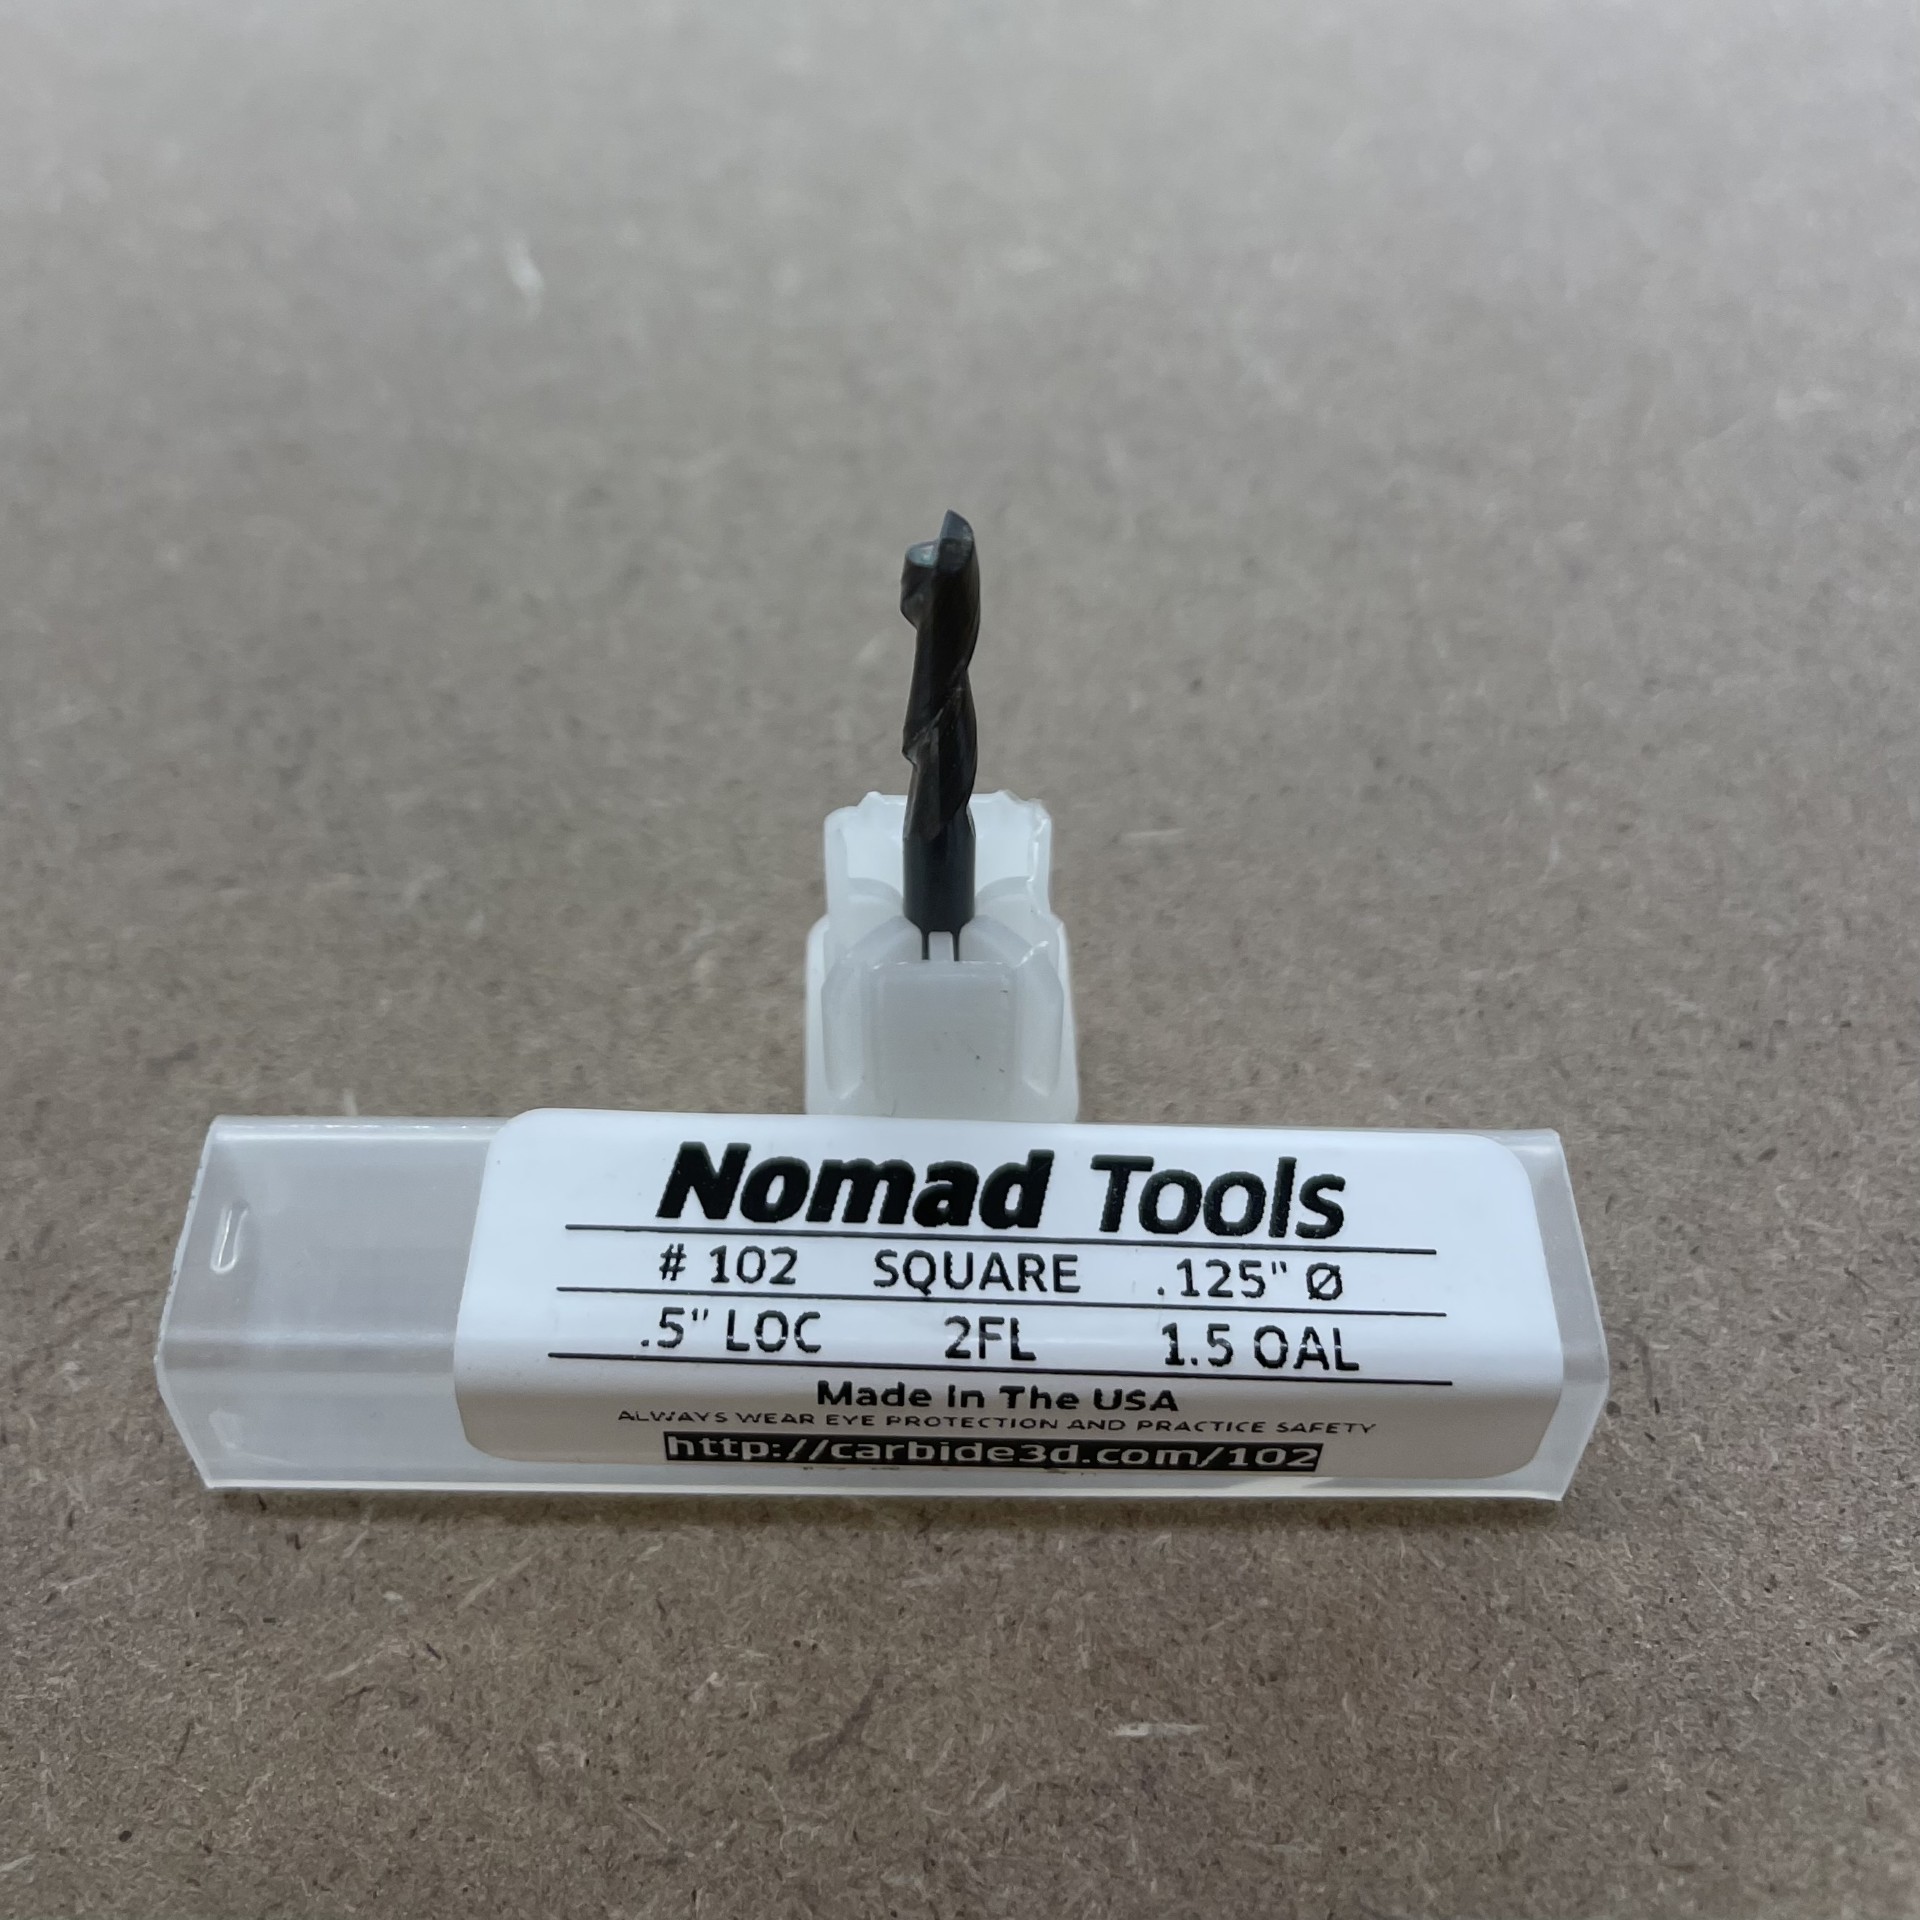 |
1/8" Flat End Mill | 102 |
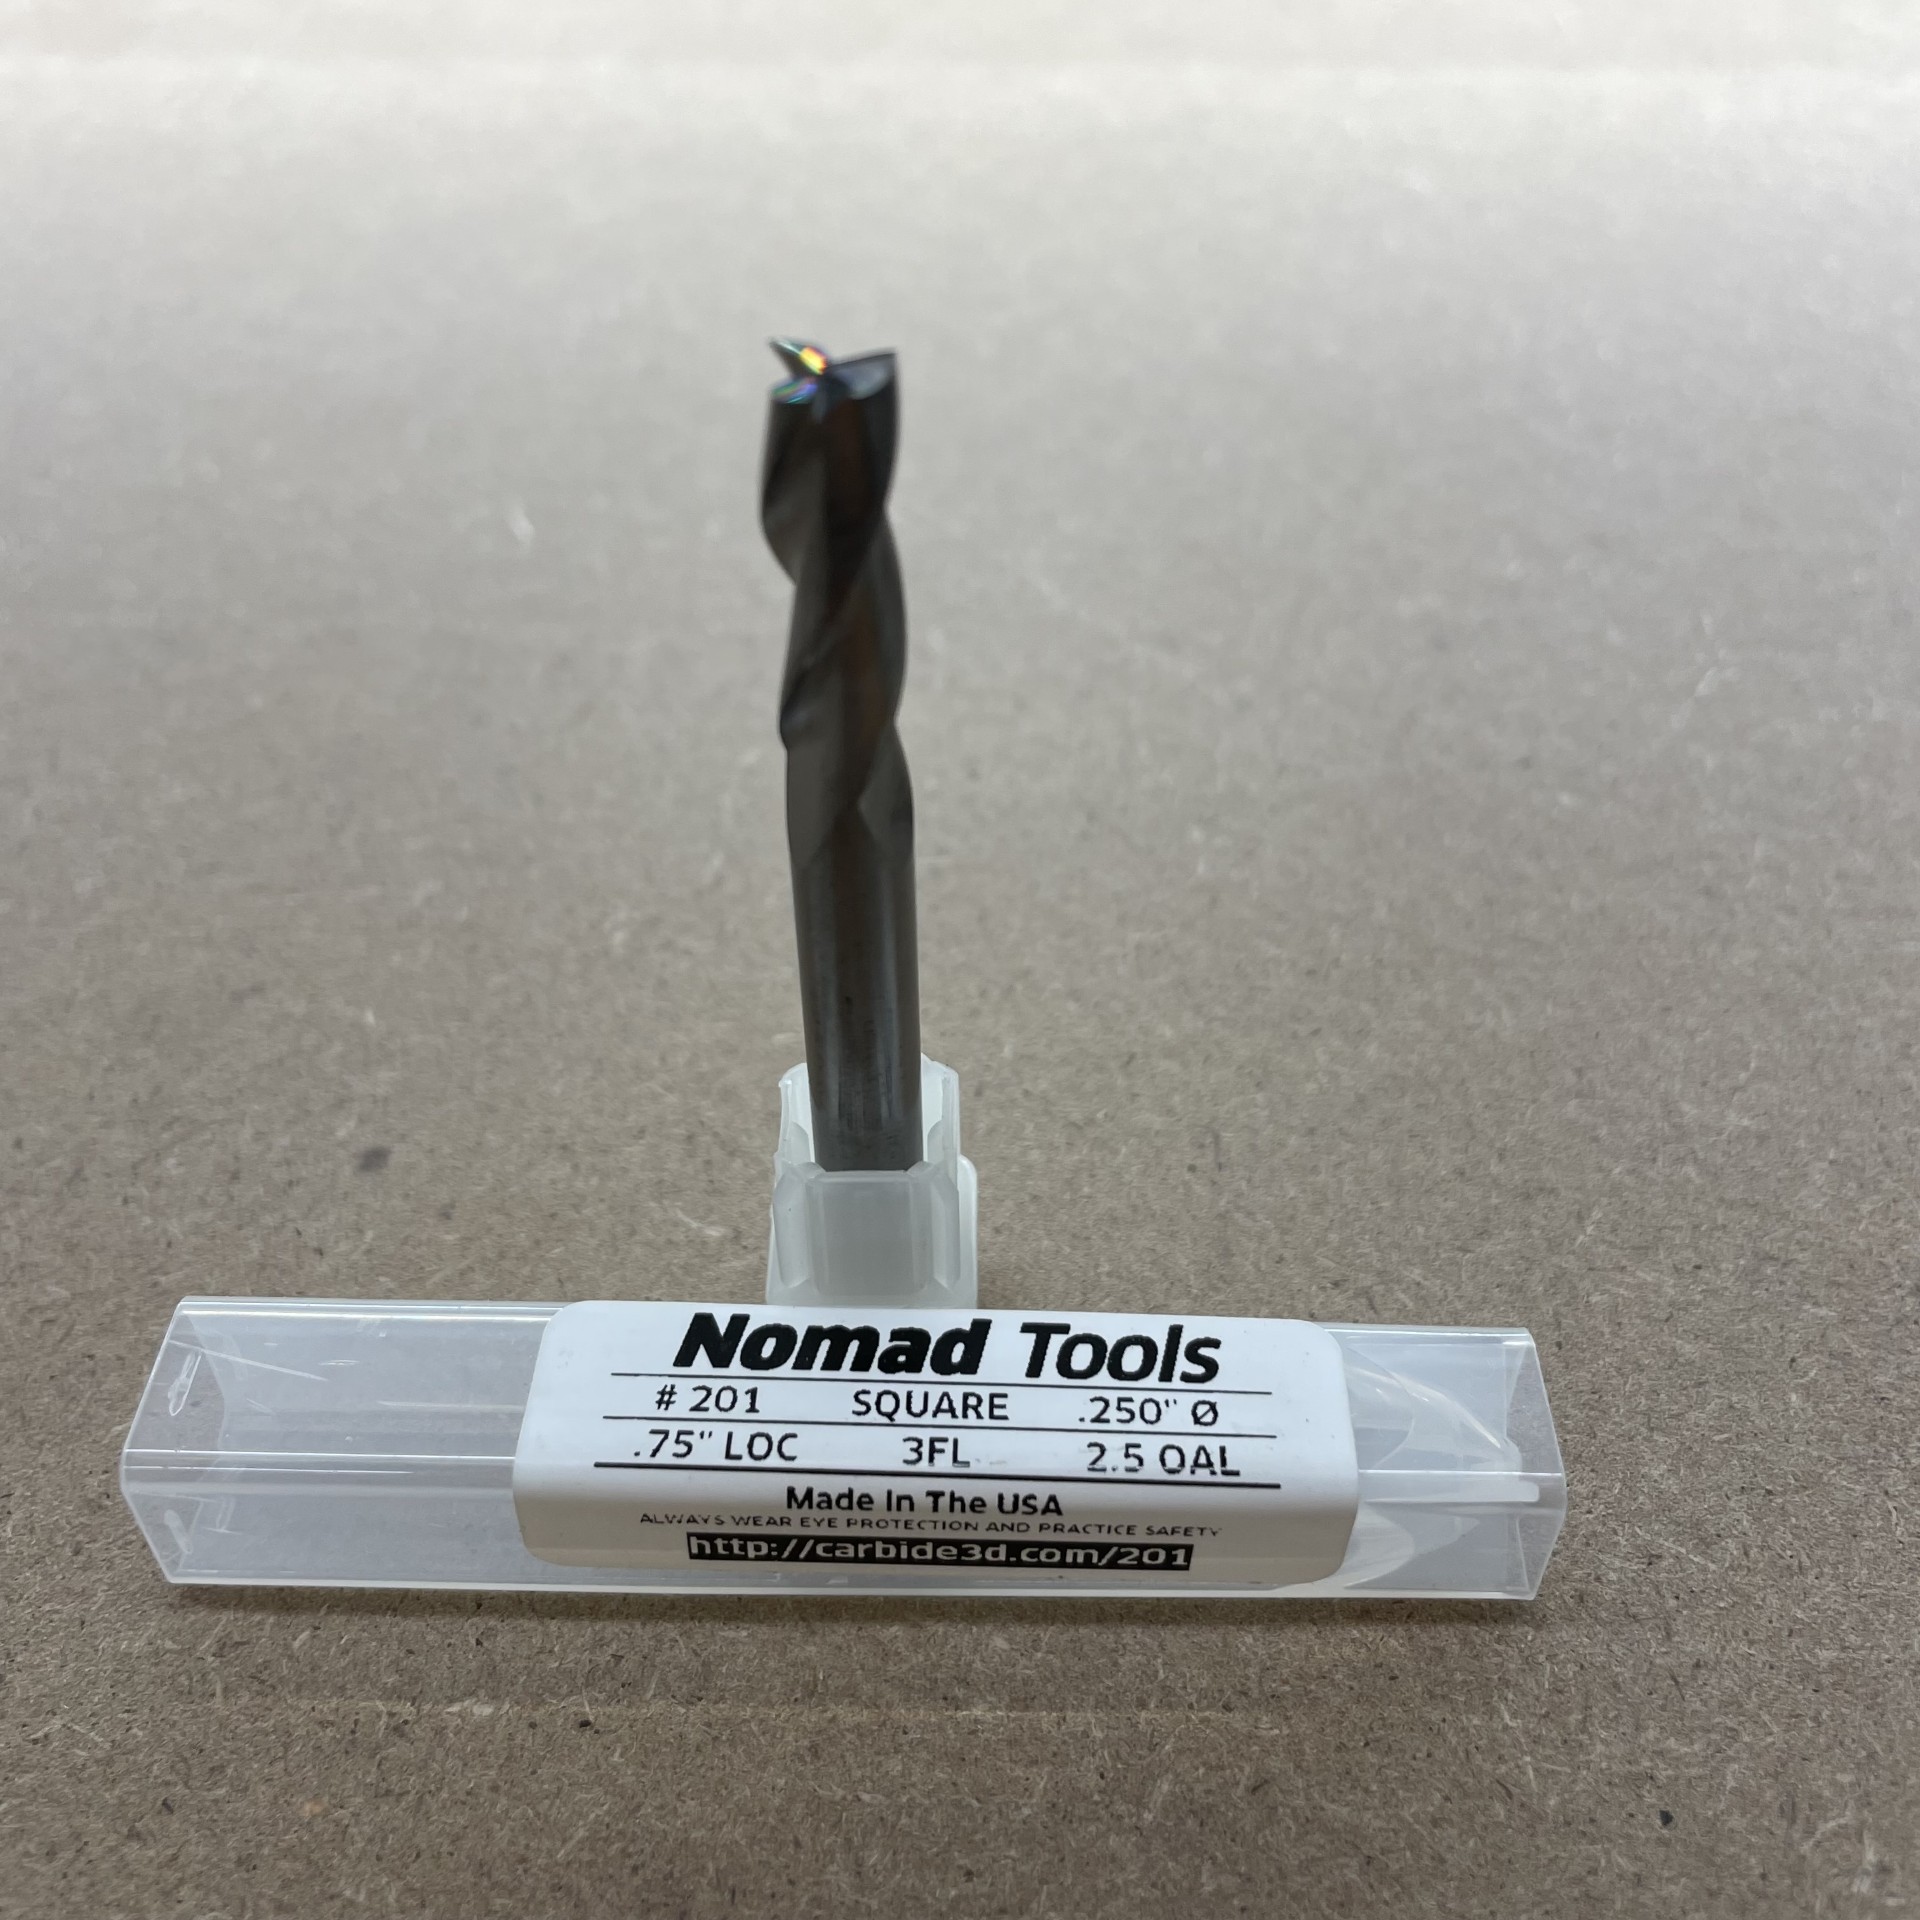 |
1/4" Flat End Mill | 201 |
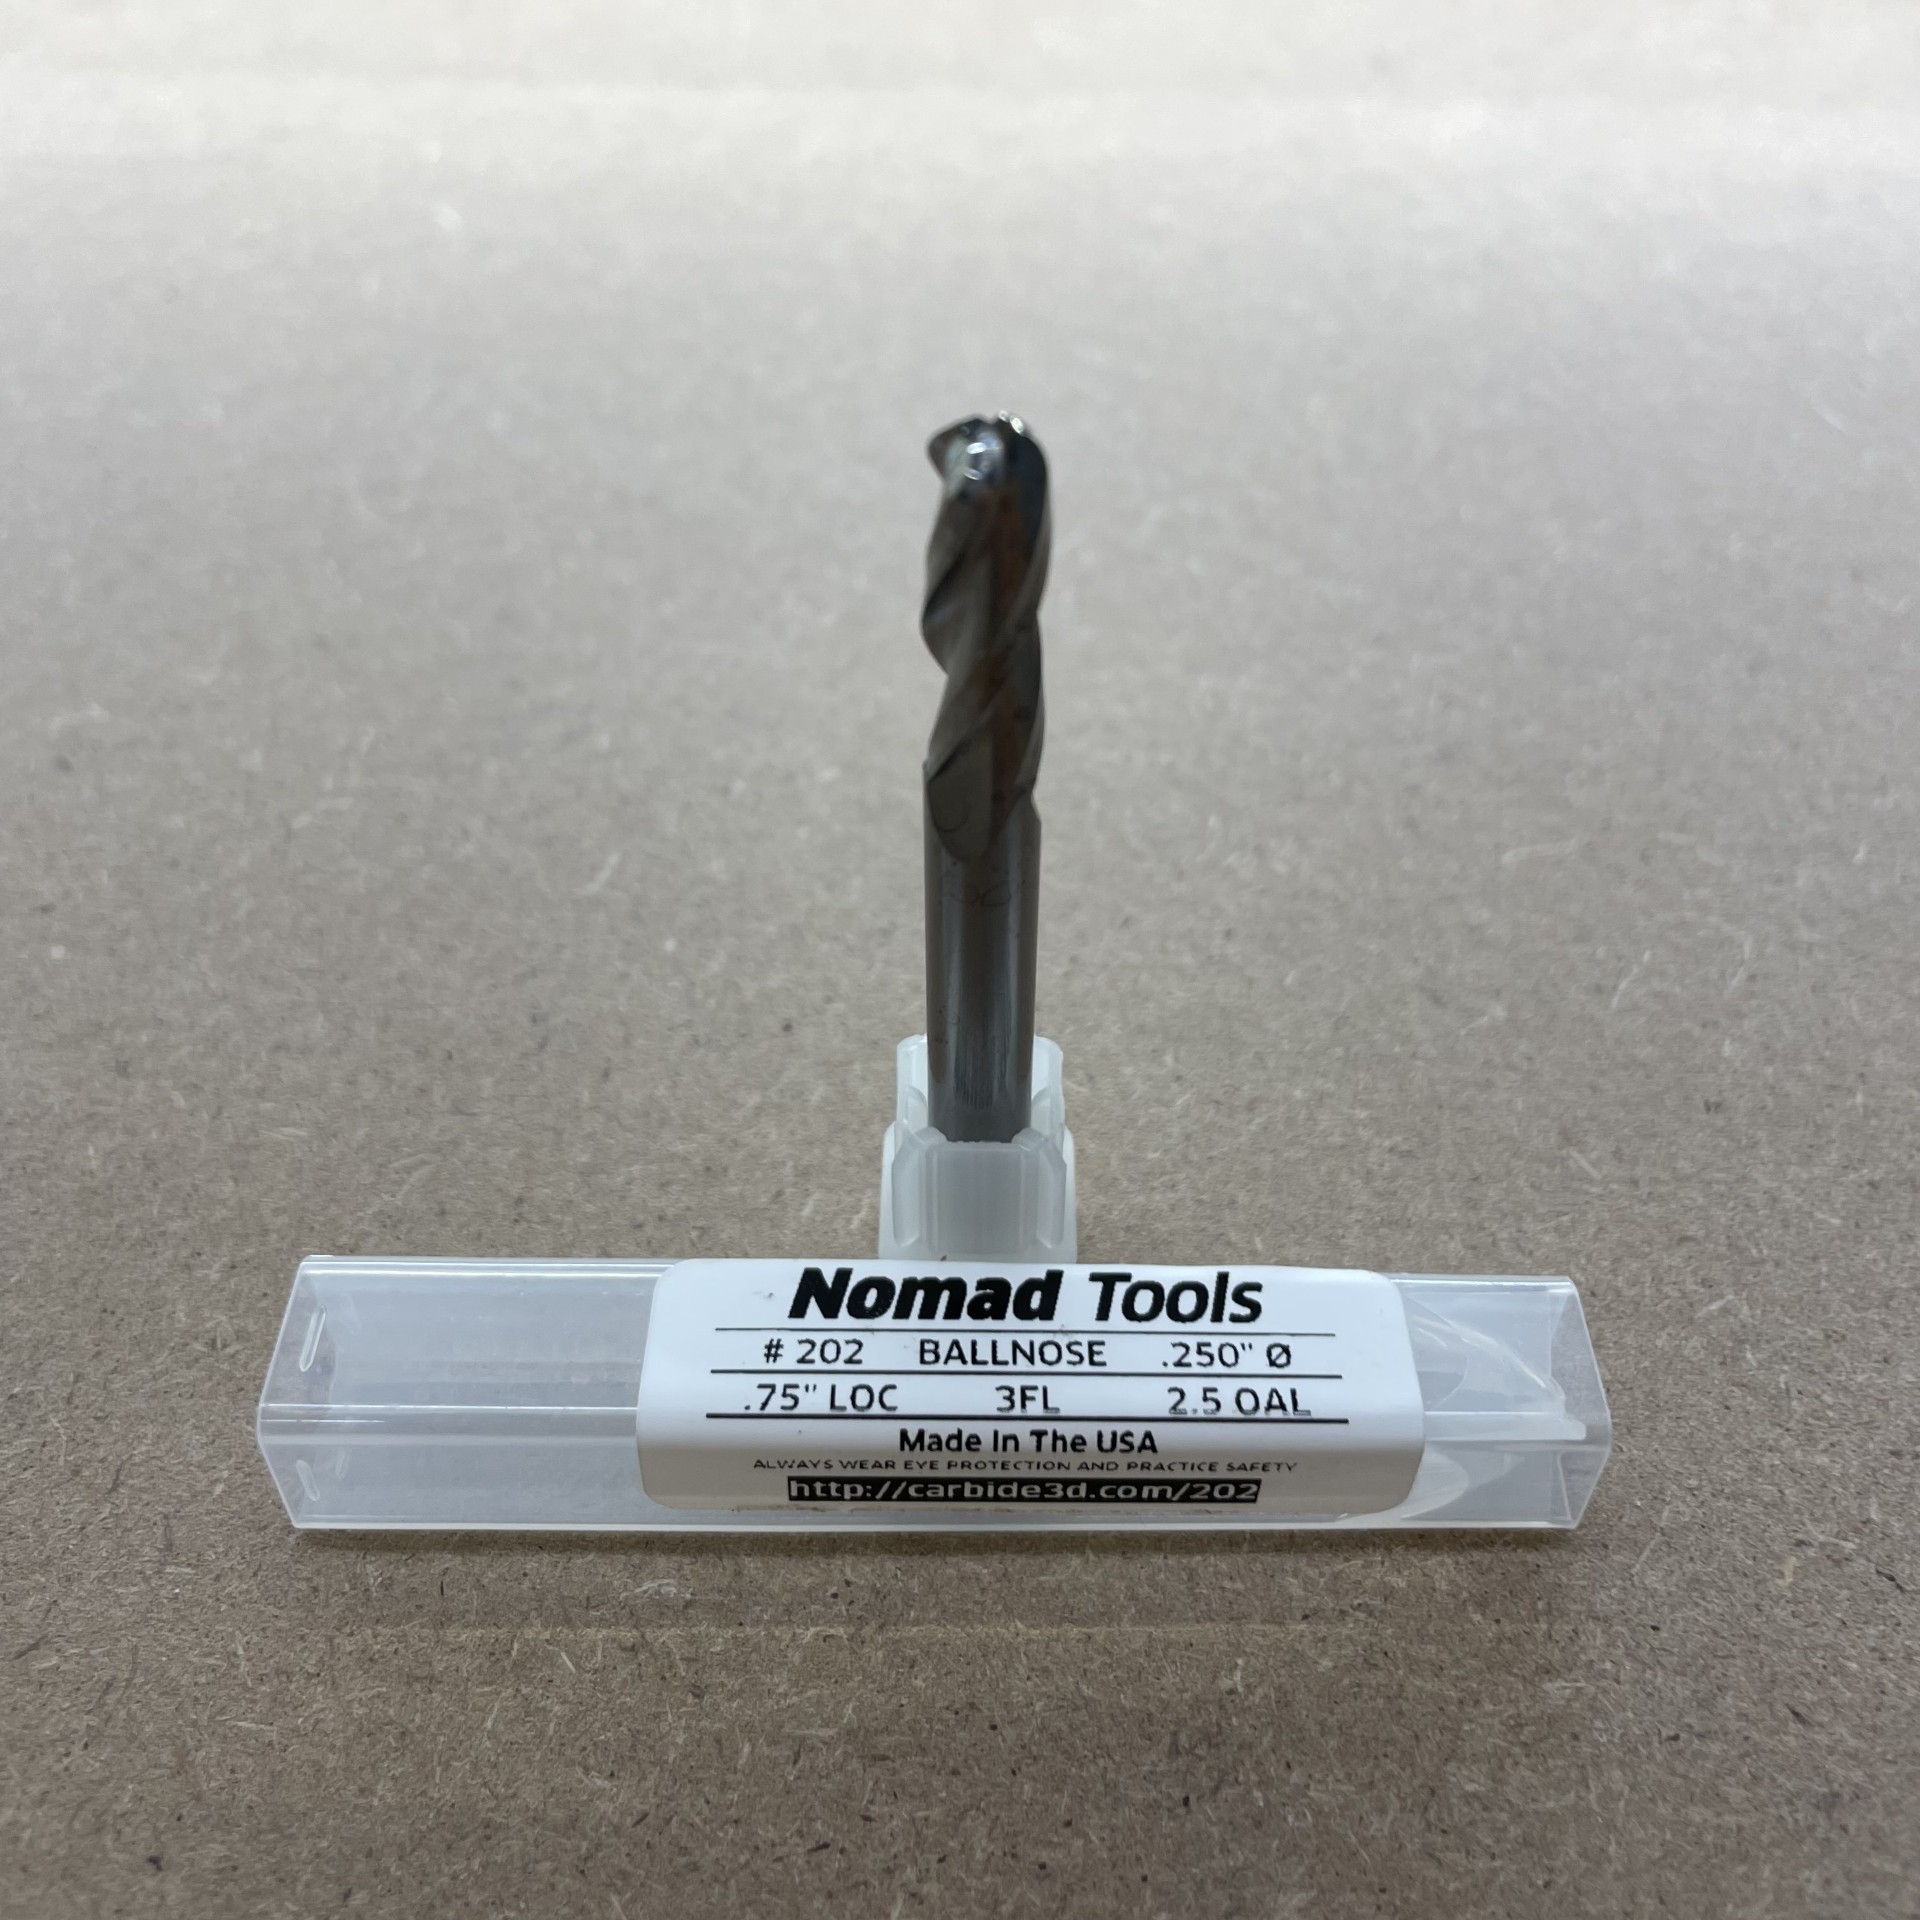 |
1/4" Ballnose End Mill | 202 |
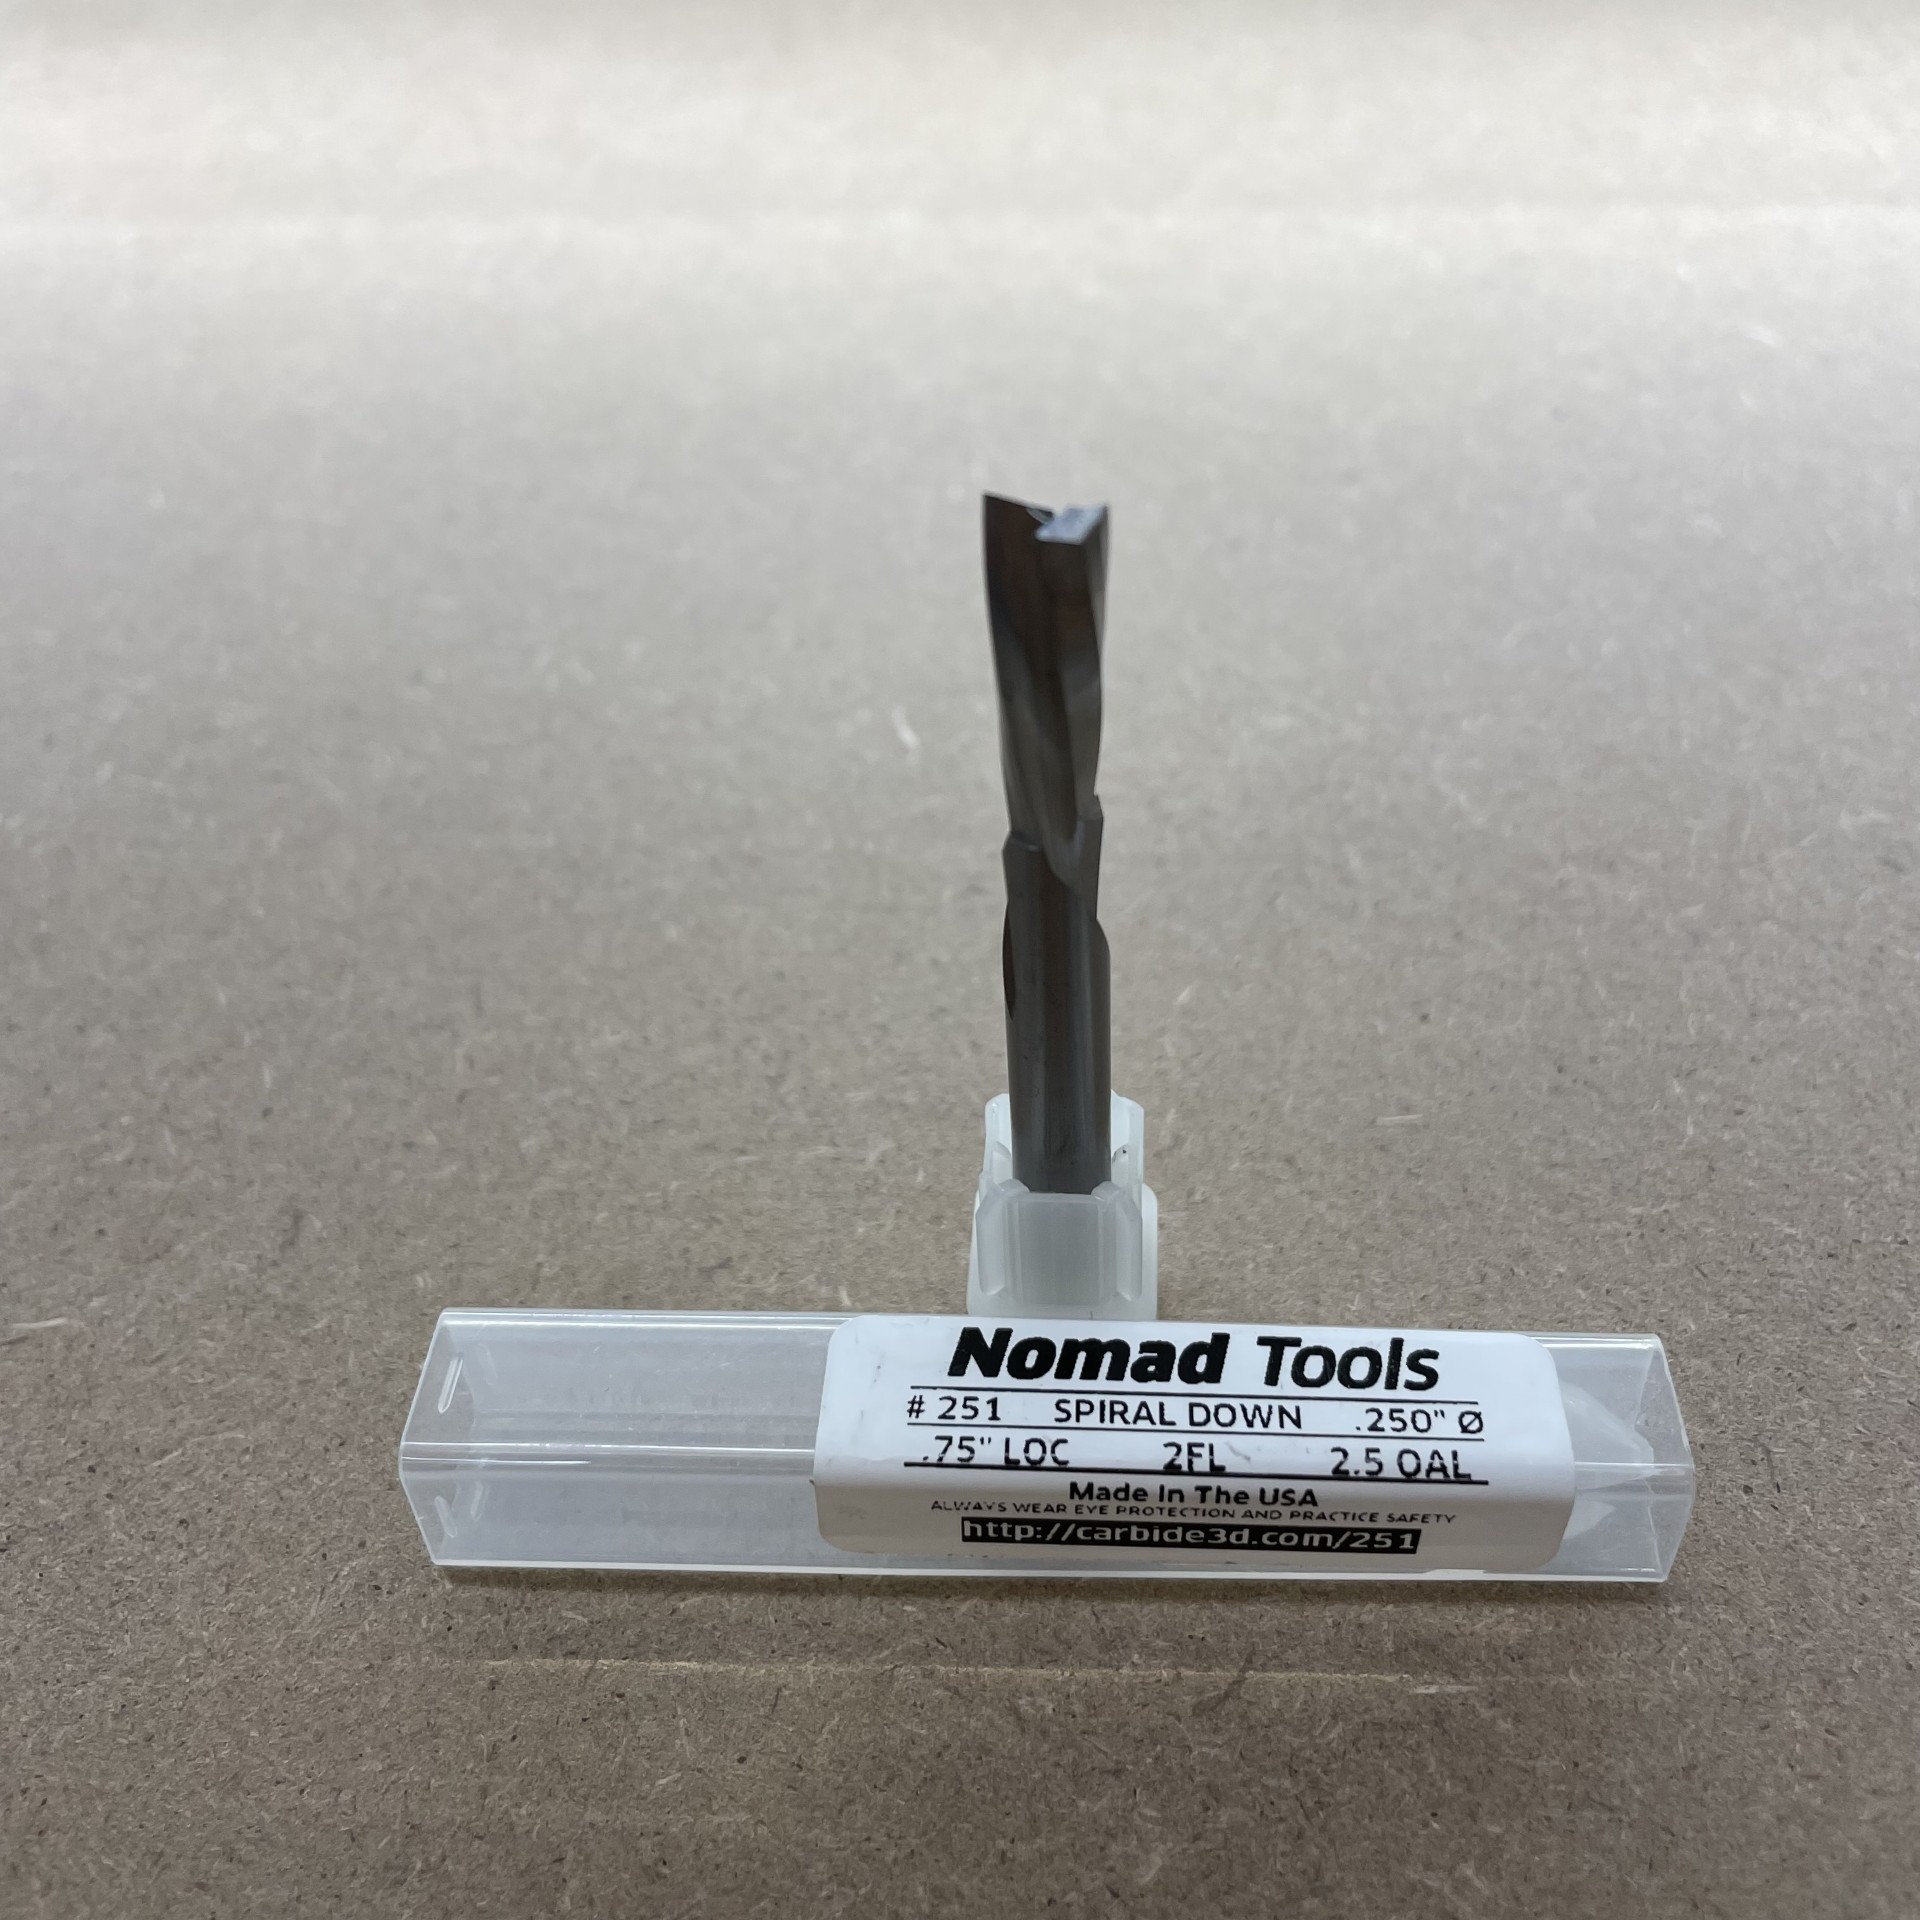 |
1/4" Downcut End Mill | 251 |
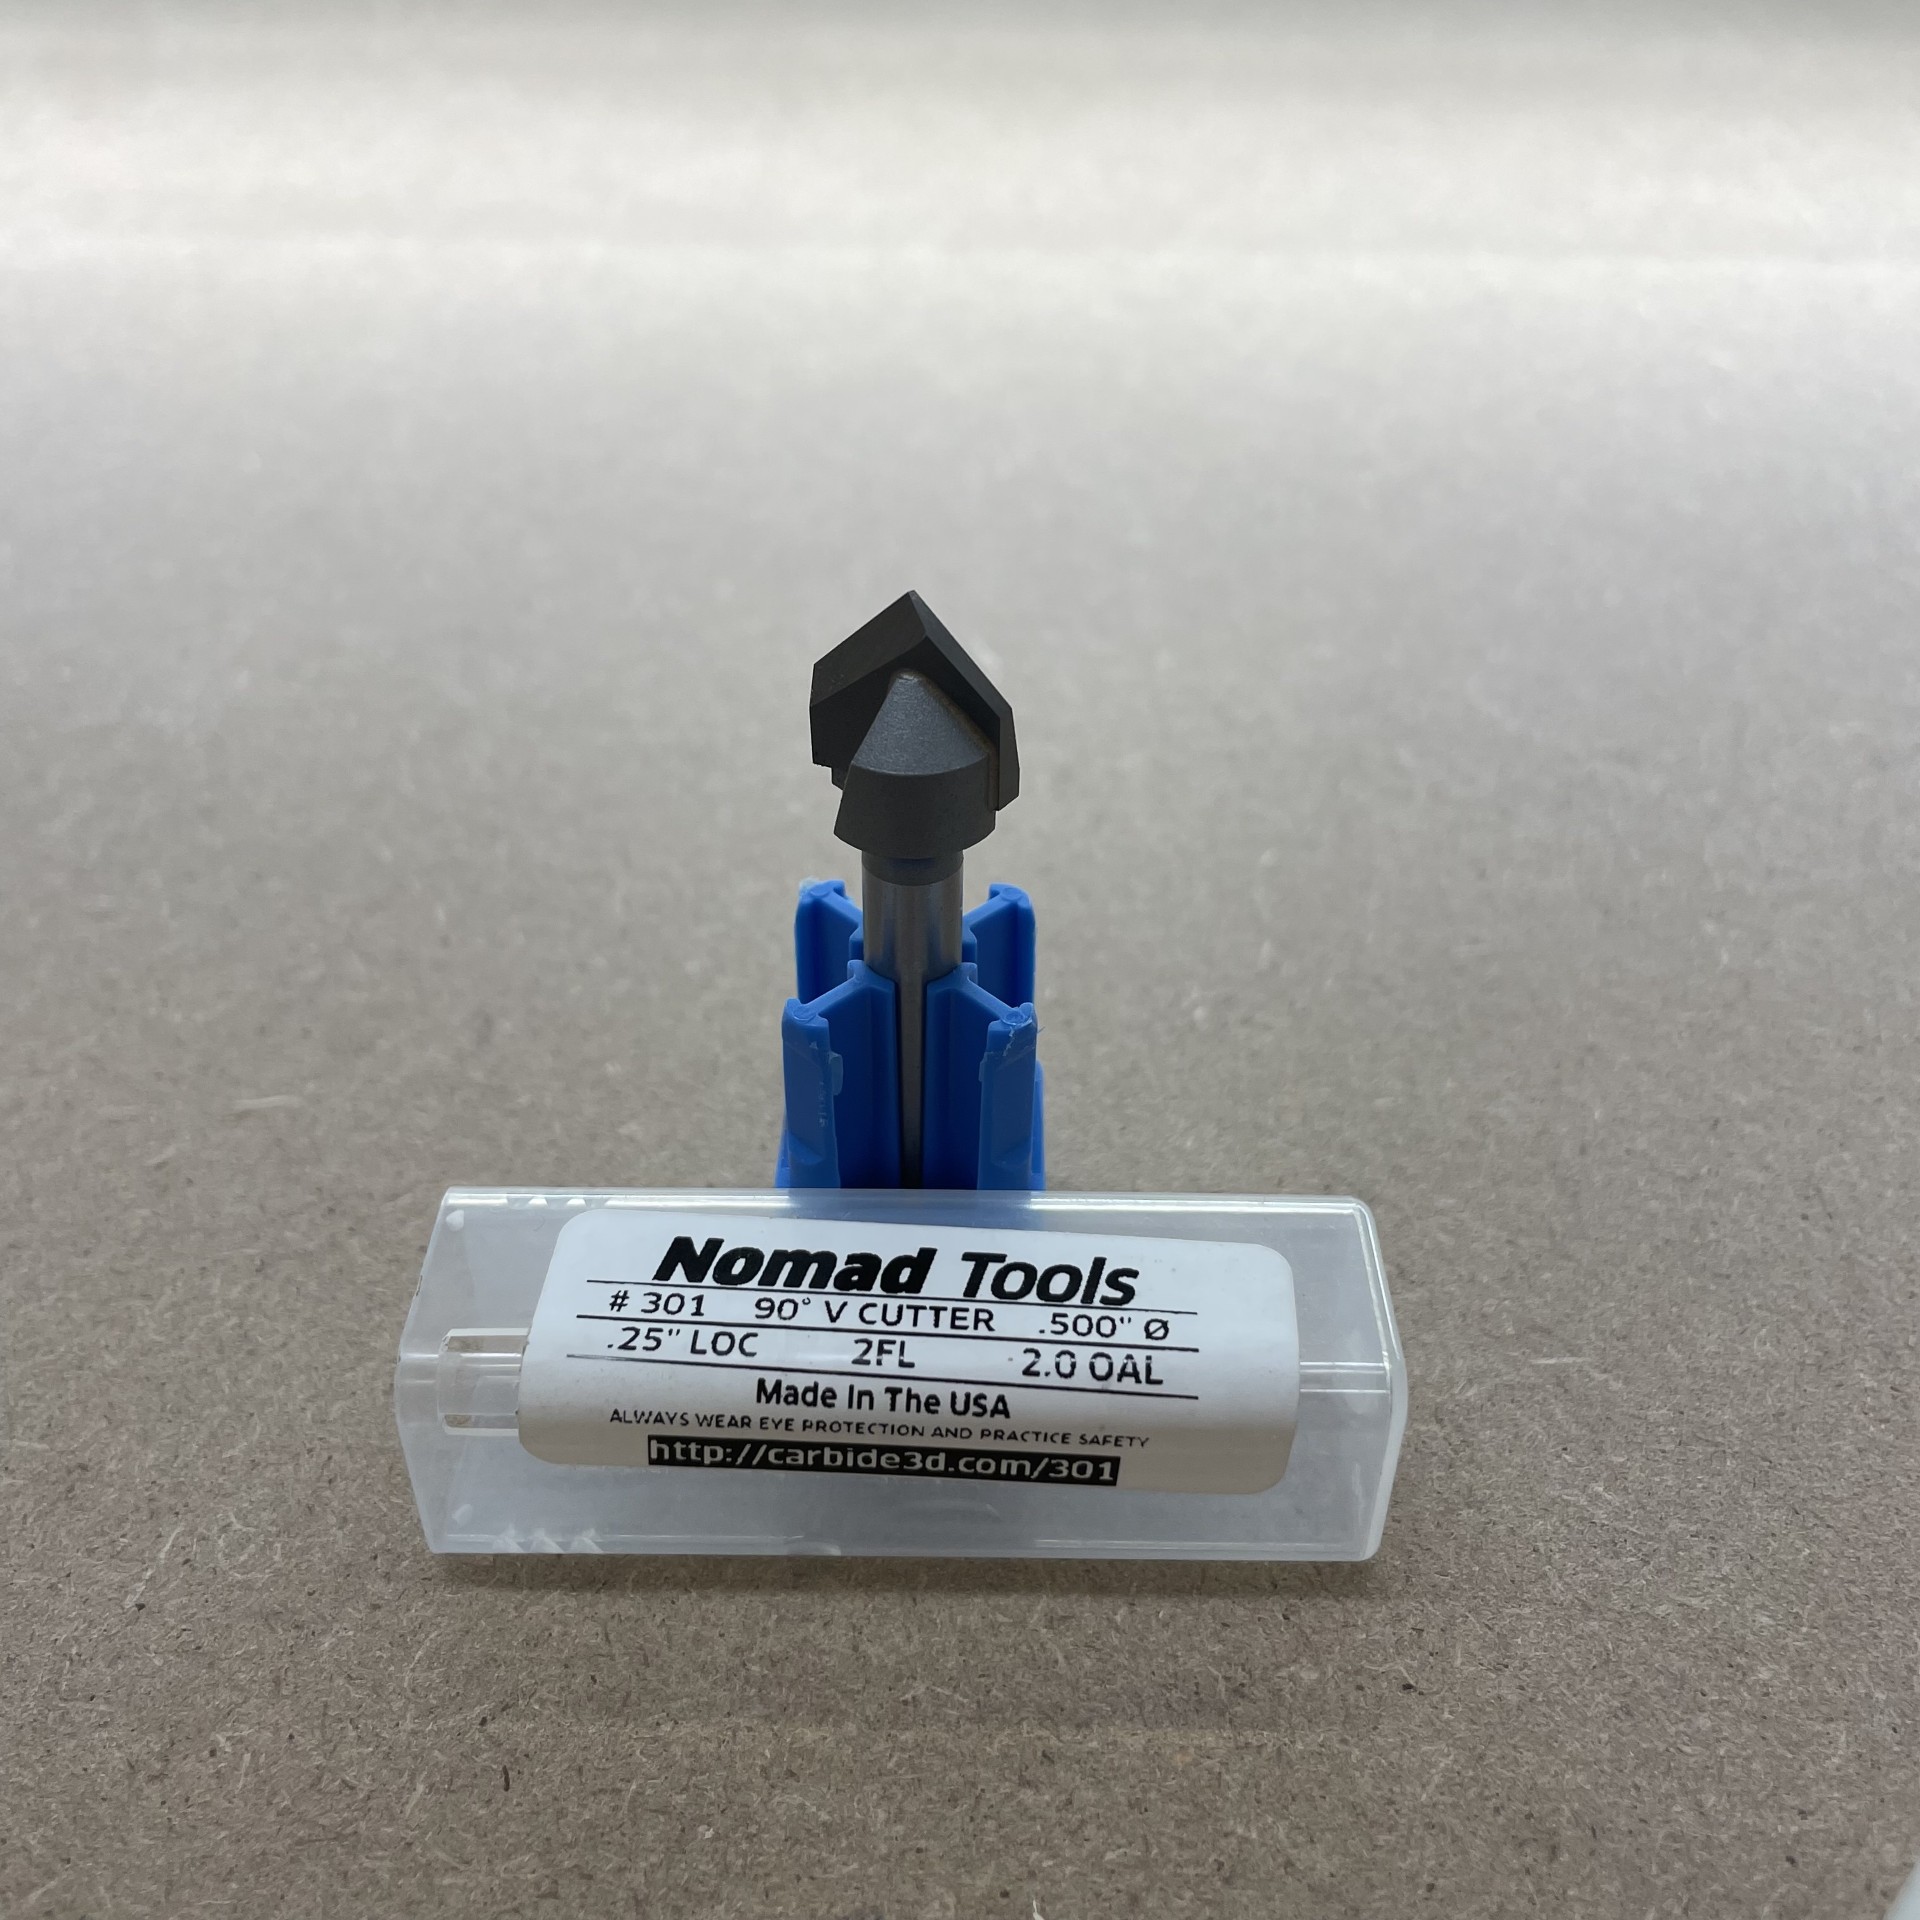 |
90° V Cutter | 303 |
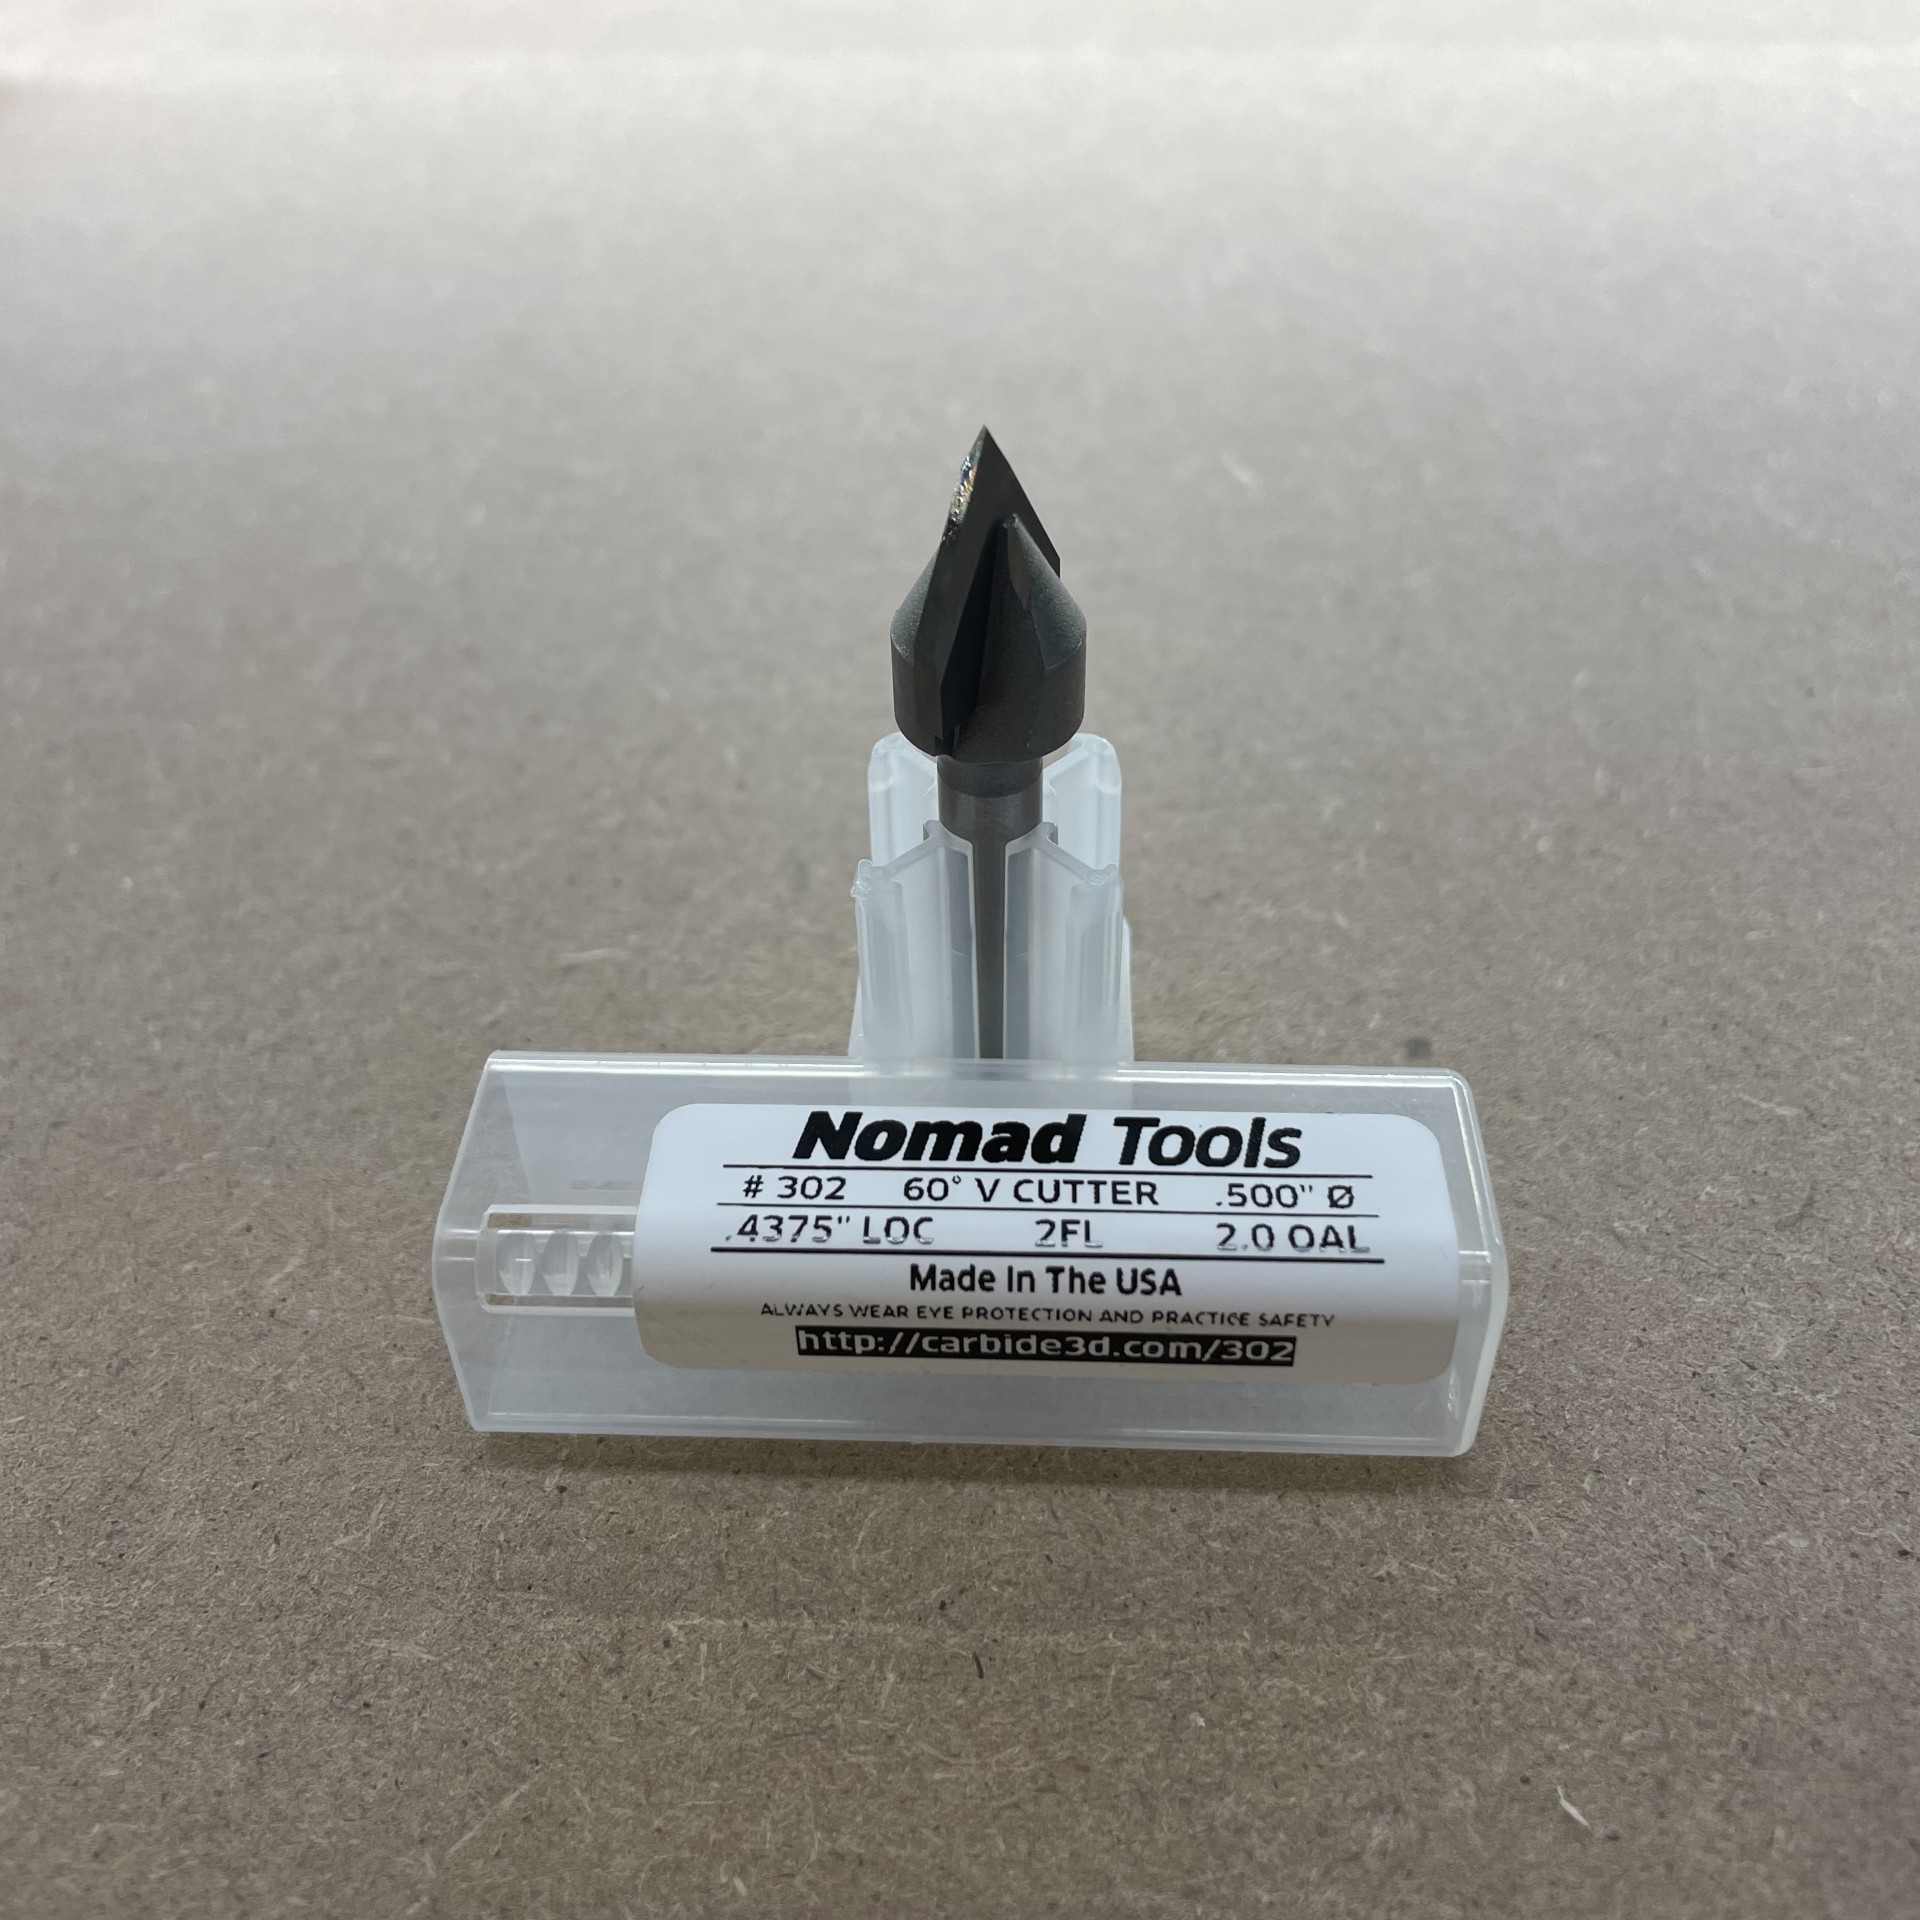 |
60° V Cutter | 302 |
When you are done designing your test part, you've checked the toolpath simulation, and you feel confident that your toolpaths will work as intended, you can export your .c2d file and bring it to a Makerspace employee to have them cut your part on the router.
Step 4 - Design Your Part
Once you have been checked off by an employee who has ensured that your test part matches the expectations, you can go on to design your own part. Keep in mind that when you cut your part, you will pay $16.00/hour for the cutting time. You can see the total time estimate by simulating your toolpaths in Carbide Create. If you would like to use the full paid version of the software, please talk to a Makerspace employee about how to access a license.
If you need some project inspiration, check out these introductory projects where you can make a drop tray, a coaster, or a sign. Find even more ideas here.